Red pepper jelly is a sweet-spicy condiment that transforms ordinary meals into something memorable. This homemade version combines bright red peppers, sugar, and a hint of heat to create a glossy, jewel-toned spread that works equally well on a charcuterie board or spooned over cream cheese.
Whether you are a seasoned canner or picking up a jar for the first time, this recipe delivers foolproof results with minimal fuss. Let’s explore how to make this crowd-pleasing preserve at home.
Why You’ll Love This Recipe
Homemade red pepper jelly tastes fresher and brighter than store-bought versions, and you control exactly how much spice and sweetness goes into each batch.
- Versatile enough to serve with cheese, crackers, roasted meats, or even ice cream
- Makes an excellent homemade gift that impresses everyone on your list
- Uses simple, whole-food ingredients with no artificial additives or thickeners
- The jelling process is forgiving and hard to mess up, even for beginners
- Keeps for months in a cool pantry when properly canned
My Experience Making This Recipe
The first time I made red pepper jelly, I was skeptical about the combination of peppers and sugar, but one taste converted me instantly. The sweetness plays beautifully against the gentle heat and bright pepper flavor, creating a complexity that somehow feels both elegant and totally approachable.
I have made this recipe at least a dozen times now, both for my own pantry and as gifts during the holidays. My friends and family ask me to bring it to every potluck, and I have caught people eating it straight from the jar more than once.
The most magical part happens when you pour the jelly into sterilized jars and hear those satisfying pops as the lids seal. It signals that your hard work paid off and you have successfully created something shelf-stable and beautiful.
Recipe Overview
- Recipe Name: Red Pepper Jelly
- Servings: Makes about 8 half-pint jars
- Prep Time: 30 minutes
- Cook Time: 45 minutes
- Total Time: 1 hour 15 minutes (plus cooling and canning time)
- Course: Condiment
- Cuisine: American
- Calories per Serving: 54 calories per tablespoon
Equipment You Will Need
- Large stainless steel pot (at least 8 quarts)
- Food processor or blender
- Fine-mesh strainer
- Measuring cups and spoons
- Candy or instant-read thermometer
- Wooden spoon for stirring
- Half-pint canning jars with lids and bands
- Canning pot or large water bath with rack
- Jar lifter
- Funnel (optional but helpful)
- Clean kitchen towels
Ingredients for Red Pepper Jelly
- 4 pounds fresh red bell peppers, seeded and roughly chopped (about 8 large peppers)
- 1 to 2 red jalapeño peppers, seeded and chopped (adjust based on heat preference)
- 6 cups granulated sugar
- 1 cup apple cider vinegar or white vinegar
- 1 tablespoon salt
- 1/2 teaspoon black pepper
- 6 ounces liquid pectin (one 3-ounce pouch or equivalent)
Ingredient Notes and Substitutions
- Red bell peppers provide the signature mild sweetness and beautiful color. If you cannot find fresh red peppers, roasted red peppers in a jar work, though drain them thoroughly and reduce the cooking time slightly.
- Jalapeños deliver gentle heat without overpowering the sweet pepper flavor. Substitute with Thai bird’s eye chiles for more intense spice, or omit them entirely for a mild version.
- Granulated sugar is essential for proper gel formation. Brown sugar or honey will change both the texture and flavor, so stick with white granulated sugar here.
- Apple cider vinegar adds subtle complexity compared to white vinegar, but either works. Red wine vinegar gives a deeper color if that appeals to you.
- Liquid pectin ensures the jelly sets firmly without overcoking the peppers. Powdered pectin requires different timing and temperatures, so use liquid if possible.
How to Make Red Pepper Jelly
Step 1: Prepare Your Peppers
Wash the red bell peppers and jalapeños thoroughly under cold running water. Cut each pepper in half, remove the stem and seeds, and roughly chop the flesh into 1-inch pieces so they blend smoothly.
Step 2: Puree the Peppers
Place the chopped peppers in a food processor and blend until completely smooth, working in batches if needed. The goal is a uniform, seedless puree with no visible chunks.
Step 3: Strain the Puree
Pour the pepper puree into a fine-mesh strainer set over a bowl and let gravity do the work for at least 10 minutes. This removes excess liquid and any small seeds or fiber, giving you a cleaner final product with better texture.
Step 4: Combine Ingredients in the Pot
Pour the strained pepper puree into your large pot and add the sugar, vinegar, salt, and black pepper. Stir well to combine everything evenly before heating.
Step 5: Bring to a Rolling Boil
Place the pot over high heat and stir frequently until the mixture comes to a rolling boil that you cannot stir down. This typically takes 15 to 20 minutes depending on your stove’s power and the pot’s size.
Step 6: Add the Pectin
Once the mixture is at a full rolling boil, quickly stir in the liquid pectin and return the mixture to a rolling boil. Let it boil for exactly one minute, stirring constantly, then remove from heat immediately.
Step 7: Skim and Jar
Skim off any foam that has risen to the surface using a spoon. Using a funnel and jar lifter, carefully fill sterilized half-pint jars leaving 1/4 inch headspace, then wipe the rims clean with a damp cloth.
Step 8: Process in a Water Bath
Place the filled jars into a water bath canner with enough water to cover the lids by at least one inch. Bring the water to a rolling boil and process for 10 minutes, then turn off the heat and let the jars sit in the water for 5 minutes before removing them.
Pro Tip: Do not skip the straining step even though it feels tedious, as it removes the watery pepper juice that would otherwise make your jelly weep slightly and prevent it from setting as firmly.
Tips for the Best Red Pepper Jelly
- Use a candy thermometer to verify your mixture reaches exactly 220 degrees Fahrenheit before adding pectin, as this ensures proper gel formation regardless of your altitude or humidity.
- Sterilize your jars by running them through a hot dishwasher cycle just before filling, or boil them in water for 10 minutes. This prevents contamination and helps the lids seal properly.
- Do not skip the one-minute rolling boil after adding pectin, as this activates the pectin molecules and is crucial for setting.
- Let sealed jars cool at room temperature for 24 hours before moving them to storage. This allows the lids to seal completely and the jelly to set fully.
- If a jar fails to seal, refrigerate it and use it within a few weeks, or reprocess it with a new lid within 24 hours.
- Taste your jelly after it sets and adjust seasonings in future batches if you want more spice, sweetness, or tartness.
Common Mistakes to Avoid
- Not straining the pepper puree properly results in a weeping jelly with a grainy texture and excess liquid on top. The liquid separates during storage because it was never removed.
- Boiling the mixture too long before adding pectin breaks down the pectin molecules and prevents proper gelling. Keep the initial boil to under 30 minutes.
- Using powdered pectin without adjusting the cooking temperature and time causes the jelly to either fail to set or become rubbery. Stick with liquid pectin for this recipe.
- Filling jars too full or leaving uneven headspace creates failed seals and allows mold to grow during storage. Aim for exactly 1/4 inch headspace in every jar.
- Processing jars for too long or at too high a temperature can crack them or cause the lids to pop off prematurely. Follow the 10-minute water bath time exactly.
Serving Suggestions
Red pepper jelly shines brightest when paired with sharp, creamy, or savory foods that balance its sweetness. The possibilities are genuinely endless once you get creative.
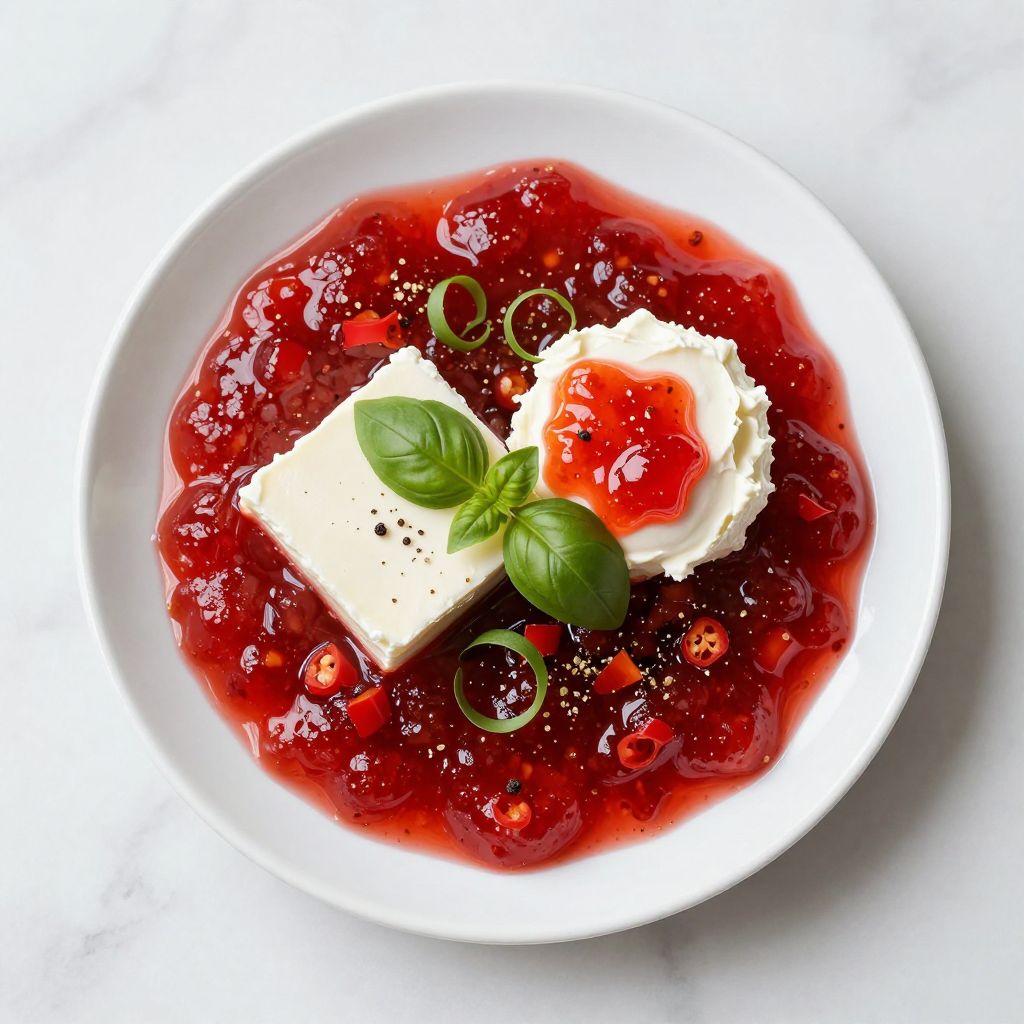
- Spoon over a block of cream cheese and serve with crackers for an elegant appetizer
- Glaze roasted ham, pork chops, or chicken during the last few minutes of cooking
- Mix into cream cheese to fill jalapepo poppers or stuff chicken breast
- Top baked brie with a few tablespoons and bake until melted, then serve with crusty bread
- Swirl into plain yogurt for a sweet-spicy breakfast parfait or snack
Variations to Try
- Smoky Red Pepper Jelly: Add 1/2 teaspoon of smoked paprika and substitute smoked salt for regular salt. The smokiness pairs beautifully with roasted meats and adds depth.
- Spicy Version: Increase the jalapeños to 3 or 4, or add 1/4 teaspoon of cayenne pepper for serious heat lovers. This version becomes a true hot sauce condiment.
- Garlic Red Pepper Jelly: Mince 4 cloves of fresh garlic and add them with the peppers for a savory twist. The garlic mellows slightly during cooking but remains flavorful.
- Herb-Infused: Stir in 1 tablespoon of fresh basil or 1 teaspoon of dried thyme just before jarring. Fresh herbs should be added after cooking to preserve their flavor.
- Orange Red Pepper Jelly: Replace 1/4 cup of the vinegar with fresh orange juice and add the zest of one orange. This adds brightness and a subtle citrus note.
Dietary Adaptations
- Gluten-free: This recipe is naturally gluten-free as written. Simply verify your pectin and all other ingredients carry a gluten-free certification if cross-contamination is a concern.
- Dairy-free: Red pepper jelly contains no dairy, making it safe for dairy-free diets. It pairs wonderfully with dairy-free cream cheese alternatives if you want a plant-based appetizer.
- Vegan: This recipe is entirely vegan, using only plant-based ingredients. No modifications are needed.
- Low-carb or Keto: Standard red pepper jelly is too high in sugar for strict keto diets. Replace sugar with a keto-friendly sweetener like erythritol in a 1:1 ratio, though gel formation may be less reliable.
Storage and Reheating
Refrigerator
Properly sealed jars keep in a cool, dark pantry for up to one year. Once opened, store jars in the refrigerator and use within three weeks.
- Keep opened jars covered to prevent contamination
- Check for any mold or off odors before each use
Freezer
Red pepper jelly freezes well for up to two years if stored in airtight containers. Leave 1/2 inch headspace to account for expansion.
- Thaw overnight in the refrigerator before opening
- Frozen jelly may be slightly less firm when thawed but still tastes excellent
Reheating
Red pepper jelly does not require reheating and tastes best at room temperature. If you want to warm it for pouring, heat gently in a small saucepan over low heat for a minute or two.
- Never microwave jelly in the jar as it may damage the lids and container
- Transfer to a microwave-safe dish if warming is necessary
Nutrition Information
| Nutrient | Amount |
|---|---|
| Calories | 54 |
| Total Fat | 0 g |
| Saturated Fat | 0 g |
| Carbohydrates | 14 g |
| Fiber | 0 g |
| Sugar | 13 g |
| Protein | 0 g |
| Sodium | 180 mg |
| Cholesterol | 0 mg |
Nutrition values are approximate and based on one tablespoon serving size. Values may vary based on specific ingredients used and preparation methods.
Frequently Asked Questions
Can I make this recipe without a canning pot?
Yes, a large stockpot works fine as long as you can fit the jars in the water and cover them by at least one inch. The pot needs to be deep enough to prevent the jars from tipping over during the rolling boil.
What if my jelly does not set after 24 hours?
First, confirm it truly has not set by tilting the jar slightly. If it runs freely, you can recook it by returning the jelly to a pot, bringing it to a boil, and stirring in an additional 2 tablespoons of liquid pectin before processing again for 10 minutes.
Can I use frozen red peppers instead of fresh?
Frozen peppers work in a pinch, though the final jelly may be slightly softer in texture because frozen peppers release more liquid. Thaw them completely and drain thoroughly before using.
Why did my jelly turn out more like a sauce than a spreadable jelly?
This typically happens when the straining step is skipped or done too quickly, leaving excess liquid in the mixture. The water prevents proper gel formation even with pectin.
How do I know if a sealed jar is safe to eat?
Check that the lid is concave and does not move when you press it, indicating a proper seal. Before opening, inspect for any bulging, mold, or unusual odors, all of which signal spoilage.
Can I double this recipe to make more at once?
Doubling works well, but increase your cooking time slightly and monitor the temperature carefully. Larger batches take longer to reach the proper gel point.
Red Pepper Jelly
Ingredients
Equipment
Method
- Wash the red bell peppers and jalapeños thoroughly under cold running water. Cut each pepper in half, remove the stem and seeds, and roughly chop the flesh into 1-inch pieces so they blend smoothly.
- Place the chopped peppers in a food processor and blend until completely smooth, working in batches if needed. The goal is a uniform, seedless puree with no visible chunks.
- Pour the pepper puree into a fine-mesh strainer set over a bowl and let gravity do the work for at least 10 minutes to remove excess liquid and any small seeds or fiber.
- Pour the strained pepper puree into your large pot and add the sugar, vinegar, salt, and black pepper. Stir well to combine everything evenly before heating.
- Place the pot over high heat and stir frequently until the mixture comes to a rolling boil that you cannot stir down; this typically takes 15 to 20 minutes.
- Once the mixture is at a full rolling boil, quickly stir in the liquid pectin and return the mixture to a rolling boil. Let it boil for exactly one minute, stirring constantly, then remove from heat immediately.
- Skim off any foam that has risen to the surface using a spoon. Using a funnel and jar lifter, carefully fill sterilized half-pint jars leaving 1/4 inch headspace, then wipe the rims clean with a damp cloth.
- Place the filled jars into a water bath canner with enough water to cover the lids by at least one inch. Bring the water to a rolling boil and process for 10 minutes, then turn off the heat and let the jars sit in the water for 5 minutes before removing them.
Notes
Final Thoughts
Making red pepper jelly at home proves that preserving is not intimidating or complicated, and the reward of homemade jars lined up in your pantry is genuinely worth the small effort involved. This recipe delivers reliably beautiful results every time, even if you have never canned before.
Your first batch might become a new tradition, and people will start asking you to make more before the year is out. Give this recipe a try and discover why homemade red pepper jelly has earned its place on tables everywhere.