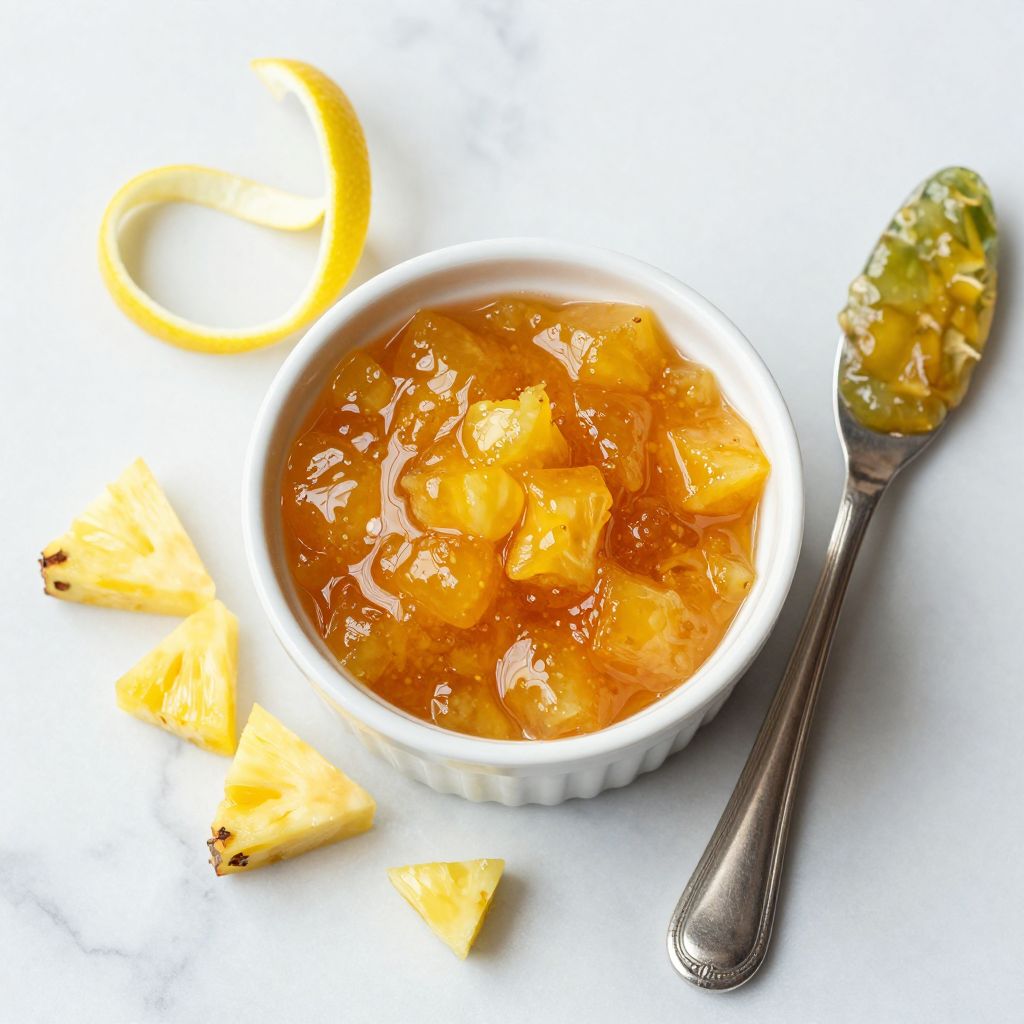
Pineapple jam is a tropical burst of sweet, tangy flavor that transforms fresh pineapple into a spreadable treasure for your breakfast table. This homemade version beats anything store-bought because you control the sweetness and get that vibrant, authentic pineapple taste that makes everyone ask for your secret.
Making jam at home might sound intimidating, but this recipe strips away the fuss and delivers a foolproof method that works on your first try. Keep reading to discover how simple it really is.
Why You’ll Love This Recipe
Homemade pineapple jam captures the essence of summer in a jar and costs a fraction of premium brands.
- Fresh, bright pineapple flavor that tastes nothing like the canned stuff
- Control over sugar content means you can make it as sweet or tart as you prefer
- Perfect gift for friends and family who appreciate good food
- Works beautifully on toast, yogurt, pastries, or stirred into cocktails
- No pectin or special equipment required to get that perfect set
My Experience Making This Recipe
The first time I made pineapple jam, I was skeptical that fruit alone could thicken into something spreadable. Watching the mixture bubble and transform over thirty minutes felt like kitchen magic, and when I spread that golden jam on warm toast the next morning, I understood why people bottle this stuff.
My kids devoured it so fast I had to make a second batch within a week. Friends have begged for jars, and now I make it in summer when fresh pineapples hit their peak sweetness and price.
The smell while it cooks is absolutely incredible: your whole kitchen smells like a tropical vacation. If you’ve never made jam before, this recipe builds your confidence for future batches.
Recipe Overview
- Recipe Name: Pineapple Jam
- Servings: Makes about 3 cups (6 half-pint jars)
- Prep Time: 15 minutes
- Cook Time: 35 minutes
- Total Time: 50 minutes
- Course: Condiment
- Cuisine: International
- Calories per Serving: 45 per tablespoon
Equipment You Will Need
- Sharp chef’s knife
- Cutting board
- Large heavy-bottomed pot (5-quart minimum)
- Wooden spoon for stirring
- Measuring cups and spoons
- Candy/deep-fry thermometer
- Clean glass jars with lids (half-pint or pint size)
- Ladle
- Funnel (optional but helpful)
- Large bowl for ice water (to test gel stage)
Ingredients for Pineapple Jam
- 4 pounds fresh pineapple (about 1 large fruit, peeled and cored)
- 3 cups granulated sugar
- 2 tablespoons fresh lemon juice
- 1/4 teaspoon salt
Ingredient Notes and Substitutions
- Fresh pineapple: You need ripe but firm fruit that smells fragrant at the base. If your pineapple feels soft or mushy, it’s overripe and won’t set properly; substitute with frozen pineapple chunks (thawed) if fresh isn’t available, though the flavor will be slightly less vibrant.
- Granulated sugar: Sugar acts as a preservative and helps the jam reach the gel stage through pectin activation. You can reduce sugar by up to 1/2 cup if you prefer less sweetness, but the jam may not set as firmly and won’t last as long in storage.
- Lemon juice: Acid is essential for flavor balance and helps activate natural pectin in the fruit. If you don’t have fresh lemon, bottled lemon juice works fine, or substitute with lime juice for a different twist on the flavor profile.
- Salt: A pinch enhances the pineapple’s natural sweetness and prevents the jam from tasting flat. You can omit it entirely if sodium is a concern, though the flavor will be slightly less complex.
How to Make Pineapple Jam
Step 1: Prepare Your Pineapple
Cut the pineapple in half lengthwise and remove the tough core using a sharp knife or corer. Slice away the rough outer skin and cut the yellow flesh into chunks roughly the size of dice.
Working methodically matters here: uneven pieces cook at different rates and can lead to mushy jam. Aim for consistency so everything breaks down together.
Step 2: Measure and Combine Ingredients
You need about 4 pounds of fruit, which yields roughly 3 cups of chopped pineapple when prepared. Add the pineapple, sugar, lemon juice, and salt to your large pot and stir gently to combine.
The sugar will look like it swallows the fruit, but don’t worry. The pineapple will release liquid as it heats and create a syrupy base for cooking.
Step 3: Heat Over Medium-High Heat
Bring the mixture to a rolling boil over medium-high heat, stirring occasionally to prevent sticking on the bottom. You should see thick bubbles breaking the surface after about 5 to 8 minutes.
Once it reaches a full boil, reduce heat to medium and maintain a steady, vigorous simmer. This is where the magic happens: the fruit breaks down, juice releases, and the mixture begins to thicken.
Step 4: Simmer and Stir Regularly
Continue cooking for 25 to 30 minutes, stirring frequently (every 2 to 3 minutes) to prevent the bottom from scorching. The mixture will gradually darken from bright yellow to a deeper golden-amber color as water evaporates and natural sugars concentrate.
You’ll notice the fruit pieces soften and break apart into smaller bits. Skim off any foam that rises to the surface with a spoon if it bothers you, though it’s harmless and indicates proper boiling.
Step 5: Test for Gel Stage
At around the 30-minute mark, begin testing for the gel stage, which means the jam has thickened enough to set on the plate. Place a small spoonful of jam on a chilled plate from your freezer and let it cool for 30 seconds.
Push it gently with your finger: it should wrinkle and hold its shape rather than run. If it still flows, continue cooking for another 2 to 3 minutes and test again.
Step 6: Check Temperature
Alternatively, use a candy thermometer to verify your jam has reached 220 degrees Fahrenheit (104 Celsius), the typical setting point for jam. Keep the thermometer in the mixture without touching the bottom of the pot, and read it at eye level for accuracy.
The thermometer method is faster once you’ve used it a few times. Both methods work well, so pick whichever feels comfortable.
Step 7: Prepare Jars
While the jam finishes cooking, sterilize your jars by running them through a hot dishwasher or boiling them in water for 10 minutes. Fill a pot with hot (not boiling) water and place your lids inside to soften the rubber seal.
Clean, hot jars prevent contamination and help the jam seal properly. This step takes just minutes but makes a big difference in shelf stability.
Step 8: Fill and Seal Jars
Using a ladle or funnel, carefully pour the hot jam into hot jars, leaving about 1/4 inch of headspace at the top. Wipe the rim of each jar with a clean, damp cloth to remove any drips, which prevents sealing issues.
Place a hot lid on each jar and screw the band down until it’s snug but not over-tightened. You’ll hear a satisfying pop as each jar cools and the lid seals, which means your jam will keep for months.
Pro Tip: Don’t skip the gel stage test because it’s the difference between syrup and spreadable jam, and there’s no going back once the jars are sealed.
Tips for the Best Pineapple Jam
- Choose a pineapple that feels heavy for its size and has a sweet aroma at the base, which indicates peak ripeness and maximum flavor concentration.
- Stir the mixture frequently once it reaches a boil to prevent the bottom from scorching, which creates bitter flavors that ruin the entire batch.
- Don’t skip the lemon juice, as it brightens the flavor and activates natural pectin needed for proper setting without added gelling agents.
- Use a heavy-bottomed pot so heat distributes evenly and the jam cooks consistently, preventing hot spots that cause burning.
- Let the jam cool in the jars before moving them to storage so the seals set properly and the contents redistribute evenly.
- Label your jars with the date so you know when you made it and can enjoy them at their freshest.
Common Mistakes to Avoid
- Using overripe or mushy pineapple means the fruit breaks down too quickly into mush rather than keeping texture, resulting in a sauce instead of jam with body.
- Rushing the cooking process by using high heat causes the mixture to caramelize too fast and burn before reaching proper gel stage.
- Skipping the gel stage test and guessing when jam is done leads to either runny syrup or over-cooked rubber that tastes burnt.
- Filling jars while they’re cold causes the jam to crack or fail to seal properly because the temperature change stresses the glass.
- Over-tightening the jar bands prevents air from escaping during cooling and stops the seal from forming, leaving your jam vulnerable to mold.
Serving Suggestions
Pineapple jam shines on toast with butter and a pinch of sea salt, but that’s just the beginning. This jam works beautifully in both sweet and savory applications, making it one of the most versatile preserves you can make.
- Spread on fresh scones or biscuits with whipped cream for an elegant breakfast
- Swirl into Greek yogurt with granola for a tropical breakfast bowl
- Top vanilla ice cream or cheesecake for a vibrant, fruity contrast
- Mix into barbecue sauce or brush on grilled ham for a sweet and tangy glaze
- Stir into sparkling water or cocktails for homemade tropical mixers
Variations to Try
- Pineapple and Ginger Jam: Add 2 tablespoons of grated fresh ginger to the pot at the start for warming spice that complements the tropical fruit beautifully.
- Pineapple and Vanilla Jam: Split a vanilla bean, scrape the seeds into the mixture, and add the pod during cooking, then remove it before jarring for floral sweetness.
- Pineapple and Coconut Jam: Stir in 1/2 cup of unsweetened shredded coconut during the last 5 minutes of cooking for tropical depth and texture.
- Spiced Pineapple Jam: Add 1/2 teaspoon ground cinnamon and 1/4 teaspoon ground cloves at the start for warm holiday spice.
- Pineapple and Passion Fruit Jam: Replace 1 cup of pineapple with passion fruit pulp for tartness that heightens the exotic flavor profile.
Dietary Adaptations
- Gluten-Free: This recipe is naturally gluten-free as written, containing no grains or thickening agents that typically contain gluten.
- Dairy-Free: The jam contains no dairy products, making it safe for anyone avoiding milk or cream.
- Vegan: All ingredients are plant-based, so this jam works perfectly for vegan diets with no modifications needed.
- Lower Sugar: Reduce sugar to 2 cups for a tarter jam that still sets, though it won’t keep quite as long because sugar acts as a preservative.
Storage and Reheating
Refrigerator
Properly sealed jars keep for up to one year in a cool, dark cupboard. Once opened, refrigerate and consume within three weeks.
- Store in the coldest part of your fridge for maximum shelf life
- Always use a clean spoon to remove jam so bacteria doesn’t contaminate the jar
- If mold appears on the surface, discard the entire jar rather than scraping it off
Freezer
You can freeze jam in airtight containers or jars for up to two years, though freezing changes the texture slightly to be less firm. Leave an inch of headspace in containers to allow for expansion as the jam freezes.
- Thaw in the refrigerator overnight before using
- Frozen jam works better for cooking and baking than for spreading straight from the jar
Reheating
Pineapple jam doesn’t require reheating for serving straight from the jar. If you need to warm it for cooking or glazing, simply place the jar in hot water for a few minutes to soften it.
- Never microwave jam in the jar as it can overheat and cause the glass to crack
- Spoon into a small dish and warm gently if needed
Nutrition Information
| Nutrient | Amount |
|---|---|
| Calories | 45 |
| Total Fat | 0g |
| Saturated Fat | 0g |
| Carbohydrates | 12g |
| Fiber | 0g |
| Sugar | 11g |
| Protein | 0g |
| Sodium | 25mg |
| Cholesterol | 0mg |
Nutrition information is calculated per tablespoon serving and assumes the recipe yields 48 tablespoons (3 cups total). Values are approximate and based on standard USDA data for ingredients.
Frequently Asked Questions
Can I use canned or frozen pineapple instead of fresh?
Yes, but fresh pineapple will give you the best flavor and texture. Canned pineapple in juice works if drained well, though the flavor will be less bright; frozen pineapple (thawed) is acceptable but slightly less flavorful than fresh.
Do I need to add pectin to make the jam set?
No, this recipe relies on natural pectin in the pineapple and lemon juice to set, so no special gelling agents are required. The key is reaching 220 degrees Fahrenheit and testing properly for gel stage.
How long can I store sealed jars of pineapple jam?
Properly sealed jars keep for up to one year in a cool, dark place at room temperature. Once opened, refrigerate and consume within three weeks for best quality and food safety.
Why did my jam turn out runny?
Runny jam usually means it didn’t reach 220 degrees or proper gel stage, or you used overripe fruit that broke down too quickly. You can reheat it with a bit more lemon juice and sugar, then recan it in clean jars.
Can I use brown sugar or honey instead of white sugar?
Brown sugar changes the flavor to something richer and darker, which some people love, though it masks the bright pineapple taste. Honey makes the jam very thick and affects the flavor profile significantly, so stick with white sugar for classic results.
What’s the difference between jam, jelly, and preserves?
Jam contains fruit pieces and is chunky, jelly is smooth and clear, and preserves have larger fruit pieces. This recipe makes jam because you keep some of the fruit texture rather than straining everything smooth.
Final Thoughts
Making pineapple jam at home transforms a simple fruit into something special that tastes infinitely better than store-bought versions. The process takes less than an hour from fruit to sealed jars, and your kitchen will smell absolutely incredible the entire time.
Once you’ve made this recipe successfully, you’ll have the confidence to experiment with other fruits and flavor combinations. Give it a try this week and watch how fast those jars disappear from your pantry.
Pineapple Jam
Ingredients
Equipment
Method
- Cut the pineapple in half lengthwise and remove the tough core using a sharp knife or corer. Slice away the rough outer skin and cut the yellow flesh into chunks roughly the size of dice, aiming for consistent pieces.
- Add the pineapple chunks, granulated sugar, fresh lemon juice, and salt to a large heavy-bottomed pot and stir gently to combine.
- Bring the mixture to a rolling boil over medium-high heat, stirring occasionally to prevent sticking, until thick bubbles break the surface, about 5 to 8 minutes.
- Reduce heat to medium and maintain a steady, vigorous simmer. Cook for 25 to 30 minutes, stirring frequently every 2 to 3 minutes to prevent scorching. Skim off any foam if desired.
- At around 30 minutes, test for gel stage by placing a small spoonful of jam on a chilled plate. Let cool 30 seconds, then push with your finger. If it wrinkles and holds shape, jam is ready. Otherwise continue cooking 2 to 3 more minutes and test again.
- Alternatively, use a candy thermometer to check that jam has reached 220 degrees Fahrenheit (104 Celsius), typical setting point for jam.
- While cooking finishes, sterilize jars by running through a hot dishwasher or boiling in water for 10 minutes. Soften rubber seals by placing lids in hot (not boiling) water.
- Using a ladle and optional funnel, carefully fill hot sterilized jars with hot jam, leaving 1/4 inch headspace at the top. Wipe rims clean to prevent sealing issues.
- Place hot lids on jars and screw bands down snugly without over-tightening. Allow jars to cool undisturbed to hear sealing pop.