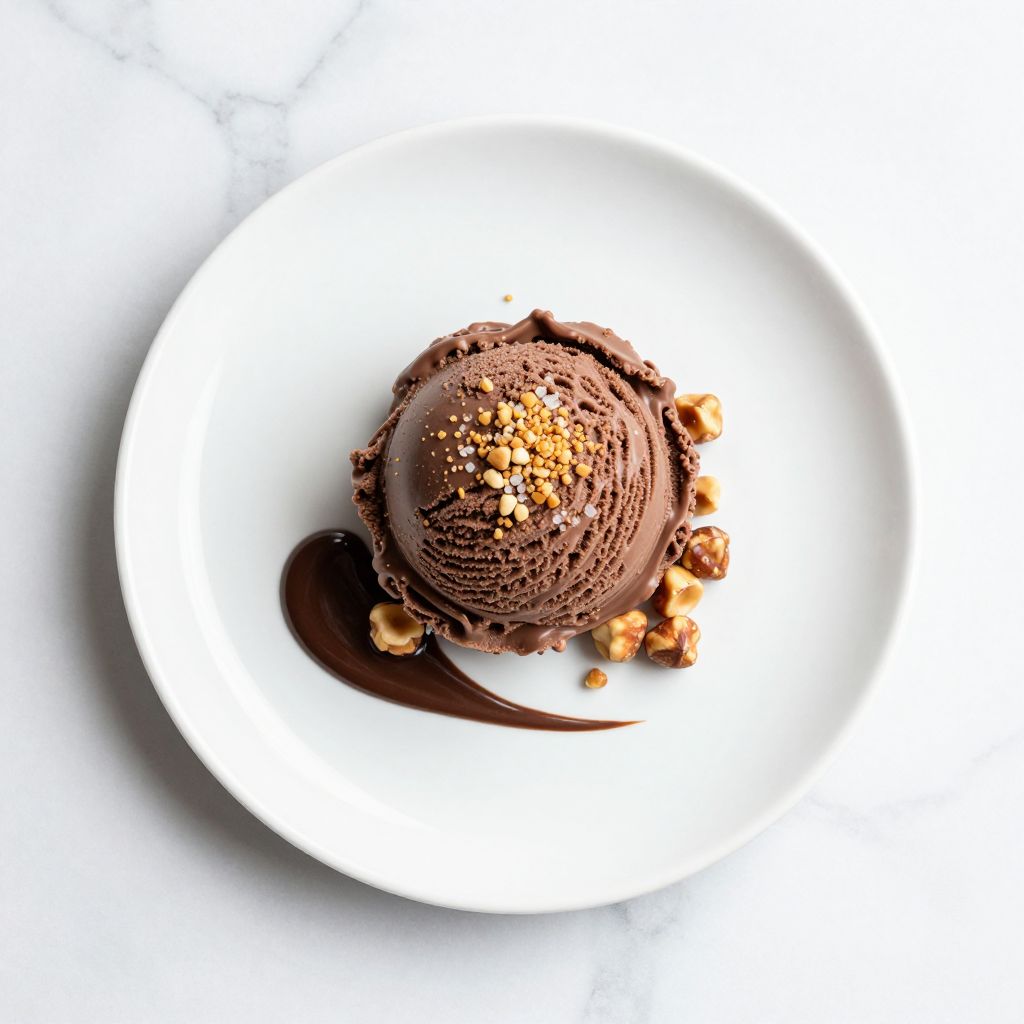
Nutella ice cream is the ultimate indulgence for chocolate-hazelnut lovers who want restaurant-quality dessert at home. This creamy, dreamy frozen treat combines rich Nutella with fresh cream and eggs to create a silky texture that melts on your tongue.
If you’ve ever wondered how to capture that luxurious Nutella flavor in homemade ice cream form, you’re about to find out. Let’s build your perfect batch from scratch.
Why You’ll Love This Recipe
This recipe delivers an authentic gelato-style ice cream that tastes like pure Nutella bliss without any chalky or icy texture.
- Smooth, creamy texture that rivals premium ice cream shops
- Deep, authentic Nutella flavor in every spoonful
- No ice cream maker required if you use the freezer method
- Only five main ingredients
- Ready in under an hour with active freezing
My Experience Making This Recipe
The first time I made this, I was skeptical that simple ingredients could taste this good. One bite and I became a believer.
My family demolished the entire batch in two days, which tells you everything you need to know. The hazelnut aroma fills your kitchen while it’s churning, and your guests will beg you for the recipe before they even taste it.
I’ve made this countless times now, tweaking ratios to get the perfect balance between Nutella intensity and creamy smoothness. This version hits that sweet spot every single time.
Recipe Overview
- Recipe Name: Nutella Ice Cream
- Servings: 6 to 8 servings
- Prep Time: 10 minutes
- Cook Time: 0 minutes
- Total Time: 4 hours plus freezing
- Course: Dessert
- Cuisine: Italian-Inspired
- Calories per Serving: 320
Equipment You Will Need
- Ice cream maker (or freezer-safe container for no-churn method)
- Medium saucepan
- Whisk
- Mixing bowl
- Thermometer (optional but recommended)
- Fine mesh strainer
- Spatula
Ingredients for Nutella Ice Cream
- Nutella: 1 cup
- Heavy cream: 2 cups, cold
- Whole milk: 1 cup
- Egg yolks: 4 large
- Granulated sugar: 1/4 cup
- Vanilla extract: 1/2 teaspoon
- Sea salt: 1/4 teaspoon
Ingredient Notes and Substitutions
- Nutella: This is your flavor foundation, providing both chocolate and hazelnut depth. You can use store-brand hazelnut-chocolate spread, though the flavor will be slightly less rich.
- Heavy cream: Whole cream creates the silky mouthfeel that makes this taste premium. Half-and-half will work but produces a slightly thinner texture.
- Egg yolks: They emulsify the mixture and create that gelato-style creaminess without an ice cream maker. Pasteurized eggs are safest if you’re concerned about raw eggs.
- Sugar: This sweetens the base and lowers the freezing point so the ice cream stays scoopable. You can substitute honey or agave for a slightly different texture.
- Vanilla extract: This brightens the Nutella flavor and adds subtle complexity. Omit it if you prefer pure hazelnut chocolate flavor.
How to Make Nutella Ice Cream
Step 1: Combine Egg Yolks and Sugar
Whisk together your egg yolks and sugar in a medium mixing bowl until the mixture turns pale yellow and slightly thick, about 2 to 3 minutes. This process, called “ribboning,” aerates the eggs and helps them emulsify the cream later.
Step 2: Heat the Milk
Pour the milk into a medium saucepan and heat it over medium heat until steam rises from the surface and you see tiny bubbles forming around the edges, around 170 to 180 degrees Fahrenheit if using a thermometer. Do not boil it, as this can cook the eggs too quickly and create a grainy texture.
Step 3: Temper the Eggs
Slowly drizzle the hot milk into your egg mixture while whisking constantly to prevent the eggs from scrambling. Once you’ve added about half the milk, you can pour the remaining milk in a steady stream while continuing to whisk.
This gradual temperature increase allows the eggs to cook gently and incorporate smoothly without curdling. The result is a silky custard base.
Step 4: Cook the Custard
Pour the entire mixture back into the saucepan and heat it over low heat, stirring constantly with a spatula or whisk. Cook until the custard reaches 160 to 165 degrees Fahrenheit and coats the back of a spoon thickly, about 8 to 10 minutes.
You’ll know it’s ready when you can draw a line through the custard on the spoon and it doesn’t immediately flow back together. This temperature ensures any bacteria are eliminated while keeping the custard smooth.
Step 5: Strain and Cool the Custard
Pour the hot custard through a fine mesh strainer into a clean bowl to remove any lumps or bits of cooked egg. This creates an incredibly smooth base that won’t have any graininess in your final ice cream.
Let the custard cool to room temperature, about 20 to 30 minutes. Once it reaches room temperature, cover it and refrigerate for at least 2 hours, or preferably overnight, as a cold custard churns more efficiently.
Step 6: Mix in the Nutella
Remove your chilled custard and whisk in the Nutella until completely smooth and no streaks remain. The custard will become thicker and richer as you blend in the Nutella.
Take your time with this step to ensure the Nutella incorporates evenly throughout. Any lumps now will create uneven texture in your finished ice cream.
Step 7: Whip the Heavy Cream
In a separate bowl, whip the cold heavy cream with vanilla extract and sea salt until soft peaks form, about 2 to 3 minutes. Soft peaks mean the cream holds its shape but still looks fluffy and light.
Don’t overbeat the cream, or you’ll end up with butter instead of whipped cream. The texture should be fluffy and cloud-like.
Step 8: Fold Together and Churn
Gently fold the whipped cream into your Nutella custard mixture in two additions using a spatula, being careful not to deflate the cream. The folding motion is crucial here because it keeps the air you’ve whipped into the cream intact.
Pour the finished mixture into your ice cream maker and churn according to the manufacturer’s instructions, usually 20 to 30 minutes. If you don’t have an ice cream maker, pour the mixture into a freezer-safe container and freeze for 4 hours, stirring vigorously every 30 minutes to break up ice crystals and create a smoother texture.
Step 9: Transfer and Final Freeze
Once churned, transfer the ice cream to a freezer-safe airtight container and freeze for at least 4 to 6 hours until it reaches a firm scoopable consistency. The mixture will still be somewhat soft when it comes out of the ice cream maker, so this final freeze is essential for proper texture.
Pro Tip: Use an ice cream maker rather than the no-churn method for the smoothest, creamiest texture with the least amount of ice crystal formation, though both methods produce delicious results.
Tips for the Best Nutella Ice Cream
- Make sure your custard is completely cold before churning, as a warmer base churns less efficiently and can produce a grainier texture.
- Use quality Nutella straight from the jar without thinning it, as this ensures maximum hazelnut-chocolate flavor in every bite.
- Add the whipped cream gently to maintain the aeration you’ve created, which gives the ice cream its light, fluffy texture.
- Keep your ice cream maker bowl in the freezer overnight before use to ensure it stays cold enough throughout the churning process.
- Temper the eggs slowly and carefully, as rushing this step can result in scrambled eggs rather than smooth custard.
- Scoop the ice cream with a warm spoon dipped in hot water between scoops for cleaner servings and less effort.
Common Mistakes to Avoid
- Skipping the chilling step before churning will result in less efficient freezing and potentially icy texture instead of smooth cream.
- Overheating the milk past 180 degrees can cause the eggs to cook unevenly, creating a lumpy or grainy custard base.
- Adding cold Nutella directly to a hot custard without tempering can cause it to seize and clump, making it difficult to incorporate smoothly.
- Overmixing the whipped cream into the custard deflates the air bubbles, resulting in a denser, icier final product.
- Storing ice cream in the coldest part of the freezer can cause it to become rock-hard and difficult to scoop, as it freezes too aggressively.
Serving Suggestions
Serve Nutella ice cream on its own or pair it with complementary desserts and flavors that enhance the chocolate-hazelnut profile. A few simple additions transform it into a complete dessert experience.
- Alongside warm hazelnut brownies or chocolate chip cookies for textural contrast
- In a waffle cone or sugar cone for easy eating and added crunch
- Drizzled with warm chocolate sauce or hazelnut praline sauce
- Topped with crushed roasted hazelnuts and a sprinkle of sea salt flakes
- Layered in a sundae with whipped cream, chocolate sauce, and amaretti biscuits
Variations to Try
- Nutella Swirl: Reserve a quarter of the Nutella and gently marble it through the finished ice cream just before final freezing for a ripple effect and concentrated flavor pockets.
- Salted Nutella: Increase the sea salt to 1/2 teaspoon to create a sweet and salty balance that makes the chocolate-hazelnut flavor pop even more.
- Nutella Espresso: Mix 1 tablespoon of instant espresso powder into the whipped cream before folding it in, adding depth and a sophisticated coffee note.
- Nutella Banana: Puree 1 ripe banana and fold it into the custard base for added creaminess and a subtle fruity sweetness that complements the hazelnut flavor.
- Nutella Crunch: Fold in 1/2 cup of crushed waffle cone pieces or toasted hazelnut pieces just before transferring to the freezer for added texture and crunch.
Dietary Adaptations
- Gluten-Free: This recipe is naturally gluten-free as written, but verify your Nutella brand is certified gluten-free if you have celiac disease or sensitivity.
- Dairy-Free: Replace heavy cream with full-fat coconut cream and milk with unsweetened almond or oat milk, though the texture will be slightly less rich.
- Vegan: Substitute egg yolks with 1/4 cup of aquafaba (liquid from canned chickpeas) whisked until frothy, and use dairy-free alternatives for cream and milk, though the custard method won’t work the same way.
- Lower Sugar: Reduce sugar to 2 tablespoons and use a Nutella variety labeled as reduced sugar, understanding this will produce a less sweet final product.
Storage and Reheating
Refrigerator
Nutella ice cream doesn’t really “reheat,” but you can soften it in the refrigerator for 10 to 15 minutes before serving if it’s become too hard to scoop. This won’t last long in the refrigerator since it will melt quickly, so plan to serve it immediately after softening.
- Serve within 30 minutes of removing from the freezer
- Cover tightly to prevent ice crystal formation
Freezer
Nutella ice cream stores beautifully in the freezer for up to 2 to 3 weeks when kept in an airtight container. The flavors actually meld and deepen over a few days, so it often tastes even better after a day or two of storage.
- Use an airtight container to prevent freezer burn
- Press plastic wrap directly onto the surface before closing the lid to minimize ice crystal formation
- Label with the date so you remember when you made it
Reheating
There’s no true reheating for ice cream, but you can enjoy it soft-serve style by letting it sit on the counter for 5 to 10 minutes before scooping. If you’ve accidentally frozen it too hard, a quick thaw in the refrigerator restores scoop-ability without melting it completely.
- Remove from freezer 5 to 10 minutes before serving for optimal texture
- Never microwave or directly heat frozen ice cream
Nutrition Information
| Nutrient | Amount |
|---|---|
| Calories | 320 |
| Total Fat | 22g |
| Saturated Fat | 14g |
| Carbohydrates | 30g |
| Fiber | 1g |
| Sugar | 26g |
| Protein | 4g |
| Sodium | 95mg |
| Cholesterol | 115mg |
These values are estimates based on standard ingredients and serving size of 1/8 of the batch. Actual nutrition varies slightly depending on specific Nutella brand and portion size.
Frequently Asked Questions
Can I make Nutella ice cream without an ice cream maker?
Yes, you can use the freezer method by pouring the mixture into a container and stirring it vigorously every 30 minutes for 4 hours. The texture won’t be quite as smooth as machine-churned, but it’s still creamy and delicious with proper stirring.
Is this recipe safe with raw eggs?
No, the eggs are cooked to 160 to 165 degrees Fahrenheit, which safely eliminates bacteria while keeping them smooth. If you’re still concerned, purchase pasteurized eggs from the grocery store for extra safety.
How do I prevent ice crystals from forming?
Chill your custard thoroughly before churning, use an ice cream maker rather than the no-churn method, and store in an airtight container with plastic wrap pressed directly onto the surface. Consuming within 2 to 3 weeks also helps since crystals grow the longer ice cream sits.
Can I use Nutella from a jar that’s been open for months?
Yes, as long as the Nutella is sealed, refrigerated after opening, and shows no signs of mold or off odor, it’s perfectly fine to use. Nutella keeps for a surprisingly long time due to its fat and sugar content.
What if my Nutella ice cream came out too hard?
This usually means it froze longer than needed or your freezer is set very cold. Let it sit on the counter for 5 to 10 minutes before scooping, or move it to the refrigerator for 15 to 20 minutes to soften slightly without melting completely.
Can I make a larger batch?
Absolutely, you can double or triple the recipe, though you’ll need a larger ice cream maker bowl or multiple batches. The timing and temperatures remain the same regardless of batch size.
Final Thoughts
Making homemade Nutella ice cream is genuinely easier than most people think, and the result tastes infinitely better than store-bought versions. Once you’ve mastered this recipe, you’ll find yourself making it constantly for family gatherings, hot summer days, and quiet moments when only ice cream will do.
The beauty of this recipe is that it teaches you fundamental ice cream-making techniques you can apply to countless other flavors. Try it this week and join the growing number of people who’ve ditched the ice cream shop for their own creamy, dreamy homemade version.
Nutella Ice Cream
Ingredients
Equipment
Method
- Whisk together egg yolks and sugar in a medium mixing bowl until pale yellow and slightly thick, about 2 to 3 minutes.
- Pour the milk into a medium saucepan and heat over medium heat until steam rises and bubbles form around edges, about 170 to 180°F; do not boil.
- Slowly drizzle the hot milk into the egg yolk mixture while whisking constantly to prevent scrambling, first half then the rest in a steady stream.
- Pour mixture back into saucepan and cook over low heat, stirring constantly until custard coats the back of a spoon and reaches 160 to 165°F, about 8 to 10 minutes.
- Strain custard through a fine mesh strainer into a clean bowl to remove lumps, then let cool to room temperature about 20 to 30 minutes.
- Cover and refrigerate custard for at least 2 hours or preferably overnight.
- Remove chilled custard and whisk in Nutella until completely smooth and no streaks remain.
- In a separate bowl, whip cold heavy cream with vanilla extract and sea salt until soft peaks form, about 2 to 3 minutes.
- Gently fold whipped cream into Nutella custard in two additions, careful to not deflate the cream.
- Pour mixture into an ice cream maker and churn for 20 to 30 minutes according to manufacturer's instructions. Alternatively, pour into a freezer-safe container and freeze for 4 hours, stirring vigorously every 30 minutes.
- Transfer churned ice cream to an airtight freezer-safe container and freeze for an additional 4 to 6 hours until firm and scoopable.