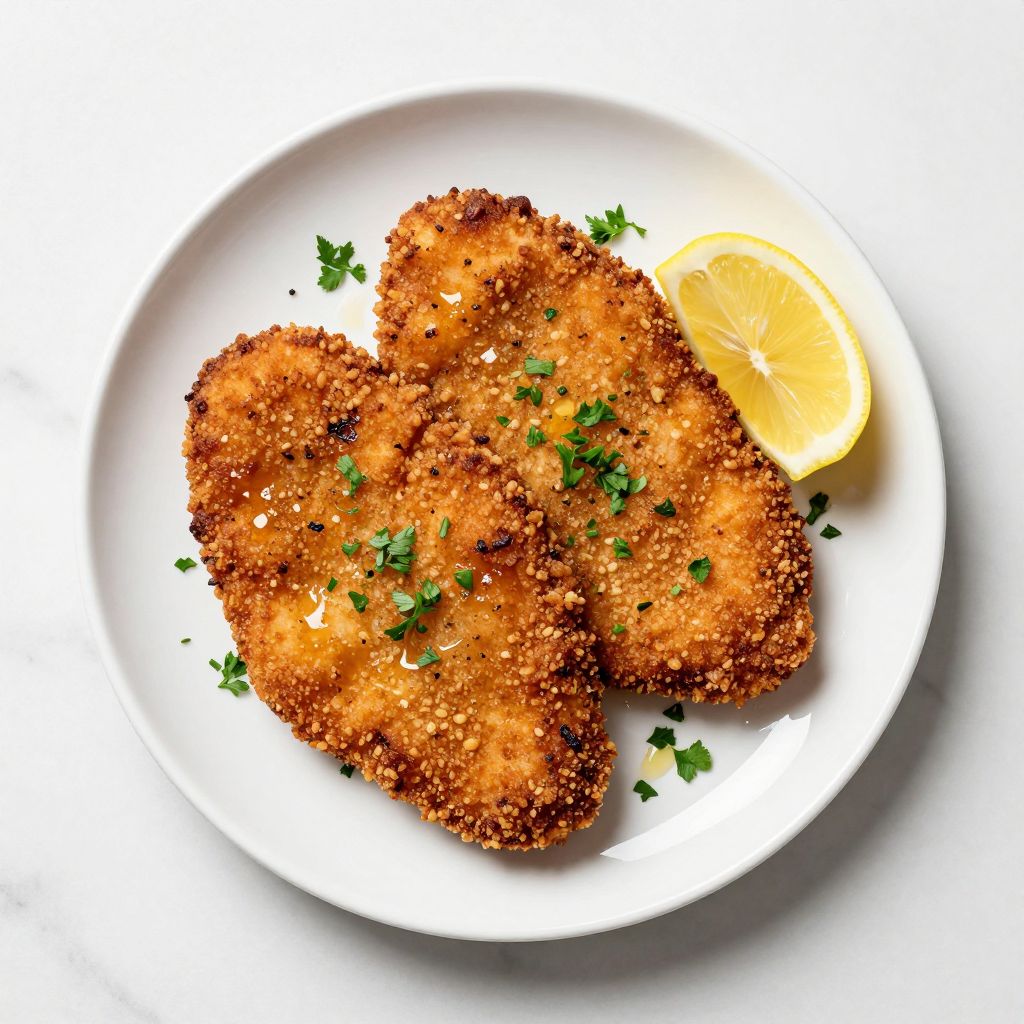
Italian chicken cutlet is a timeless classic that delivers crispy, golden-brown perfection in under 30 minutes. This dish features tender chicken breasts pounded thin, coated in seasoned breadcrumbs, and pan-fried until they develop that irresistible crunchy exterior.
If you want restaurant-quality chicken on a weeknight with minimal fuss, this recipe is your answer. Let me show you how to master this Italian favorite.
Why You’ll Love This Recipe
This recipe strikes the perfect balance between simplicity and sophistication, delivering impressive results with basic pantry ingredients.
- Ready in 25 minutes from start to finish
- Requires just six core ingredients plus seasonings
- Works perfectly for weeknight dinners or entertaining guests
- Freezes beautifully before or after cooking
- Pairs with countless side dishes and sauces
My Experience Making This Recipe
The first time I made Italian chicken cutlet for my family, I was nervous about the pounding step. I worried I’d either destroy the chicken or leave it too thick.
The moment those cutlets hit the hot oil and started sizzling, my doubts vanished. The kitchen filled with this incredible nutty aroma, and within two minutes, I had golden, crispy cutlets that looked straight from a trattoria.
My kids asked for seconds, and my partner declared it restaurant-quality. Since then, this recipe has become my go-to when I need to impress without spending hours in the kitchen.
Recipe Overview
- Recipe Name: Italian Chicken Cutlet
- Servings: 4
- Prep Time: 10 minutes
- Cook Time: 12 minutes
- Total Time: 22 minutes
- Course: Main Course
- Cuisine: Italian
- Calories per Serving: 285
Equipment You Will Need
- Meat mallet or heavy skillet
- Three shallow bowls or plates
- Large skillet or frying pan
- Paper towels
- Tongs
- Meat thermometer (optional but helpful)
- Cutting board
Ingredients for Italian Chicken Cutlet
- 4 boneless, skinless chicken breasts (about 6 ounces each)
- 1 cup all-purpose flour
- 2 large eggs
- 1.5 cups Italian seasoned breadcrumbs
- 0.5 cup vegetable oil (for frying)
- Salt and black pepper to taste
- 0.25 teaspoon garlic powder (optional)
- 0.25 teaspoon red pepper flakes (optional)
- Juice of half a lemon (for finishing)
Ingredient Notes and Substitutions
- Chicken breasts: You need them boneless and skinless for quick, even cooking and a clean presentation. If you only have bone-in breasts, pound them thinner and add 5 extra minutes to cooking time.
- Breadcrumbs: Italian seasoned breadcrumbs contain oregano and garlic, saving you prep work. For a homemade option, pulse stale crusty bread with dried oregano and garlic powder.
- Vegetable oil: Olive oil burns too quickly at high heat, so avoid it for frying. Use avocado or light canola oil as equally effective alternatives.
- Eggs: They act as the binding agent between chicken and breadcrumb coating. Milk mixed with one egg works if you’re short on eggs, though the coating will be slightly less crispy.
- Flour: This creates a base layer for adhesion and helps brown the chicken. Cornstarch mixed half-and-half with flour gives extra crunch if you prefer maximum crispness.
How to Make Italian Chicken Cutlet
Step 1: Pound the Chicken Breasts
Place each chicken breast between two sheets of plastic wrap or parchment paper on a cutting board. Using a meat mallet or the bottom of a heavy skillet, gently but firmly pound the chicken until it’s approximately 0.25 inch thick, working from the center outward in gentle, overlapping strokes.
Pounding creates an even thickness so the chicken cooks uniformly and becomes more tender. Uneven thickness leads to dry edges and undercooked centers.
Step 2: Set Up Your Breading Station
Arrange three shallow bowls or plates in a line: one with flour, one with beaten eggs, and one with breadcrumbs. This assembly-line setup keeps your hands cleaner and makes the process faster than hunting for each ingredient.
If you’re working with four cutlets, prep all three stations before you start breading to maintain momentum and keep oil at the right temperature.
Step 3: Season and Flour the Chicken
Season both sides of each pounded cutlet generously with salt and pepper, adding garlic powder or red pepper flakes if you like. Working with one cutlet at a time, coat it thoroughly in flour, shaking off any excess.
The flour acts as an adhesive layer that helps the egg coating stick properly. Without this step, your breadcrumb coating will flake off during frying.
Step 4: Dip in Egg Mixture
Transfer the floured cutlet to the egg mixture and coat both sides completely, letting excess egg drip back into the bowl. This creates the crucial binding layer between flour and breadcrumbs.
Don’t skip this step or rush through it. Proper egg coverage ensures your breadcrumb coating adheres and creates that signature crispy shell.
Step 5: Coat with Breadcrumbs
Place the egg-coated cutlet onto the breadcrumb plate and press gently to coat both sides evenly, ensuring complete coverage. Gently press with your fingers so breadcrumbs adhere rather than just sitting on top.
A well-breaded cutlet has a unified, golden appearance when cooked. Thin spots will brown faster and potentially burn while thicker areas stay soft.
Step 6: Heat Your Oil
Pour vegetable oil into a large skillet and heat over medium-high heat for about 2 minutes until it shimmers and a breadcrumb sizzles immediately when dropped into it. Use a thermometer if available—aim for 350 degrees Fahrenheit.
Oil that’s too cool produces greasy, soggy cutlets, while oil that’s too hot burns the outside before the inside cooks. Getting this temperature right is the difference between crispy and disappointing results.
Step 7: Fry the Cutlets
Carefully place each breaded cutlet into the hot oil, working in batches if needed and avoiding overcrowding the pan. Fry for 3 to 4 minutes on the first side without moving them, allowing the breadcrumb coating to develop that deep golden color.
Resist the urge to flip constantly. The chicken needs uninterrupted contact with hot oil to develop proper color and crispness.
Step 8: Flip and Finish Cooking
Flip each cutlet using tongs and fry the second side for another 2 to 3 minutes until golden brown and crispy. The chicken should register 165 degrees Fahrenheit on a meat thermometer in the thickest part.
The second side cooks faster since it already transferred heat from the first side. Watch for any spots turning dark brown and reduce heat slightly if needed.
Step 9: Drain and Finish
Transfer finished cutlets to a paper towel-lined plate to drain excess oil, then arrange on a serving platter. Squeeze fresh lemon juice over the warm cutlets for brightness and acidity that cuts through the richness.
Serve immediately while the coating is still crispy. The cutlets stay warm for about 5 minutes but begin losing their crunch as they cool.
Pro Tip: Keep your breaded cutlets on a parchment-lined baking sheet in the refrigerator for up to 4 hours before frying for maximum crispness and easier last-minute cooking.
Tips for the Best Italian Chicken Cutlet
- Pound your chicken evenly, aiming for consistent thickness so nothing dries out or stays raw. Use a gentle, confident motion rather than aggressive smashing.
- Don’t skip the plastic wrap when pounding. It keeps your cutting board clean and prevents raw chicken from splashing everywhere.
- Test your oil temperature with a small piece of breadcrumb before committing cutlets to the pan. If it sizzles immediately and rises to the top, you’re ready to go.
- Use fresh breadcrumbs if possible for superior crunch compared to stale, fine ones. Panko breadcrumbs create extra crispiness if you prefer that texture.
- Season your cutlets right before frying, not hours ahead. Salt draws moisture to the surface, which interferes with browning.
- Work in batches rather than crowding the pan, as too many cutlets drop the oil temperature and create steaming instead of frying.
Common Mistakes to Avoid
- Pounding unevenly creates some sections too thin that brown quickly and others too thick that stay undercooked. Aim for uniform thickness throughout by pounding methodically from center outward.
- Oil that’s not hot enough produces greasy, soggy chicken instead of the crispy coating you want. Always test with a small piece of breading first.
- Moving the cutlets around in the pan interrupts the browning process and prevents proper crust formation. Resist the urge to flip or adjust until the first side is golden.
- Using olive oil for frying burns at lower temperatures and creates a burnt, bitter flavor. Save your good olive oil for finishing dishes instead.
- Breading too far in advance allows moisture to soften the coating before cooking. Bread cutlets no more than 4 hours ahead and keep them refrigerated and uncovered.
Serving Suggestions
Italian chicken cutlet shines with simple sides that let the crispy coating take center stage. A squeeze of fresh lemon juice is all this dish truly needs to reach its full potential.
- Serve alongside a fresh arugula salad dressed with lemon vinaigrette
- Pair with a creamy risotto or buttered pasta for a complete meal
- Top with fresh tomato sauce and melted mozzarella for chicken parmigiana
- Accompany with roasted vegetables like zucchini, bell peppers, or cherry tomatoes
- Serve in a crusty bread roll with arugula and a drizzle of aioli for a gourmet sandwich
Variations to Try
- Parmesan Crust: Replace half the breadcrumbs with grated Parmesan cheese for a richer, savory flavor and extra crispy texture. This adds depth without changing the cooking time or technique.
- Lemon Herb Version: Add zest from one lemon and 1 teaspoon each of dried basil and oregano to your breadcrumb mixture for brighter, herbaceous notes. This variation pairs perfectly with seafood-inspired sides.
- Spicy Kick: Mix 0.5 teaspoon cayenne pepper and 0.5 teaspoon paprika into your breadcrumbs for heat that builds gradually. Serve with cooling tzatziki or ranch for balance.
- Whole Wheat Option: Use whole wheat breadcrumbs mixed 50/50 with regular breadcrumbs for added nutrition and a slightly nuttier flavor. The coating takes on a darker, earthier appearance.
- Almond Flour Crust: Replace half the breadcrumbs with finely ground almond flour for a gluten-free, lower-carb version that stays exceptionally crispy. The flavor becomes slightly richer and more complex.
Dietary Adaptations
- Gluten-Free: Swap regular flour for rice flour or cornstarch and use gluten-free breadcrumbs or crushed gluten-free crackers. The coating may be slightly less crispy, so press firmly during breading for better adhesion.
- Dairy-Free: Use plant-based milk mixed with cornstarch as your egg wash substitute, though the coating won’t crisp quite as much. The texture remains excellent and the flavor is unaffected.
- Vegan/Vegetarian: This recipe relies on chicken as the protein, but you can replicate it perfectly with thick slices of extra-firm tofu or cauliflower steaks using identical breading and frying technique. Cook times drop to 2 minutes per side for tofu.
- Low-Carb/Keto: Replace breadcrumbs with a mixture of almond flour, grated Parmesan, and crushed pork rinds for a virtually carb-free coating that crisps beautifully. The flavor becomes richer and more savory.
Storage and Reheating
Refrigerator
Store cooked cutlets in an airtight container for up to 3 days. The coating softens slightly but remains edible.
- Keep cutlets in a single layer separated by parchment to prevent sticking
- Store uncooked breaded cutlets on a parchment-lined tray for up to 4 hours before frying
Freezer
Freeze uncooked breaded cutlets on a tray for 2 hours, then transfer to a freezer bag for up to 3 months. This is the best option for meal prep.
- Fry directly from frozen, adding 1 to 2 extra minutes per side
- Do not thaw before cooking or the coating will become soggy
Reheating
Reheat cooked cutlets in a 350-degree-Fahrenheit oven for 8 to 10 minutes to restore some crispness, much better than microwaving.
- Place on a wire rack so air circulates underneath
- Avoid microwaving, which makes the coating rubbery and soft
- Air fryer at 375 degrees for 5 minutes restores crispness nearly as well as fresh frying
Nutrition Information
| Nutrient | Amount |
|---|---|
| Calories | 285 |
| Total Fat | 12g |
| Saturated Fat | 2g |
| Carbohydrates | 18g |
| Fiber | 1g |
| Sugar | 0g |
| Protein | 32g |
| Sodium | 520mg |
| Cholesterol | 85mg |
These values are estimates based on using standard ingredients and a 4-ounce cooked portion per serving. Exact nutrition varies based on oil absorption and specific brands used.
Frequently Asked Questions
Can I make Italian chicken cutlet ahead of time?
Yes, you can bread the cutlets several hours ahead and keep them in the refrigerator on a parchment-lined tray. Fry them fresh when you’re ready to serve for maximum crispness.
What’s the difference between Italian chicken cutlet and chicken parmigiana?
Italian chicken cutlet is the breaded and fried chicken by itself, while chicken parmigiana tops it with tomato sauce and melted cheese. Both start with the exact same crispy cutlet.
How do I keep the coating crispy if I need to hold the cutlets before serving?
Transfer finished cutlets to a wire rack set over a baking sheet and keep them in a 200-degree-Fahrenheit oven for up to 15 minutes. This keeps them warm without steaming and softening the coating.
Why does my coating fall off during frying?
You’re likely skipping the flour layer or not letting the egg coating dry slightly before adding breadcrumbs. Both steps are crucial for adhesion.
Can I use chicken thighs instead of breasts?
You can, though thighs are thicker and require slightly longer pounding and a few extra minutes of frying. They stay juicier but take about 5 extra minutes total to cook through.
Is it better to shallow fry or deep fry Italian chicken cutlet?
Shallow frying with 0.5 inch of oil works perfectly and uses far less oil with virtually identical crispness. Deep frying submerges everything but wastes oil without significantly improving results.
What oil has the best flavor for frying?
Vegetable oil is neutral and perfect for frying since it has a high smoke point and won’t overpower the chicken. Avocado oil works equally well if you prefer a slightly different neutral flavor profile.
Final Thoughts
Italian chicken cutlet deserves a regular spot on your weeknight rotation. It’s fast, foolproof once you understand the technique, and delivers restaurant-quality results that feel special without the price tag or complexity.
Give this recipe a try this week and watch how impressed your family becomes. You’ve got all the knowledge you need to nail it on the first attempt and impress everyone at your table.
Italian Chicken Cutlet
Ingredients
Equipment
Method
- Place each chicken breast between two sheets of plastic wrap or parchment paper on a cutting board. Using a meat mallet or the bottom of a heavy skillet, gently pound the chicken until it's approximately 0.25 inch thick, working from the center outward in gentle, overlapping strokes.
- Arrange three shallow bowls or plates in a line: one with flour, one with beaten eggs, and one with breadcrumbs.
- Season both sides of each pounded cutlet generously with salt, black pepper, and optionally garlic powder or red pepper flakes. Coat it thoroughly in flour, shaking off any excess.
- Transfer the floured cutlet to the beaten eggs bowl and coat both sides completely, letting excess egg drip back into the bowl.
- Place the egg-coated cutlet onto the breadcrumb plate and press gently to coat both sides evenly, ensuring complete coverage.
- Pour vegetable oil into a large skillet and heat over medium-high heat for about 2 minutes until the oil shimmers and a breadcrumb sizzles immediately when dropped into it. Aim for approximately 350 degrees Fahrenheit.
- Carefully place each breaded cutlet into the hot oil, working in batches if needed to avoid overcrowding. Fry for 3 to 4 minutes on the first side without moving them.
- Flip each cutlet using tongs and fry the second side for another 2 to 3 minutes until golden brown and crispy. The chicken should register 165 degrees Fahrenheit on a meat thermometer in the thickest part.
- Transfer finished cutlets to a paper towel-lined plate to drain excess oil, then arrange on a serving platter. Squeeze fresh lemon juice over the warm cutlets before serving.