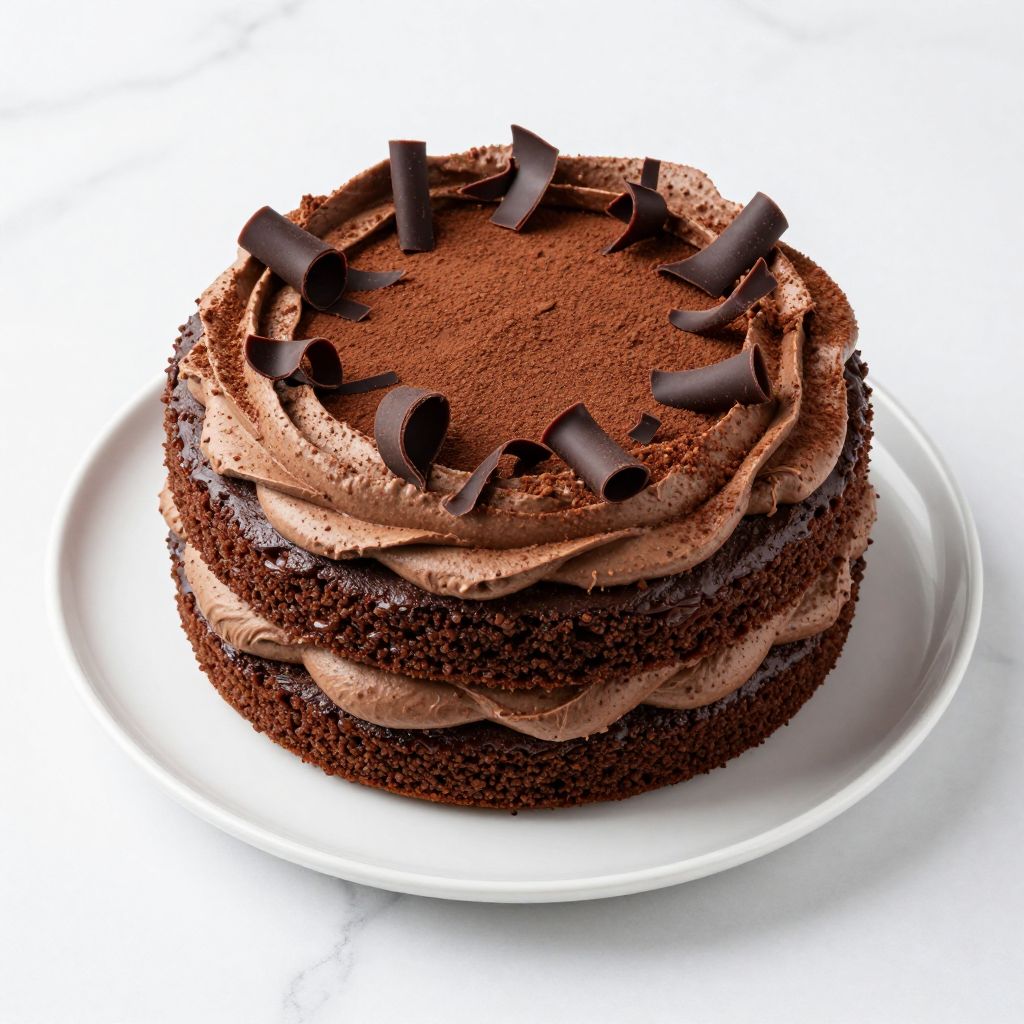
Thunder Cake is a tender, moist chocolate cake that’s perfect for transforming an ordinary day into something special. This recipe combines rich cocoa, hot water, and simple pantry staples to create layers of deep chocolate flavor that feel indulgent without fussy techniques.
The magic happens when you pour hot water into the batter, which seems counterintuitive but creates an incredibly fudgy texture. Whether you’re baking for a celebration or just craving homemade chocolate cake, this recipe delivers reliable, delicious results every single time.
Why You’ll Love This Recipe
This cake checks all the boxes for a go-to chocolate dessert. The technique is straightforward, the ingredient list is short, and the payoff tastes like you spent hours in the kitchen.
- Incredibly moist and tender crumb from the hot water technique
- Deep chocolate flavor without cocoa powder being overwhelming
- Uses basic ingredients you likely have on hand
- Scales easily for different pan sizes and occasions
- Bakes in under an hour from start to finish
My Experience Making This Recipe
I first made this cake on a rainy afternoon when my kids asked for chocolate cake but I hadn’t planned ahead. The simplicity of the ingredient list caught my attention, and I was skeptical that pouring hot water into the batter would actually work.
The moment I pulled it from the oven, the kitchen smelled like a chocolate factory had exploded in the best way possible. My family devoured two layers in one sitting, and I’ve been making it regularly ever since.
What surprised me most was how forgiving this recipe is. Even when I’ve rushed through it or made small tweaks, the cake turns out moist and delicious every time.
Recipe Overview
- Recipe Name: Thunder Cake
- Servings: 12 servings
- Prep Time: 15 minutes
- Cook Time: 30 to 35 minutes
- Total Time: 45 to 50 minutes
- Course: Dessert
- Cuisine: American
- Calories per Serving: 320
Equipment You Will Need
- Two 9-inch round cake pans
- Large mixing bowl
- Medium mixing bowl
- Whisk
- Wooden spoon or spatula
- Measuring cups and spoons
- Electric mixer (optional but helpful)
- Oven thermometer (optional)
- Cooling racks
Ingredients for Thunder Cake
- 1 3/4 cups all-purpose flour
- 2 cups granulated sugar
- 3/4 cup unsweetened cocoa powder
- 2 teaspoons baking soda
- 1 teaspoon baking powder
- 1 teaspoon salt
- 2 large eggs
- 1 cup strong brewed coffee, cooled slightly
- 1 cup buttermilk
- 1/2 cup vegetable oil
- 1 teaspoon vanilla extract
- 1 cup boiling water
Ingredient Notes and Substitutions
- All-purpose flour provides structure for the cake and creates a tender crumb when combined with the wet ingredients. Cake flour can replace it for an even softer texture, though you may need slightly less.
- Unsweetened cocoa powder delivers the deep chocolate flavor without added sugar. Dutch-process cocoa works beautifully and provides a slightly more sophisticated chocolate taste than natural cocoa.
- Brewed coffee amplifies the chocolate notes and adds depth of flavor. Hot water works as a substitute, though the cake will taste less complex.
- Buttermilk reacts with baking soda to activate leavening and adds tanginess. Regular milk mixed with one tablespoon of lemon juice or vinegar per cup works in a pinch.
- Boiling water creates steam and moisture in the batter, producing the signature fudgy texture. Never skip this step or use room temperature water, as it won’t have the same effect.
How to Make Thunder Cake
Step 1: Prepare Your Pans
Preheat your oven to 350 degrees Fahrenheit and position a rack in the center. Butter and flour two 9-inch round cake pans, or use parchment paper on the bottom to ensure easy removal after baking.
Step 2: Mix the Dry Ingredients
In a large mixing bowl, whisk together the flour, sugar, cocoa powder, baking soda, baking powder, and salt. Whisking combines the leavening agents evenly throughout the dry mixture, which prevents uneven rise and dense spots in the cake.
Step 3: Combine the Wet Ingredients
In a medium bowl, whisk the eggs, cooled coffee, buttermilk, oil, and vanilla extract until well combined. This creates a smooth wet mixture that will blend seamlessly with the dry ingredients without lumps.
Step 4: Create the Batter
Pour the wet ingredients into the dry ingredients and stir until just combined, using a wooden spoon or spatula. Overmixing toughens the cake, so stop as soon as no streaks of flour remain.
Step 5: Add the Boiling Water
Carefully pour the boiling water into the batter and stir gently until fully incorporated. The batter will look thin and loose, which is exactly right, so don’t panic.
Step 6: Divide Between Pans
Pour the batter evenly between the prepared pans, dividing as equally as possible. The batter is thin enough to level itself as it bakes, so don’t worry about perfecting the surface.
Step 7: Bake the Cake
Bake for 30 to 35 minutes, until a toothpick inserted in the center comes out with just a few moist crumbs. The tops should spring back lightly when touched, indicating they’re set.
Step 8: Cool the Cake
Let the pans cool on a wire rack for 15 minutes, then turn the cakes out onto cooling racks to cool completely. Cooling completely ensures the cake is stable enough to frost without crumbling.
Pro Tip: Brew your coffee fresh and let it cool for a few minutes before adding it to the batter, as very hot liquid can affect the other ingredients negatively.
Tips for the Best Thunder Cake
- Use room-temperature eggs and buttermilk, as cold ingredients can create lumps and affect mixing. This takes just 10 minutes if you take the items out before you start prepping.
- Don’t skip the cooling time before frosting, as warm cake is fragile and will tear. A completely cool cake holds frosting evenly and looks more polished.
- Sift the cocoa powder if it’s lumpy, which ensures a smooth, lump-free batter. Cocoa powder can be dense and compact after sitting in the pantry.
- Measure flour by spooning it into the cup rather than scooping directly from the bag, which prevents packing too much into each measurement. Overmeasuring flour is the top reason cakes turn out dry.
- Check the oven temperature with an oven thermometer, as many home ovens run hot or cold and affect bake time. Even a 25-degree difference changes how quickly the cake sets.
Common Mistakes to Avoid
- Using boiling water that’s cooled too much weakens the leavening reaction and results in a denser cake. The water needs to be actively hot to create the signature fudgy texture.
- Overmixing the batter after adding the wet ingredients to the dry ones overdevelops gluten, making the cake tough and chewy. Mix only until no dry streaks appear.
- Opening the oven door too early releases heat and causes uneven baking or sunken centers. Resist the urge to peek until the last 5 minutes of baking.
- Skipping the buttermilk in favor of regular milk eliminates the acid that activates baking soda, resulting in less lift and rise. The buttermilk is essential for the chemistry, not just flavor.
- Frosting while the cake is still warm causes the frosting to melt and slide off. Patience here prevents a frosting disaster and guarantees a beautiful presentation.
Serving Suggestions
Thunder Cake pairs wonderfully with classic frosting options and simple accompaniments. Serve it at room temperature for the best flavor and texture.
- Layer with chocolate buttercream frosting and top with cocoa powder dusting
- Frost with vanilla buttercream and add fresh berries between layers
- Serve unfrosted with a dusting of powdered sugar and a scoop of vanilla ice cream
- Pair slices with cold milk or hot coffee for a simple, satisfying dessert
- Top with whipped cream and chocolate shavings for an elegant presentation
Variations to Try
- Add one teaspoon of espresso powder to the dry ingredients to deepen the chocolate flavor. This makes the chocolate taste more sophisticated without tasting like coffee.
- Stir in one cup of chocolate chips or chunks into the batter before baking for extra richness. The chips melt slightly and create pockets of chocolate throughout.
- Replace half the cocoa powder with finely grated dark chocolate for a more intense flavor. Dark chocolate adds complexity that straight cocoa powder doesn’t quite achieve.
- Add one teaspoon of cinnamon to the dry ingredients for warmth and spice. Cinnamon complements chocolate beautifully without overpowering it.
- Make a smaller single-layer cake in an 8-inch pan, reducing the bake time to 25 to 28 minutes. This works perfectly for smaller households.
Dietary Adaptations
- Gluten-free: Replace the all-purpose flour with a one-to-one gluten-free baking blend, which maintains the crumb structure and texture. The result is slightly less tender but still delicious.
- Dairy-free: Use unsweetened almond milk mixed with one tablespoon of lemon juice instead of buttermilk, and replace the oil with coconut oil. The flavor is slightly lighter but the cake remains moist.
- Vegan: Swap eggs for two flax eggs or applesauce, use dairy-free buttermilk, and ensure the cocoa powder and other ingredients are vegan-certified. The texture is similar, though slightly more crumbly.
- Low-carb/keto: Use almond flour mixed with psyllium husk and substitute the sugar with a keto-friendly sweetener, which requires testing to get the proportions right. The result is denser and requires careful attention to avoid dryness.
Storage and Reheating
Refrigerator
Store cooled cake layers in an airtight container for up to 3 days. Frosted cakes keep for 4 to 5 days when covered properly.
- Layer the cooled cake with parchment paper between layers to prevent sticking
- Keep the container sealed to lock in moisture
Freezer
Thunder Cake freezes beautifully for up to 2 months, making it ideal for advance baking. Wrap layers individually in plastic wrap and then in foil.
- Unfrosted layers thaw faster and more evenly than whole cakes
- Frosted cakes can freeze for up to 1 month with the frosting protecting the crumb
Reheating
Serve the cake at room temperature straight from the refrigerator or thawed from the freezer. Microwaving individual slices for 10 to 15 seconds refreshes the texture if the cake has dried out slightly.
- Never reheat a frosted cake in the oven, as the frosting will melt
- Room temperature cake tastes more flavorful than cold cake
Nutrition Information
| Nutrient | Amount |
|---|---|
| Calories | 320 |
| Total Fat | 12g |
| Saturated Fat | 2g |
| Carbohydrates | 50g |
| Fiber | 1g |
| Sugar | 38g |
| Protein | 4g |
| Sodium | 380mg |
| Cholesterol | 35mg |
These values are estimates based on a 12-serving cake without frosting. Actual nutrition varies by specific ingredients and brands used.
Frequently Asked Questions
Can I make this cake in a single 9×13-inch pan instead of two round pans?
Yes, you can bake it in a 9×13-inch pan, though you’ll need to increase the bake time to 35 to 40 minutes. Check for doneness with a toothpick since the thicker cake takes longer to bake through.
What if I don’t have buttermilk on hand?
Mix one cup of regular milk with one tablespoon of lemon juice or white vinegar and let it sit for 5 minutes before using. This creates the acidity needed for proper leavening without affecting the final cake.
Can I make this cake ahead and frost it the next day?
Absolutely, and this is actually a smart move since cooled cake is easier to handle. Wrap the unfrosted layers tightly in plastic wrap and store them at room temperature overnight, then frost the next day.
Why is my cake sinking in the middle?
The oven temperature is likely too high, causing the edges to set too quickly while the center remains underbaked. Use an oven thermometer to verify the actual temperature and bake at 325 to 350 degrees.
Can I use instant coffee instead of brewed coffee?
Yes, dissolve one tablespoon of instant coffee in one cup of hot water and let it cool slightly. This creates the same effect as freshly brewed coffee with more convenience.
Final Thoughts
Thunder Cake is the kind of recipe that belongs in every baker’s rotation because it delivers professional-quality results without demanding technical skill. The hot water trick creates moisture and fudgy texture that makes people think you spent hours perfecting the recipe when you actually just followed a few straightforward steps.
Make this cake for weeknight desserts, celebrations, or just because the chocolate craving hit at 3 p.m. Once you master the basic recipe, you’ll find yourself experimenting with variations and frosting combinations that make it uniquely yours.
Thunder Cake
Ingredients
Equipment
Method
- Preheat your oven to 350 degrees Fahrenheit and position a rack in the center.
- Butter and flour two 9-inch round cake pans, or use parchment paper on the bottom to ensure easy removal after baking.
- In a large mixing bowl, whisk together the flour, sugar, cocoa powder, baking soda, baking powder, and salt until evenly combined.
- In a medium mixing bowl, whisk the eggs, cooled coffee, buttermilk, vegetable oil, and vanilla extract until smooth and well blended.
- Pour the wet ingredients into the dry ingredients and stir gently with a wooden spoon or spatula until just combined, stopping as soon as no dry streaks remain.
- Carefully pour the boiling water into the batter and stir gently until fully incorporated; the batter will be thin and loose.
- Divide the batter evenly between the prepared pans, smoothing the surface gently if needed.
- Bake for 30 to 35 minutes, or until a toothpick inserted in the center comes out with just a few moist crumbs and the tops spring back lightly when touched.
- Let the pans cool on a wire rack for 15 minutes, then turn the cakes out onto cooling racks to cool completely before frosting.