Making your own canned apple pie filling recipe beats anything from a store shelf and takes just one afternoon of work. You control the sugar, spices, and apple variety, which means fresher flavor and zero mysterious thickeners in your final product. Once you’ve got a few jars sitting in your pantry, you’re minutes away from a homemade pie whenever the craving hits.
This recipe walks you through the water bath canning process step by step, so even if you’ve never preserved food before, you’ll feel confident and safe. Let’s get into what makes this filling so good and how to create it in your own kitchen.
Why You’ll Love This Recipe
Home-canned apple pie filling tastes miles better than the canned versions collecting dust on grocery store shelves. You skip all the artificial flavors and get pure apples, sugar, and warm spices exactly the way you want them.
- Make pie, cobbler, or turnover filling in under an hour from a jar
- Control the sweetness level and spice intensity to match your preference
- Use whatever apple varieties you prefer: Granny Smith, Honeycrisp, Pink Lady, or a mix
- Store for a full year on a cool shelf, so you always have dessert ready
- Gorgeous gift for bakers and pie lovers on your holiday list
My Experience Making This Recipe
The first time I canned apple pie filling, I was nervous about the whole sterilization thing. But once I saw those jars seal with that satisfying pop, I felt like a kitchen wizard who’d just unlocked a superpower.
My neighbor smelled the cinnamon and nutmeg wafting through our yards and knocked on my door asking if I could make extra jars for her. That’s when I knew I was onto something special.
The real magic happens when you crack open a jar in January, dump it into a pie shell, and bake. Your family will genuinely believe you spent hours on that dessert.
Recipe Overview
- Recipe Name: Canned Apple Pie Filling
- Servings: Makes 4 quarts (enough for 4 full 9-inch pies)
- Prep Time: 30 minutes
- Cook Time: 20 minutes
- Total Time: 1 hour (plus cooling and processing time)
- Course: Dessert
- Cuisine: American
- Calories per Serving: 80 calories (per 1 cup serving)
Equipment You Will Need
- Large stainless steel pot (8 quarts or larger)
- Water bath canner or large pot with rack
- Wide-mouth canning jars (quart size)
- Two-piece canning lids and bands
- Jar lifter
- Bubble remover and headspace tool
- Large mixing bowl
- Sharp chef’s knife
- Cutting board
- Wooden spoon
- Measuring cups and spoons
- Clean kitchen towels
- Funnel (canning funnel helpful but not required)
Ingredients for Canned Apple Pie Filling
- 8 pounds fresh apples (about 16 medium apples, peeled, cored, and sliced)
- 3 cups granulated sugar
- 1/4 cup cornstarch
- 2 tablespoons all-purpose flour
- 1 tablespoon ground cinnamon
- 1 teaspoon ground nutmeg
- 1/4 teaspoon ground allspice
- 1/4 teaspoon ground cloves
- 1/2 teaspoon salt
- 1/2 cup fresh lemon juice (about 3 lemons)
- 2 cups apple juice or water
- 1 teaspoon vanilla extract (optional)
Ingredient Notes and Substitutions
- Fresh apples: A mix of tart and sweet apples creates balanced flavor; Granny Smith provides tartness while Honeycrisp adds sweetness. You can use any firm apple variety, though softer apples like Red Delicious break down too much during cooking.
- Cornstarch: This thickens the filling so it doesn’t run out of your pie during baking. Tapioca starch works as a one-to-one substitute if you prefer.
- Cinnamon: This warm spice defines apple pie flavor. Ceylon cinnamon tastes slightly sweeter and more delicate if you prefer a softer spice profile.
- Lemon juice: Acid brightens apple flavor and helps prevent browning during storage. Fresh lemon juice is always better than bottled for canning recipes.
- Apple juice: This keeps the filling tasting apple-forward instead of just sweet. You can swap for water, though the filling will taste less complex.
How to Make Canned Apple Pie Filling
Step 1: Prep Your Jars and Equipment
Before you touch a single apple, get your jars, lids, and bands ready by washing them in hot soapy water and rinsing well. Place your jars upright in your water bath canner with enough water to cover them by about an inch, then bring to a simmer to keep them hot and sterilized while you work.
Step 2: Prepare the Apples
Peel, core, and slice your apples into quarter-inch thick pieces, dropping them directly into a large bowl of cool water with a squeeze of lemon juice as you work. This prevents browning and keeps your apples fresh-looking in the final jars.
Step 3: Mix Your Dry Ingredients
In a separate bowl, whisk together the sugar, cornstarch, flour, cinnamon, nutmeg, allspice, cloves, and salt until no lumps remain. This ensures your spices distribute evenly throughout the filling instead of clumping in one jar.
Step 4: Combine Apples and Dry Mix
Drain your sliced apples and transfer them to your large stainless steel pot, then sprinkle the dry ingredient mixture over the top and toss gently until every slice gets coated. The sugar will start pulling juice from the apples immediately, which is exactly what you want.
Step 5: Add Liquids and Heat
Pour in the fresh lemon juice and apple juice (or water), then add vanilla extract if you’re using it, stirring gently to combine. Bring the mixture to a boil over medium-high heat, then reduce to medium and simmer for 15-20 minutes, stirring occasionally, until the apples soften slightly and the mixture thickens.
You want the apples still holding their shape with a little bite to them, not falling apart into mush. The filling will continue to thicken as it cools, so don’t overdo the cooking time.
Step 6: Fill Your Jars
Working quickly while the filling is still hot, use a canning funnel (or carefully pour without one) to fill your hot sterilized jars, leaving half an inch of headspace at the top. Use your bubble remover tool to slide around the inside edges and release any trapped air bubbles, which can prevent proper sealing.
Step 7: Wipe Rims and Apply Lids
Dampen a clean kitchen towel with hot water and wipe each jar rim thoroughly to remove any apple residue or sticky spots. This ensures a proper seal every time, so don’t skip this step even though it feels tedious.
Place a hot lid on each jar (the rubber compound needs to be warm to seal properly) and screw on the band until it’s snug but not tight. You should be able to turn it with just your fingertips, not with force.
Step 8: Process in the Water Bath
Carefully lower your filled jars into your simmering water bath canner using your jar lifter, making sure the water covers the jars by about an inch. Bring the water back to a rolling boil, then process for 25 minutes (add 5 minutes processing time if you live above 1,000 feet elevation).
Step 9: Cool and Listen for the Pop
Turn off the heat and let your jars sit in the hot water for 5 minutes, then carefully remove them with your jar lifter and place them on a clean kitchen towel to cool completely. Listen for that magical “pop” sound as each jar cools and the lids seal, which means your filling is shelf-stable and safe to store.
This usually happens within the first few hours of cooling. After 24 hours, press the center of each lid; if it stays pressed down and doesn’t spring back, you’ve got a proper seal.
Pro Tip: Don’t tighten the bands after processing; a light seal is what creates that pop sound, and over-tightening can prevent proper vacuum sealing.
Tips for the Best Canned Apple Pie Filling
- Use a mix of apple varieties (at least two types) rather than one kind alone, which creates more complex flavor and better texture in your filling.
- Keep your lids submerged in hot (not boiling) water until you’re ready to use them, so the rubber compound stays pliable and seals properly.
- Don’t skip the lemon juice, which brightens apple flavor and provides the acidity necessary for safe canning at high altitudes or cooler climates.
- Slice apples consistently to roughly the same thickness so they cook evenly and you don’t end up with some pieces mushy and others too firm.
- Check your seal status after 24 hours of cooling; if any jars didn’t seal, refrigerate those and use within three weeks instead of storing them long-term.
- Label your jars with the date so you use your oldest jars first and maintain a rotating stock.
Common Mistakes to Avoid
- Overfilling jars: Leaving less than half an inch of headspace prevents proper sealing and can result in leaking during processing or storage.
- Skipping the rim wipe: Even tiny bits of fruit or juice on the jar rim create a seal failure, making your jars unsafe for long-term storage.
- Using soft apples: Red Delicious and McIntosh apples break down into applesauce instead of holding their shape, ruining the texture of your pie filling.
- Processing in a regular pot without a rack: Jars sitting directly on the pot bottom can crack from direct heat exposure, so always use a canner with a rack or create one with a kitchen towel.
- Tightening bands after processing: Over-tightening prevents the vacuum seal from forming properly and can trap moisture inside, causing spoilage.
Serving Suggestions
Grab a jar from your pantry and you’ve got the foundation for a dozen different desserts ready to bake or assemble. Most recipes use one quart of filling, which fills a standard 9-inch pie perfectly.
- Dump into a pie shell and bake for a classic apple pie in under an hour
- Spoon over vanilla ice cream for an instant dessert that feels fancy but required zero effort
- Layer into a crisp or crumble with oats and brown sugar for a weeknight dessert
- Fill hand pies or turnovers with a spoonful and bake until golden for portable treats
- Swirl into yogurt or oatmeal for a breakfast that tastes like dessert
Variations to Try
- Bourbon Apple Pie Filling: Replace 1/4 cup of the apple juice with bourbon whiskey, which adds depth and sophistication without making the filling taste boozy after cooking.
- Spiced Apple Pie Filling: Double the cinnamon and add 1/2 teaspoon fresh ginger, 1/4 teaspoon cardamom, and a pinch of black pepper for a more complex warm spice profile.
- Caramel Apple Pie Filling: Stir in 1/2 cup caramel sauce after the filling thickens and before jarring, creating a richer, deeper sweet flavor that pairs beautifully with vanilla ice cream.
- Maple Apple Pie Filling: Replace 1 cup of the sugar with pure maple syrup, which creates a more sophisticated flavor and a slightly different color in the finished filling.
- Brown Sugar Apple Pie Filling: Use 2 cups brown sugar and 1 cup white sugar instead of all white sugar, which creates a warmer, molasses-forward flavor that feels autumn-focused.
Dietary Adaptations
- Gluten-free: Replace the all-purpose flour with cornstarch or rice flour in equal amounts; your filling will thicken just as well without any gluten.
- Dairy-free: This recipe is already dairy-free as written, so you can bake it into pies with dairy-free crust or serve over coconut ice cream.
- Vegan: This recipe is vegan as written since it contains only plant-based ingredients, making it perfect for vegan bakers.
- Low-sugar: Replace granulated sugar with erythritol or monk fruit sweetener in a one-to-one ratio, though the filling may not thicken quite as much since sugar also affects consistency.
- Lower-carb or keto: Use half the sugar and add 2 tablespoons of butter and 1 tablespoon of vanilla extract to increase fat content and compensate for sweetness.
Storage and Reheating
Refrigerator
Once opened, keep your apple pie filling in an airtight container and use within two weeks for best quality and safety. The filling tastes best cold or at room temperature straight from the jar.
- Transfer opened jars to airtight containers if keeping longer than a few days
- Cover original jars with plastic wrap if you prefer not to transfer
Freezer
Unopened jars can be frozen for up to a year, though home-canned products are typically best used within one year of canning for optimal flavor. Thaw frozen jars in the refrigerator overnight before using.
- Wrap jars individually in plastic wrap or foil before freezing to prevent freezer burn
- Leave an inch of headspace if transferring to plastic containers since the filling expands as it freezes
Reheating
Most recipes call for using the filling straight from the jar without reheating. If you prefer warm filling, heat gently in a saucepan over medium-low heat, stirring occasionally until it reaches your desired temperature.
- Warm filling on the stovetop for even heating without hot spots
- Microwave in a microwave-safe bowl in 30-second intervals, stirring between each, to prevent scorching
Nutrition Information
| Nutrient | Amount |
|---|---|
| Calories | 80 |
| Total Fat | 0g |
| Saturated Fat | 0g |
| Carbohydrates | 21g |
| Fiber | 1g |
| Sugar | 19g |
| Protein | 0g |
| Sodium | 95mg |
| Cholesterol | 0mg |
Nutrition information is calculated per 1-cup serving and assumes 4 quarts of filling divided into 16 servings total. Actual nutrition will vary based on exact apple variety and any substitutions made to the recipe.
Frequently Asked Questions
Can I Use Frozen Apples Instead of Fresh?
Frozen apples work but produce slightly softer texture since freezing breaks down cell walls. If using frozen, thaw them first and drain excess liquid before adding to your pot.
Why Didn’t My Jars Seal?
Jars fail to seal most often because the rims weren’t clean or dry, the lids were too cold, or you over-tightened the bands after processing. Check your process for these common issues next time.
How Long Does Canned Apple Pie Filling Last?
Properly sealed jars stored in a cool, dark place last up to two years, though quality and flavor are best during the first year. Always check for signs of spoilage before opening: bulging lids, spurting liquid, or off odors mean you should discard the jar.
Can I Make This Recipe Without a Water Bath Canner?
A water bath canner is the safest method for this recipe since the filling is high-acid due to the lemon juice. You can improvise with a large pot and a towel on the bottom to elevate the jars, but proper equipment makes the process easier and safer.
What’s the Difference Between Canned Apple Pie Filling and Homemade Pie Filling?
Canned filling has been heat-processed to kill bacteria and create a shelf-stable product, while homemade filling (refrigerated until use) uses the same ingredients but is never processed and must stay cold. The flavor is identical; canning just lets you store it longer.
Can I Use This Filling in Cakes or Other Desserts?
Yes, absolutely. Use it in layer cakes, coffee cakes, hand pies, turnovers, or even swirled into cheesecake. One jar provides plenty of filling
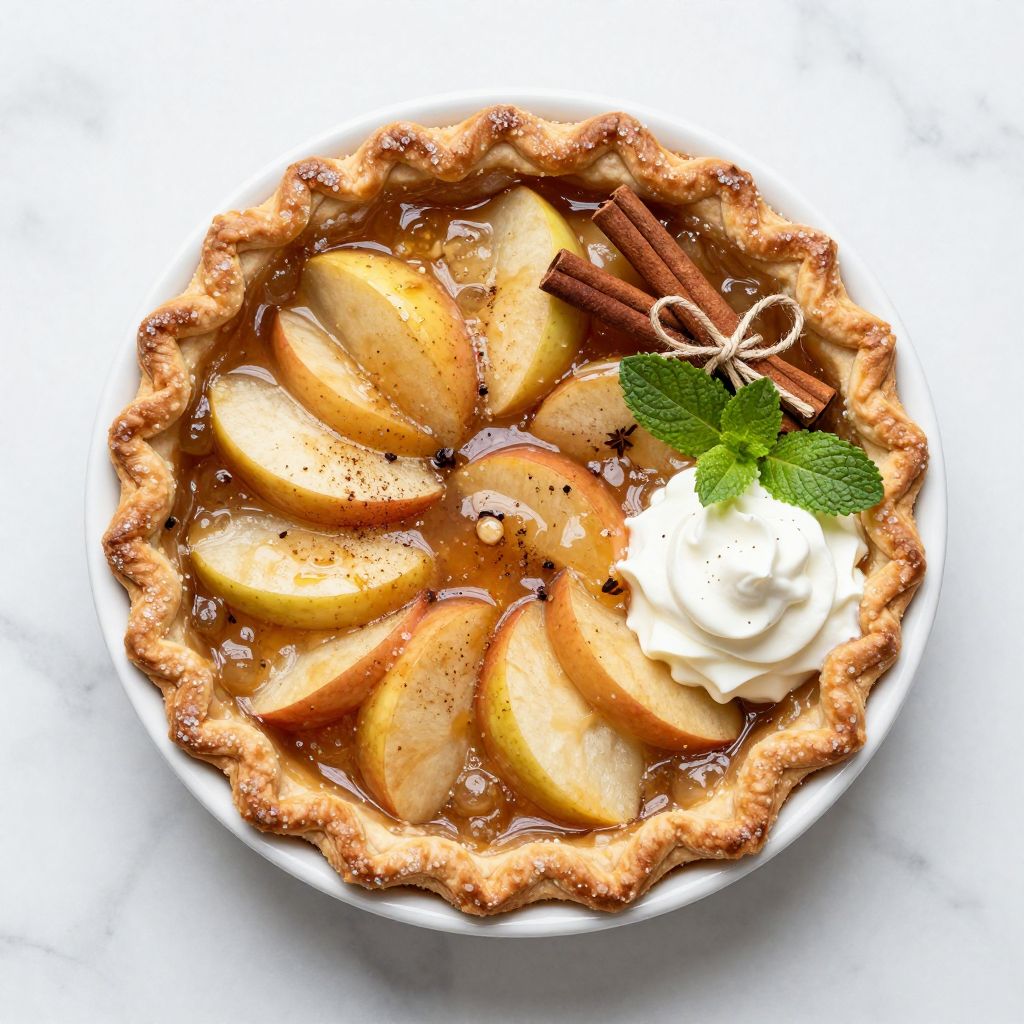
Canned Apple Pie Filling
Ingredients
Equipment
Method
- Wash jars, lids, and bands in hot soapy water, rinse well, and place jars upright in water bath canner filled with enough water to cover jars by about an inch. Bring water to a simmer to keep jars hot and sterilized while you work.
- Peel, core, and slice apples into quarter-inch thick pieces, placing them directly into a large bowl of cool water with a squeeze of lemon juice to prevent browning.
- In a separate bowl, whisk together sugar, cornstarch, flour, cinnamon, nutmeg, allspice, cloves, and salt until no lumps remain.
- Drain the sliced apples and transfer them to a large stainless steel pot. Sprinkle the dry ingredient mixture over apples and toss gently until coated, allowing sugar to draw juice out.
- Pour in fresh lemon juice and apple juice (or water). Add vanilla extract if using, and stir gently to combine.
- Bring mixture to a boil over medium-high heat, then reduce to medium and simmer for 15-20 minutes, stirring occasionally, until apples soften slightly and mixture thickens. Apples should hold their shape with a little bite.
- Working quickly, fill hot sterilized jars with hot filling using a canning funnel, leaving 1/2 inch headspace.
- Use a bubble remover tool to release trapped air bubbles by sliding it along jar edges.
- Wipe jar rims thoroughly with a clean damp kitchen towel to remove residue for proper sealing.
- Place hot two-piece lids on jars and screw bands on until fingertip tight—snug but not tight.
- Lower jars into simmering water bath using jar lifter, ensuring water covers jars by about one inch. Bring water to a rolling boil and process jars for 25 minutes (add 5 minutes if above 1,000 feet elevation).
- Turn off heat and let jars sit in hot water for 5 minutes. Remove jars carefully and place on clean kitchen towels to cool completely.
- Listen for popping sounds as lids seal during cooling. After 24 hours, press center of lids to test seal; lid should not flex up and down.