Bacon onion jam is a sweet and savory condiment that transforms simple ingredients into pure magic on a plate. This sticky, caramelized spread combines crispy bacon, sweet onions, and a touch of brown sugar to create a topping that elevates everything from cheese boards to burgers.
Whether you’re hosting a dinner party or looking for a homemade gift, this recipe delivers impressive results with minimal effort. Let me show you how to make it.
Why You’ll Love This Recipe
Bacon onion jam works as a versatile condiment that adds depth and sophistication to any meal. Your guests will ask for the recipe, and you’ll feel like a culinary genius.
- Sweet and savory flavor profile that pairs with almost anything
- Uses pantry staples and requires just five main ingredients
- Keeps in the fridge for weeks, making it perfect for meal prep
- Impresses guests on charcuterie boards, burgers, and cheese appetizers
- Takes under an hour from start to finish
My Experience Making This Recipe
I first made bacon onion jam on a lazy Sunday afternoon when I had leftover bacon and a bag of onions sitting on my counter. The aroma that filled my kitchen was absolutely intoxicating, and my partner kept wandering into the kitchen asking when it would be ready.
What surprised me most was how the flavors deepened as the jam simmered. The onions transformed from sharp and pungent to silky and caramelized, while the bacon bits added a smoky, salty anchor that prevented the jam from becoming one-note sweet.
I’ve now made it dozens of times, and it’s become my secret weapon for entertaining. People pile it onto baked brie, smear it on crostini, and use it as a burger topping without hesitation.
Recipe Overview
- Recipe Name: Bacon Onion Jam
- Servings: Makes about 1.5 cups
- Prep Time: 15 minutes
- Cook Time: 40 minutes
- Total Time: 55 minutes
- Course: Condiment or Appetizer
- Cuisine: American
- Calories per Serving: 45 calories (per tablespoon)
Equipment You Will Need
- Large skillet or Dutch oven
- Cutting board and sharp knife
- Wooden spoon for stirring
- Paper towels for draining bacon
- Glass jars for storage
- Measuring cups and spoons
Ingredients for Bacon Onion Jam
- 8 slices bacon, chopped into bite-sized pieces
- 4 large yellow onions, thinly sliced (about 6 cups)
- 2 tablespoons brown sugar
- 1 tablespoon balsamic vinegar
- 1/2 teaspoon salt
- 1/4 teaspoon black pepper
- 1/4 teaspoon garlic powder (optional)
- Pinch of cayenne pepper (optional, for subtle heat)
Ingredient Notes and Substitutions
- Bacon: The smoky fat renders out and cooks the onions beautifully. Substitute with prosciutto or pancetta for a different flavor profile, though the result will be less crispy.
- Yellow onions: They caramelize evenly and develop natural sweetness. Sweet or Vidalia onions work too, but reduce the brown sugar by half since they’re already sweet.
- Brown sugar: Adds depth and helps create the jam consistency. Swap for honey or maple syrup in equal amounts for a slightly different sweetness.
- Balsamic vinegar: Provides tanginess and complexity that balances richness. Apple cider vinegar or red wine vinegar work as alternatives, though balsamic gives the best flavor.
- Salt: Enhances all flavors and prevents the jam from tasting flat. Use kosher salt for better control over seasoning.
How to Make Bacon Onion Jam
Step 1: Cook the Bacon
Chop your bacon into bite-sized pieces and place them in a large skillet over medium heat. Cook for 5 to 7 minutes, stirring occasionally, until the bacon is crispy and the fat is rendered out.
The rendered fat will become your cooking medium for the onions, so don’t drain all of it. You want about 2 tablespoons of bacon fat left in the pan along with the crispy bacon pieces.
Step 2: Remove Bacon and Set Aside
Use a slotted spoon to transfer the cooked bacon to a paper towel-lined plate. This keeps the bacon crispy while you prepare the onions.
Leave the bacon fat in the skillet, as it’s packed with flavor that will season your onions beautifully. If you have more than 3 tablespoons of fat, pour out the excess to prevent greasiness.
Step 3: Slice the Onions
Cut your onions in half from root to tip, then slice them thinly into half-moon shapes. Aim for uniform thickness so they cook evenly and caramelize at the same rate.
You should have roughly 6 cups of sliced onions. Take your time with this step, as uniform slices make a huge difference in texture.
Step 4: Cook the Onions Low and Slow
Add the sliced onions to the skillet with the bacon fat and reduce heat to medium-low. This low temperature is critical because it allows the onions to caramelize gently without browning too quickly or burning.
Stir occasionally and let them cook for 15 to 20 minutes until they’re soft and starting to turn golden brown. You’ll notice the onions release their moisture initially, then gradually become darker and sweeter as water evaporates.
Step 5: Add the Sweetener and Vinegar
Sprinkle the brown sugar, salt, pepper, and garlic powder over the onions. Stir well to combine, making sure the sugar dissolves and coats all the onions evenly.
Pour in the balsamic vinegar and stir again. The vinegar will bubble slightly as it hits the hot pan, which is exactly what you want.
Step 6: Return the Bacon
Add the cooked bacon pieces back into the skillet and stir thoroughly. The bacon adds texture and smoky flavor that ties everything together.
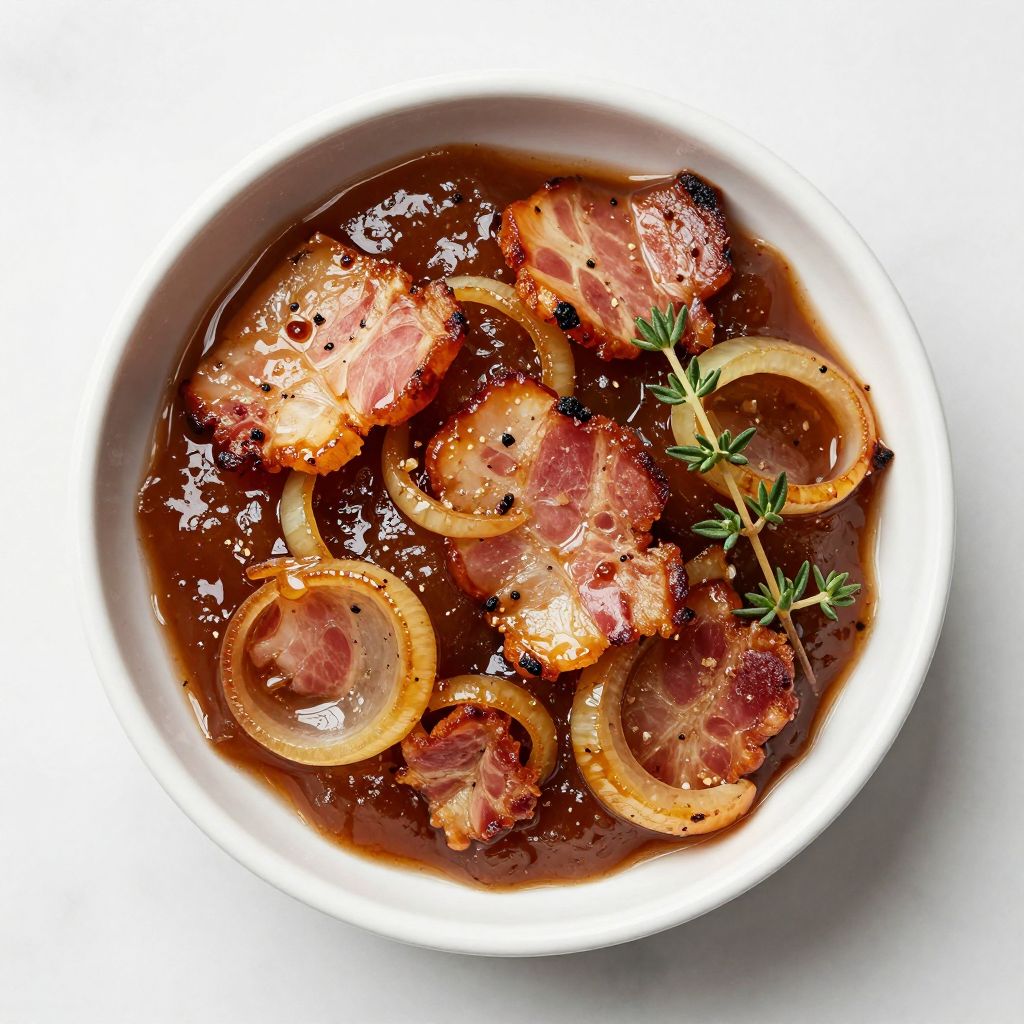
Continue cooking over medium-low heat for another 10 to 15 minutes, stirring frequently to prevent sticking. The mixture should thicken as more liquid evaporates, and the color will deepen to a rich mahogany brown.
Step 7: Reach the Right Consistency
You’ll know the jam is done when it looks thick and jam-like, with no pools of liquid at the bottom of the pan. The onions should be completely soft and almost falling apart, with bacon pieces distributed throughout.
The whole process takes about 40 minutes of cooking. If it’s still too wet after 40 minutes, keep cooking and stirring until it reaches a spreadable consistency.
Step 8: Cool Completely
Remove the skillet from heat and let the jam cool for at least 15 minutes before transferring to jars. The jam will thicken slightly more as it cools.
Once cooled, spoon the jam into sterilized glass jars and refrigerate. It will continue to set as it chills.
Pro Tip: Don’t rush the caramelization process with high heat; low and slow is the secret to jam that tastes complex and deeply flavorful rather than burnt or one-dimensional.
Tips for the Best Bacon Onion Jam
- Slice your onions uniformly so they cook at the same rate and create a cohesive texture throughout the jam.
- Stir the onions every 3 to 5 minutes to prevent them from sticking to the bottom and developing burnt spots.
- Don’t skip the medium-low heat; high heat will cause the onions to brown too quickly and taste acrid instead of sweet.
- Taste and adjust seasoning at the end; add more salt if it tastes too sweet, or more vinegar if it needs tang.
- Make a double batch; it keeps beautifully and gives you extra for spreading throughout the month.
- Use thick-cut bacon rather than thin slices so you get hearty bacon pieces in every spoonful.
Common Mistakes to Avoid
- Cooking on too high heat causes the onions to brown too quickly and become bitter, ruining the delicate sweet-savory balance.
- Not cooking the onions long enough leaves you with a watery mixture instead of a thick, spreadable jam.
- Skipping the paper towels after cooking the bacon allows excess grease to remain, making the final jam overly oily.
- Using pre-cooked or real bacon bits instead of fresh bacon means you miss the rendered fat that flavors the entire dish.
- Forgetting to stir regularly leads to burnt spots on the bottom and uneven caramelization throughout the pan.
Serving Suggestions
This jam shines brightest when paired with rich, mild flavors that let it take center stage. Serve it warm or at room temperature, depending on your application.
- Spread on crostini topped with baked brie or goat cheese for an elegant appetizer
- Use as a topping for gourmet burgers or pulled pork sandwiches
- Dollop onto a charcuterie board alongside aged cheddar, prosciutto, and crusty bread
- Swirl into cream cheese for a savory appetizer dip with crackers
- Serve alongside roasted chicken or pork chops for a sweet-savory complement
Variations to Try
- Spicy Bacon Onion Jam: Add 1/2 teaspoon of red pepper flakes or a pinch of cayenne during cooking for a subtle heat that complements the sweetness beautifully.
- Bourbon Bacon Onion Jam: Replace half the balsamic vinegar with bourbon whiskey for a deeper, more complex flavor that pairs especially well with pulled pork.
- Maple Bacon Onion Jam: Swap the brown sugar for pure maple syrup and use apple cider vinegar instead of balsamic for a more autumn-inspired version.
- Caramelized Onion Jam with Thyme: Add 1 tablespoon of fresh thyme leaves during cooking for an herbaceous note that makes this jam perfect for pairing with roasted vegetables.
- Vegetarian Onion Jam: Omit the bacon and instead add 2 tablespoons of olive oil at the start; increase the salt slightly to compensate for the missing bacon seasoning.
Dietary Adaptations
- Gluten-Free: This recipe is naturally gluten-free; just verify that any balsamic vinegar you use hasn’t been processed with gluten-containing ingredients.
- Dairy-Free: The jam itself contains no dairy, making it perfect for serving alongside dairy-free cheeses or crackers.
- Vegetarian: Remove the bacon and add 2 tablespoons of olive oil plus 1/2 teaspoon of liquid smoke for a smoky flavor without the meat.
- Low-Carb or Keto: Replace brown sugar with erythritol or monk fruit sweetener in a 1:1 ratio; the jam will be slightly less thick but still delicious.
Storage and Reheating
Refrigerator
Store your bacon onion jam in an airtight glass container on a shelf in the refrigerator. It will keep for up to 3 weeks.
- Always use a clean spoon when scooping out jam to prevent bacterial contamination
- If you notice any mold or off smells, discard the entire batch
- The jam may separate slightly as it sits; simply stir before serving
Freezer
Bacon onion jam freezes beautifully for up to 3 months in an airtight container or freezer-safe jar. Leave a bit of headspace since the jam expands slightly when frozen.
- Freeze in ice cube trays for individual portions that thaw quickly
- Label your container with the date so you remember how long it’s been frozen
- Thaw overnight in the refrigerator before using
Reheating
Bacon onion jam tastes best at room temperature or gently warmed, rather than piping hot. Simply let it sit on the counter for 20 minutes, or warm it gently in a small saucepan over low heat for a few minutes.
- Never microwave the jam, as it can become too hot and lose texture
- If the jam seems too thick after refrigeration, stir in a teaspoon of water to loosen it
- Warm jam is especially delicious on cheese or crackers
Nutrition Information
| Nutrient | Amount |
|---|---|
| Calories | 45 |
| Total Fat | 3g |
| Saturated Fat | 1g |
| Carbohydrates | 3g |
| Fiber | 0g |
| Sugar | 2g |
| Protein | 2g |
| Sodium | 150mg |
| Cholesterol | 5mg |
Nutritional values are approximate and based on one tablespoon per serving. Actual values may vary depending on the specific brands and amounts of ingredients used.
Frequently Asked Questions
Can I make bacon onion jam without using vinegar?
Yes, you can omit the vinegar, but the jam will taste one-dimensional and overly sweet without that acidic balance. If you skip it entirely, reduce the brown sugar to 1 tablespoon and add a squeeze of fresh lemon juice instead for brightness.
How far in advance can I make this recipe?
You can make bacon onion jam up to 5 days ahead and store it covered in the refrigerator. In fact, the flavors meld and deepen after a day or two, so making it a few days early is actually a smart strategy for entertaining.
What’s the best way to store bacon onion jam for gifts?
Pour the cooled jam into sterilized mason jars and refrigerate for up to 3 weeks, or freeze for up to 3 months. Include a label with instructions to refrigerate and use within 3 weeks of receiving.
Why is my jam too watery?
You likely didn’t cook it long enough; onions release lots of moisture as they caramelize, and you need to let that water evaporate completely. Keep the jam on the stove for another 10 to 15 minutes over medium-low heat, stirring frequently, until it thickens to a spreadable consistency.
Can I use turkey bacon or coconut bacon instead of regular bacon?
Turkey bacon works but won’t render as much fat, so add 1 tablespoon of olive oil to compensate. Coconut bacon doesn’t render any fat and creates an odd flavor pairing with the onions, so regular or thick-cut bacon is really your best option.
What happens if I cook the jam on high heat to speed things up?
High heat causes the onions to brown too quickly and develop a burnt, acrid flavor that overpowers the sweet-savory balance. The key to delicious bacon onion jam is patience and low, steady heat.
Final Thoughts
Bacon onion jam feels like a restaurant-quality condiment, but it’s honestly one of the easiest things you can make at home. The ingredient list is short, the technique is straightforward, and the results will make you look like a culinary genius.
Make a batch this week and watch how it transforms everything from cheese boards to casual weeknight dinners. Once you experience how versatile and delicious this jam truly is, you’ll find yourself making it again and again.
Bacon Onion Jam
Ingredients
Equipment
Method
- Chop bacon into bite-sized pieces and place in a large skillet over medium heat. Cook for 5 to 7 minutes, stirring occasionally, until bacon is crispy and fat is rendered. Leave about 2 tablespoons of bacon fat in the skillet.
- Use a slotted spoon to transfer cooked bacon onto a paper towel-lined plate to drain. Leave bacon fat in the skillet, pouring out any excess if more than 3 tablespoons.
- Cut onions in half from root to tip, then slice thinly into half-moon shapes to yield about 6 cups of sliced onions.
- Add sliced onions to skillet with bacon fat and reduce heat to medium-low. Cook onions slowly for 15 to 20 minutes, stirring occasionally, until soft and golden brown, allowing moisture to evaporate.
- Sprinkle brown sugar, salt, black pepper, and garlic powder over the onions. Stir well to dissolve the sugar and coat the onions evenly.
- Pour in balsamic vinegar and stir again, allowing the vinegar to bubble slightly on contact.
- Return the cooked bacon pieces to the skillet and stir thoroughly to combine.
- Continue cooking over medium-low heat for another 10 to 15 minutes, stirring frequently to prevent sticking, until the mixture thickens to a jam-like consistency and deepens in color.
- Remove skillet from heat and let the jam cool for at least 15 minutes.
- Transfer the cooled jam into sterilized glass jars and refrigerate. The jam will thicken slightly more as it cools.