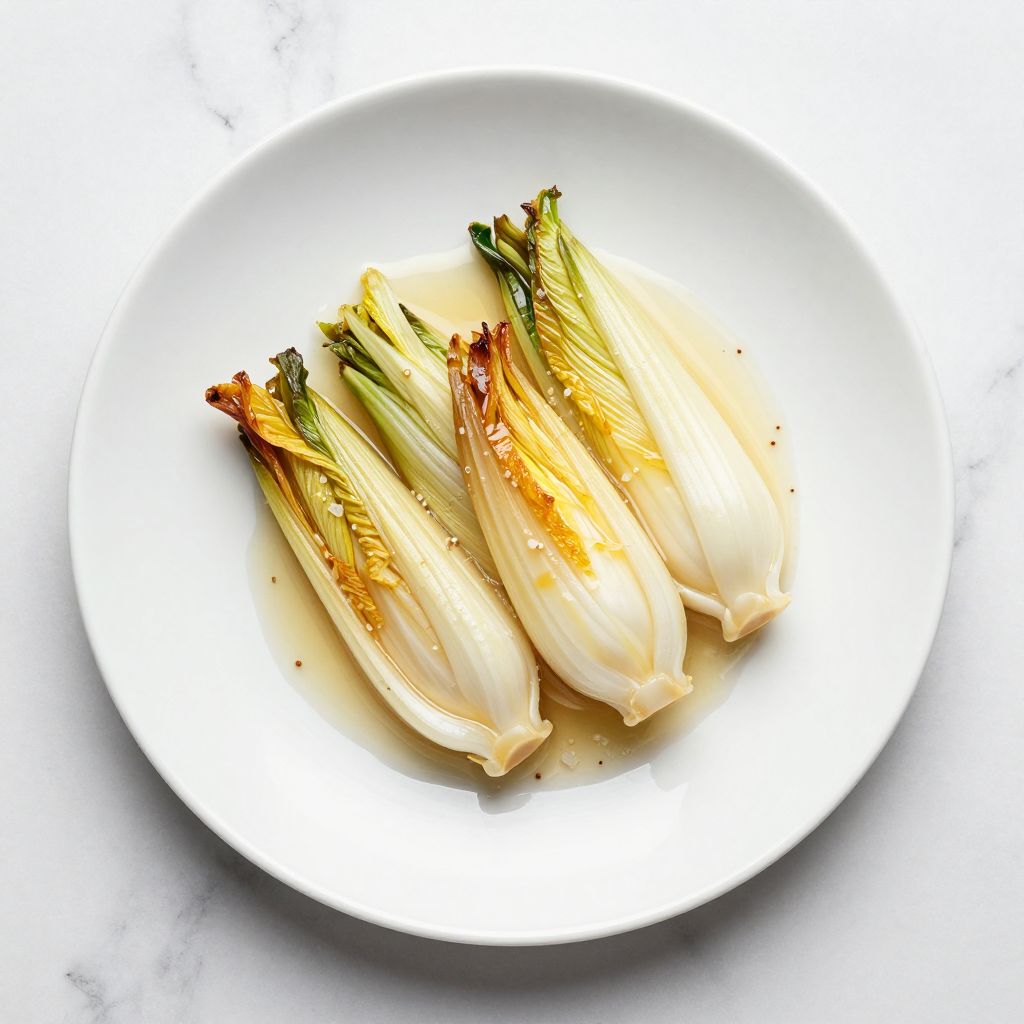
Braised Endive is a sophisticated yet simple side dish that transforms this often-overlooked vegetable into something truly special. This French-inspired recipe features tender endive heads cooked in a buttery, slightly sweet glaze that brings out their natural nutty flavor.
If you have never cooked with endive before, this recipe is the perfect introduction to what makes this vegetable so beloved in European kitchens. Ready to discover why endive deserves a spot on your dinner table?
Why You’ll Love This Recipe
Braised endive delivers elegance with minimal effort, making it ideal for both weeknight dinners and special occasions.
- Requires only 7 simple ingredients and minimal prep work.
- Cooks in under 45 minutes from start to finish.
- Creates a stunning presentation that looks restaurant-quality on the plate.
- Naturally vegetarian and pairs beautifully with any main protein.
- Tastes even better the next day as flavors meld together.
My Experience Making This Recipe
I first encountered braised endive at a small bistro in Lyon, and I was immediately hooked by how the slight bitterness of the vegetable balanced with the rich, buttery sauce. The chef told me the secret was low heat and patience, not fancy techniques, so I went home determined to recreate it.
My first attempt turned the endive mushy because I rushed the cooking time at high heat. The second try, slowing everything down and using medium-low heat, produced golden, tender endive that made my guests ask for the recipe before they even finished their plates.
Now this dish appears regularly on my table, especially when I want to impress without spending hours in the kitchen. The smell alone while it braises on the stovetop tells you something delicious is happening.
Recipe Overview
- Recipe Name: Braised Endive
- Servings: 4
- Prep Time: 10 minutes
- Cook Time: 35 minutes
- Total Time: 45 minutes
- Course: Side Dish
- Cuisine: French
- Calories per Serving: 145
Equipment You Will Need
- Large skillet or braising pan with a lid
- Sharp knife for trimming endive
- Cutting board
- Measuring spoons and cups
- Wooden spoon for stirring
- Tongs for turning endive
- Instant-read thermometer (optional but helpful)
Ingredients for Braised Endive
- 4 heads of fresh endive, about 2 pounds total
- 3 tablespoons unsalted butter
- 1 cup vegetable or chicken broth
- 1 tablespoon fresh lemon juice
- 1/2 teaspoon sea salt
- 1/4 teaspoon ground white pepper
- 1 teaspoon honey or granulated sugar
Ingredient Notes and Substitutions
- Fresh endive: Choose firm, pale heads with tightly packed leaves; they should feel crisp when you squeeze them gently. If your market only carries red endive (radicchio endive), it will work but has a more pronounced bitter flavor.
- Unsalted butter: Butter creates the rich, silky sauce and helps brown the endive slightly. Olive oil will work if you need to avoid dairy, though the result will taste less luxurious.
- Vegetable or chicken broth: Either works equally well; use low-sodium versions so you control the salt level. Water works in a pinch, but add a splash more lemon juice for depth.
- Fresh lemon juice: Brightens the flavors and balances the bitterness of the endive. Bottled juice lacks the vibrancy, so squeeze fresh if possible.
- Honey or sugar: A small amount of sweetness mellows the endive’s natural bitterness without making the dish sugary. Skip it entirely if you prefer a more assertive flavor.
How to Make Braised Endive
Step 1: Prepare the Endive
Rinse each endive head under cold running water and pat completely dry with paper towels. Wet endive will steam rather than brown, so don’t skip this drying step.
Trim the very bottom of each head with a sharp knife, removing about 1/2 inch to eliminate any yellowed or damaged outer leaves. Leave the core intact so the leaves stay bound together during cooking.
Step 2: Remove Outer Leaves if Needed
Peel away any yellowed, damaged, or particularly bitter-looking outer leaves and discard them. Two to three leaves per head is normal; you should have mostly pale, cream-colored leaves remaining.
Step 3: Heat the Skillet
Place a large skillet with a lid over medium heat and add the butter, allowing it to melt completely. Once the butter is foaming and smells nutty, you are ready to add the endive.
Step 4: Brown the Endive
Carefully place each endive head cut-side down in the hot butter, working in batches if needed to avoid crowding the pan. Let them sit undisturbed for 4 to 5 minutes until the cut side develops a light golden-brown color.
This browning creates flavor depth and gives the dish visual appeal. Do not move them around constantly, or they will steam instead of caramelize.
Step 5: Turn and Brown the Other Side
Using tongs, gently flip each endive head to brown the other cut side for another 3 to 4 minutes. The goal is light golden browning on both cut surfaces, not dark caramelization.
Step 6: Add the Braising Liquid
Pour the broth around (not over) the endive heads, then add the lemon juice, salt, white pepper, and honey. The liquid should come about halfway up the sides of the endive.
The acid from the lemon juice prevents the endive from becoming too soft and keeps the flavors bright. The honey smooths out the natural bitterness without announcing itself as sweetness.
Step 7: Braise Low and Slow
Reduce the heat to medium-low, cover the skillet with the lid, and let the endive braise gently for 20 to 25 minutes. You should see gentle simmering at the edges, not a rolling boil.
Low heat keeps the endive tender and allows the sauce to reduce and concentrate. Check halfway through to ensure the liquid is not evaporating too quickly; add a splash more broth if the pan looks dry.
Step 8: Finish and Reduce the Sauce
Remove the lid and increase the heat to medium, allowing the braising liquid to reduce for 3 to 5 minutes until it becomes a light glaze. You want just enough sauce to coat the endive, not a pool of liquid.
Tilt the pan and baste the endive with the sauce several times so they glaze evenly. The endive should be fork-tender and the cut sides should have a golden, glazed appearance.
Pro Tip: If your endive is still slightly firm after 25 minutes of braising, cover the pan again and add just 2 more minutes rather than increasing the heat; overcooking at high temperatures turns endive mushy and bitter.
Tips for the Best Braised Endive
- Choose endive that feels firm and heavy for its size; lightweight heads may be hollow or dried out inside.
- Do not skip the browning step; those golden surfaces add flavor complexity and visual appeal to the finished dish.
- Taste the braising liquid before you add it; if the broth is very salty, use half broth and half water to avoid an overly salty dish.
- Keep the heat low and steady throughout braising; high heat causes the endive to release too much water and become waterlogged.
- Serve the endive as soon as the sauce finishes reducing; letting it sit in the pan allows it to absorb too much liquid and become soggy.
- If you are cooking for a crowd, braise the endive ahead and finish the sauce reduction just before serving.
Common Mistakes to Avoid
- Using wet endive: Moisture on the surface prevents browning and traps steam, resulting in pale, flabby vegetables instead of golden, caramelized ones.
- High heat braising: This causes the endive to release water too quickly, making it mushy and intensely bitter instead of tender and mellow.
- Skipping the browning step: The Maillard reaction that creates those golden surfaces adds savory depth that simple steaming cannot achieve.
- Overcrowding the pan: If endive heads overlap or stack, they steam instead of brown, and the moisture cannot escape properly.
- Over-reducing the sauce: If you reduce the glaze too much, it becomes sticky and overly concentrated, coating the endive unevenly and tasting too intense.
Serving Suggestions
Braised endive makes an elegant side dish for nearly any protein, from roasted chicken to seared fish. Serve it warm straight from the skillet while the glaze is still silky.
- Alongside roasted duck breast for a classic French pairing.
- Next to pan-seared scallops or other seafood for a light, sophisticated meal.
- With herb-roasted chicken thighs for a comforting yet refined dinner.
- Paired with creamy mashed potatoes and grilled steak for an elegant steakhouse-style plate.
- Served at room temperature as part of a charcuterie or vegetable board.
Variations to Try
- Braised Endive with Cream: Stir 1/4 cup heavy cream into the pan after reducing the sauce for a richer, more luxurious version; this mellows the bitterness even further and creates a silky coating.
- Herbed Endive: Add 1 teaspoon of fresh thyme or tarragon to the braising liquid; these herbs complement endive’s subtle flavors beautifully and add complexity.
- Endive with Walnuts: Toast 1/3 cup chopped walnuts separately and scatter them over the finished endive; the crunch contrasts nicely with the tender vegetable and adds nutty flavor.
- Mustard-Braised Endive: Whisk 1 tablespoon Dijon mustard into the braising liquid for a sharper, more assertive flavor that appeals to those who love bold tastes.
- Braised Endive with Prosciutto: Wrap each endive head loosely with a slice of prosciutto before browning; it adds salty richness and becomes crispy during cooking.
Dietary Adaptations
- Gluten-Free: This recipe is naturally gluten-free as written; just verify that your broth is certified gluten-free if you are sensitive to cross-contamination.
- Dairy-Free: Replace butter with olive oil or coconut oil; the dish will taste lighter and more vegetal, losing some richness but gaining a fresher quality.
- Vegan: Use olive oil instead of butter and vegetable broth instead of chicken broth; the flavor profile shifts to be brighter and less luxurious but remains delicious.
- Low-Carb or Keto: This recipe fits perfectly into low-carb eating with only 6 grams of carbs per serving; no substitutions needed.
Storage and Reheating
Refrigerator
Transfer cooled braised endive to an airtight container and store for up to 4 days. The flavors actually develop and improve after a day as the endive continues to absorb the glazed sauce.
- Store the endive in its braising liquid to prevent drying out.
- Bring to room temperature before reheating for more even warming.
Freezer
Braised endive freezes well for up to 3 months in a freezer-safe container. Thaw completely in the refrigerator overnight before reheating to prevent the endive from becoming mushy.
- Freeze in the braising liquid for best results.
- Portion into individual servings for easier reheating later.
Reheating
Reheat gently in a covered skillet over medium-low heat for 5 to 7 minutes, stirring occasionally. Add a splash of broth or water if the dish looks dry, as the endive may have absorbed liquid during storage.
- Avoid microwaving, which can make the texture unevenly soft.
- Taste and adjust seasoning with lemon juice or salt before serving.
Nutrition Information
| Nutrient | Amount |
|---|---|
| Calories | 145 |
| Total Fat | 11g |
| Saturated Fat | 7g |
| Carbohydrates | 6g |
| Fiber | 2g |
| Sugar | 2g |
| Protein | 3g |
| Sodium | 380mg |
| Cholesterol | 28mg |
These values are calculated for the basic recipe without optional additions like cream or nuts. Nutritional content may vary based on the specific broth and butter brands used.
Frequently Asked Questions
Can I make braised endive ahead of time?
Absolutely; braise the endive completely, cool it, and refrigerate in an airtight container for up to 4 days. Reheat gently over medium-low heat just before serving, and you have an elegant dish with zero last-minute stress.
What is the difference between endive and radicchio?
Endive (also called Belgian endive) is pale, slender, and mild when cooked, while radicchio is round, red, and more assertively bitter. They are different vegetables, though both are chicories; this recipe works best with true endive for the most delicate result.
My endive tastes too bitter. What should I do?
Add an extra 1/2 teaspoon of honey to the braising liquid or stir in a tablespoon or two of heavy cream at the end. Bitterness in cooked endive comes from natural compounds in the vegetable; a touch of sweetness or richness balances it beautifully.
Can I use frozen endive?
Frozen endive loses its firm texture and becomes mushy during braising, so fresh endive is strongly preferred. If frozen is your only option, reduce the braising time to 12 to 15 minutes and watch carefully to avoid mushiness.
What broth should I use if I want the most flavorful result?
Homemade vegetable or chicken broth will give you the best depth of flavor, but good quality store-bought low-sodium broth produces excellent results too. Avoid bouillon cubes or very salty broths, which can overwhelm the delicate endive.
Can I brown the endive the day before and braise it later?
Yes, you can brown the endive, cool it, refrigerate it, and braise it the next day; bring it to room temperature first so the cooking time stays consistent. This approach is helpful when preparing a dinner party where you want to minimize last-minute cooking.
Braised Endive
Ingredients
Equipment
Method
- Rinse each endive head under cold running water and pat completely dry with paper towels to remove moisture.
- Trim the very bottom of each head with a sharp knife, removing about 1/2 inch to eliminate any yellowed or damaged outer leaves, leaving the core intact.
- Peel away any yellowed, damaged, or particularly bitter-looking outer leaves and discard them, leaving mostly pale, cream-colored leaves.
- Place a large skillet with a lid over medium heat and add the butter, allowing it to melt completely and foam, smelling nutty.
- Carefully place each endive head cut-side down in the hot butter without crowding the pan. Let them brown undisturbed for 4 to 5 minutes until light golden brown develops.
- Using tongs, gently flip each endive head and brown the other cut side for another 3 to 4 minutes until both sides are lightly golden.
- Pour the broth around (not over) the endive heads, then add the lemon juice, sea salt, ground white pepper, and honey. The liquid should come about halfway up the sides of the endive.
- Reduce heat to medium-low, cover skillet with the lid, and braise gently for 20 to 25 minutes, ensuring gentle simmering but not boiling. Check halfway and add a splash more broth if liquid evaporates too quickly.
- Remove the lid, increase heat to medium, and reduce the braising liquid for 3 to 5 minutes until it forms a light glaze that coats the endive.
- Tilt the pan and baste the endive several times with the glaze. Endive should be fork-tender with a golden glazed appearance on cut sides. If still firm after 25 minutes, cover again and braise for 2 more minutes on low heat.
Notes
Final Thoughts
Braised endive proves that sometimes the simplest recipes create the most memorable dishes. This elegant side deserves a spot in your regular cooking rotation because it impresses guests with minimal effort and transforms a humble vegetable into something truly special.
Give this recipe a try at your next dinner, and you will discover why European chefs consider braised endive a timeless classic worth mastering. Your family and guests will keep asking for it, and you will be thrilled to oblige.