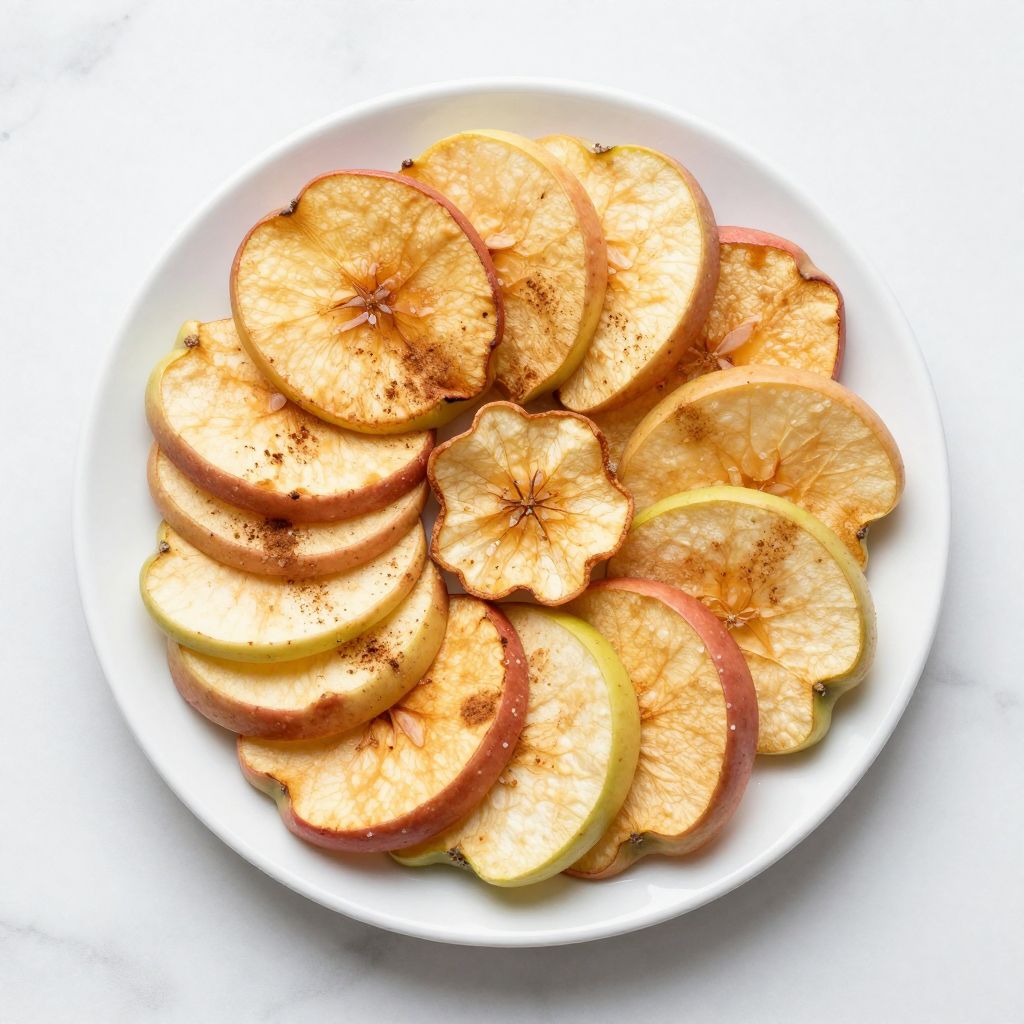
Dehydrated apples are a simple, wholesome snack that transforms fresh fruit into crispy, chewy perfection in just a few hours. These naturally sweet treats store for months and cost a fraction of store-bought versions, making them perfect for lunch boxes, trail mix, or solo snacking.
Whether you’re using a dehydrator, oven, or air fryer, this recipe walks you through every step to achieve the exact texture you crave. Let’s get started.
Why You’ll Love This Recipe
Dehydrated apples deliver real fruit flavor without added sugar, preservatives, or mystery ingredients. You control the thickness, texture, and seasonings completely.
- Ready in 4 to 8 hours depending on your equipment and thickness preference
- Stores in an airtight container for up to 3 months
- Works with any apple variety: Honeycrisp, Granny Smith, Fuji, or mixed
- A single batch requires just apples, water for soaking, and optional cinnamon or sugar
- No special skills needed, just patience and attention
My Experience Making This Recipe
I first dehydrated apples to use up a bushel from a local orchard, and I was genuinely shocked how addictive they became. My kids ate an entire batch meant for trail mix within two days.
The aroma while they dehydrate fills your kitchen with warm apple and cinnamon notes that smell better than any candle. I’ve since made them dozens of times and experimented with thin, crispy chips versus thicker, chewier rings.
Thin slices (1/8 inch) give you that satisfying crunch, while thicker cuts (1/4 inch) stay tender inside with slightly crisp edges. Both styles disappear fast once people realize how good homemade tastes.
Recipe Overview
- Recipe Name: Dehydrated Apples
- Servings: Makes about 2 cups of dried apple pieces per 4 medium apples
- Prep Time: 15 minutes
- Cook Time: 4 to 8 hours depending on thickness and equipment
- Total Time: 4 hours 15 minutes to 8 hours 15 minutes
- Course: Snack
- Cuisine: American
- Calories per Serving: 35 calories per ounce (approximately)
Equipment You Will Need
- Mandoline slicer or sharp knife for consistent thickness
- Food dehydrator (preferred) or conventional oven set to low temperature
- Air fryer (optional alternative)
- Cutting board
- Bowl for water soaking
- Paper towels or clean kitchen cloth
- Parchment paper for oven or air fryer use
- Airtight container for storage
Ingredients for Dehydrated Apples
- 4 medium apples (any variety: Honeycrisp, Granny Smith, Fuji, or a mix)
- 2 cups water (for soaking to prevent browning)
- 1 tablespoon lemon juice (optional but recommended to brighten flavor and prevent oxidation)
- 1 teaspoon ground cinnamon (optional)
- 1 tablespoon granulated sugar (optional)
- Pinch of sea salt (optional)
Ingredient Notes and Substitutions
- Apples: Choose firm, unblemished fruit with good flavor; avoid mealy varieties. You can substitute with pears, which dehydrate similarly but take slightly longer.
- Lemon juice: Prevents browning and adds subtle tartness that balances sweetness. Lime juice or white vinegar work if you don’t have lemon.
- Cinnamon: Adds warmth and depth without sugar; omit for plain unsweetened chips or use nutmeg or cardamom instead.
- Sugar: Creates a light candied crust; skip it for fully unsweetened snacks or use coconut sugar for a caramel note.
How to Make Dehydrated Apples
Step 1: Prepare Your Apples
Rinse your apples under cool running water and pat them dry with a clean cloth. Start with the cleanest fruit possible to avoid any grit on the finished product.
Step 2: Slice Your Apples Consistently
Using a mandoline slicer or sharp knife, slice apples into rounds approximately 1/8 inch thick for crispy chips or 1/4 inch for chewier texture. Aim for uniform thickness so every piece dehydrates at the same rate.
Step 3: Create an Acidulated Water Bath
Mix 2 cups water with 1 tablespoon lemon juice in a bowl. Immediately submerge your apple slices for 2 to 3 minutes; this prevents enzymatic browning and keeps them looking bright and appealing.
Step 4: Drain and Pat Dry
Remove apples from the bath and lay them on paper towels or a clean cloth. Pat them completely dry; any surface moisture extends dehydration time and creates uneven results.
Step 5: Season (Optional)
In a small bowl, combine 1 teaspoon cinnamon, 1 tablespoon sugar, and a pinch of salt if using. Sprinkle the mixture lightly over both sides of each slice as you arrange them on dehydrator trays.
Step 6: Arrange on Dehydrator Trays
Lay apple slices in a single layer on dehydrator trays, keeping them from touching or slightly overlapping. Overlapping slices will stick together and won’t dry evenly.
Step 7: Dehydrate at the Right Temperature
Set your dehydrator to 160 degrees Fahrenheit and dehydrate for 4 to 6 hours for thin slices or 6 to 8 hours for thicker pieces. At this temperature, the apples dry slowly enough to retain flavor while preventing case hardening, where the outside hardens before moisture escapes from the center.
Step 8: Check for Doneness
Apples are done when they bend slightly but don’t break, with no visible moisture when you cut or fold a slice. Thin pieces should be completely crisp; thicker ones stay slightly pliable in the center with firm edges.
Pro Tip: Don’t over-dehydrate your apples. They continue to lose moisture even after removal from heat, and overdried slices become tough and less flavorful.
Tips for the Best Dehydrated Apples
- Use a mandoline slicer for perfectly uniform thickness; uneven slices dehydrate at different rates and ruin consistency.
- Leave the skin on for added fiber, color, and natural pectin that helps slices hold their shape during dehydration.
- Stack your dehydrator trays from top to bottom in the correct order; bottom trays often run hotter, so rotate halfway through dehydration.
- Store finished apples in an airtight container with a food-grade desiccant packet to maintain crispness and prevent moisture reabsorption.
- Taste one piece before storing the full batch to confirm texture and doneness; it’s your guide for future batches.
- Make a double or triple batch since they disappear so fast and storage time is long.
Common Mistakes to Avoid
- Skipping the lemon juice bath: Apples brown quickly and lose visual appeal and some flavor compounds to oxidation.
- Uneven slicing: Thick and thin pieces on the same tray mean some burn while others stay moist, creating an inconsistent snack.
- Dehydrating too hot: High heat (above 170 degrees) creates a hard exterior that traps moisture inside, leaving them tough and chewy instead of crispy.
- Not rotating racks: Dehydrators have hot spots, so apples closest to the heat source dry faster and may brown or burn.
- Storing while still warm: Residual heat creates condensation inside your container, causing mold and sogginess within days.
Serving Suggestions
Dehydrated apples shine on their own as a grab-and-go snack or paired with other dried fruits and nuts. Try them in breakfast situations, baked goods, or straight from a jar whenever a sweet craving hits.
- Trail mix with almonds, cashews, dark chocolate chips, and coconut flakes
- Sprinkled over oatmeal or yogurt for breakfast crunch
- Chopped into pieces and added to granola recipes or energy balls
- Paired with cheese and crackers for an easy snack board
- Steeped in hot water to create a naturally sweet apple tea
Variations to Try
- Candied apples: Double the sugar coating and dehydrate at 180 degrees for 3 to 4 hours, creating a crispy, candy-like texture that tastes like dessert.
- Spiced blend: Mix cinnamon with nutmeg, ginger, and cloves for a warm fall flavor that pairs beautifully with hot cider or oatmeal.
- Brown sugar and vanilla: Coat slices with brown sugar instead of white and add a drop of vanilla extract per batch for deeper, molasses-like sweetness.
- Tart and tangy: Skip sugar entirely and add extra lemon juice plus a pinch of cayenne pepper for a sophisticated snack that works in savory contexts too.
- Maple glazed: Brush slices lightly with pure maple syrup before dehydrating for a forest-sweet flavor that complements both sweet and savory dishes.
Dietary Adaptations
- Gluten-free: Dehydrated apples are naturally gluten-free; no adjustments needed.
- Dairy-free: The base recipe contains no dairy; it’s naturally dairy-free.
- Vegan: This recipe is fully vegan; all ingredients are plant-based.
- Low-carb or keto: Apples contain natural sugars, so they’re higher in carbs; use sparingly in keto diets or enjoy them as occasional treats in moderation.
Storage and Reheating
Refrigerator
Store dehydrated apples in an airtight container at room temperature for up to 3 months. Cool them completely before sealing to avoid condensation.
- Use glass jars or food-grade plastic containers with tight-fitting lids
- Store in a cool, dark, dry place away from direct sunlight
- Keep away from strong odors that might transfer flavor
Freezer
Freezing isn’t necessary for shelf stability, but you can freeze apples for up to one year if you want to extend storage beyond three months. Thaw at room temperature before opening to prevent condensation.
- Place apples in freezer-safe containers or vacuum-sealed bags
- Label with the date you prepared them
- Keep in a section of your freezer away from foods with strong odors
Reheating
Dehydrated apples don’t need reheating; eat them straight from the container or add them to recipes as-is. If you want to soften them for baking or cooking, soak in warm water or apple juice for 10 to 15 minutes until pliable.
- No reheating required for snacking
- Soak in water or juice to plump them for recipes
- Add directly to oatmeal or yogurt where they’ll absorb moisture naturally
Nutrition Information
| Nutrient | Amount |
|---|---|
| Calories | 35 |
| Total Fat | 0.1g |
| Saturated Fat | 0g |
| Carbohydrates | 9.2g |
| Fiber | 1.5g |
| Sugar | 7.1g |
| Protein | 0.1g |
| Sodium | 1.2mg |
| Cholesterol | 0mg |
Nutrition values are approximate and based on one ounce of dehydrated apples made with no added sugar. Values vary depending on apple variety and whether you add cinnamon, sugar, or other seasonings.
Frequently Asked Questions
Can I use a regular oven instead of a dehydrator?
Yes, absolutely. Set your oven to the lowest setting (usually 170 to 200 degrees Fahrenheit), place apples on parchment-lined baking sheets, and prop the oven door slightly open with a wooden spoon to allow moisture to escape. Dehydration takes 6 to 10 hours depending on thickness and your oven’s accuracy.
What’s the best apple variety for dehydrating?
Honeycrisp, Fuji, and Gala apples work beautifully because they’re naturally sweet and firm. Granny Smith apples are tarter and create a more complex flavor if you prefer less sweetness.
How do I know when they’re done?
Thin slices should snap cleanly when you bend them; thicker pieces bend slightly without breaking. There should be no visible moisture beading up when you cut into them.
Can I dehydrate apples with seeds removed?
Yes, you can core your apples before slicing if you prefer, though it takes extra time and the nutritional difference is minimal. Most people find leaving the core in easier and the seeds add no noticeable flavor.
Why are my apples sticking together?
Overlapping slices or residual moisture from insufficiently drying them after soaking causes sticking. Pat them completely dry and space them out on trays with at least 1/4 inch between each slice.
Can I add honey or other sweeteners during dehydration?
Honey burns easily at dehydrator temperatures and becomes bitter. Granulated sugar or brown sugar work better; apply them lightly and sparingly to avoid caramelization or burning.
Final Thoughts
Dehydrated apples are one of those recipes that teaches you something new every time you make them. You discover what texture you truly love, which seasonings make your taste buds sing, and how satisfying it is to snack on food you created yourself.
Make a batch this week and watch them vanish just as fast as you did as a kid. Your future self will thank you when you reach for homemade, wholesome snacks instead of packaged alternatives.
Dehydrated Apples
Ingredients
Equipment
Method
- Rinse your apples under cool running water and pat them dry with a clean cloth. Start with the cleanest fruit possible to avoid any grit on the finished product.
- Using a mandoline slicer or sharp knife, slice apples into rounds approximately 1/8 inch thick for crispy chips or 1/4 inch for chewier texture. Aim for uniform thickness so every piece dehydrates at the same rate.
- Mix 2 cups water with 1 tablespoon lemon juice in a bowl. Immediately submerge your apple slices for 2 to 3 minutes; this prevents enzymatic browning and keeps them looking bright and appealing.
- Remove apples from the bath and lay them on paper towels or a clean cloth. Pat them completely dry; any surface moisture extends dehydration time and creates uneven results.
- In a small bowl, combine 1 teaspoon cinnamon, 1 tablespoon sugar, and a pinch of salt if using. Sprinkle the mixture lightly over both sides of each slice as you arrange them on dehydrator trays.
- Lay apple slices in a single layer on dehydrator trays, keeping them from touching or slightly overlapping. Overlapping slices will stick together and won't dry evenly.
- Set your dehydrator to 160 degrees Fahrenheit and dehydrate for 4 to 6 hours for thin slices or 6 to 8 hours for thicker pieces. At this temperature, the apples dry slowly enough to retain flavor while preventing case hardening, where the outside hardens before moisture escapes from the center.
- Apples are done when they bend slightly but don't break, with no visible moisture when you cut or fold a slice. Thin pieces should be completely crisp; thicker ones stay slightly pliable in the center with firm edges.