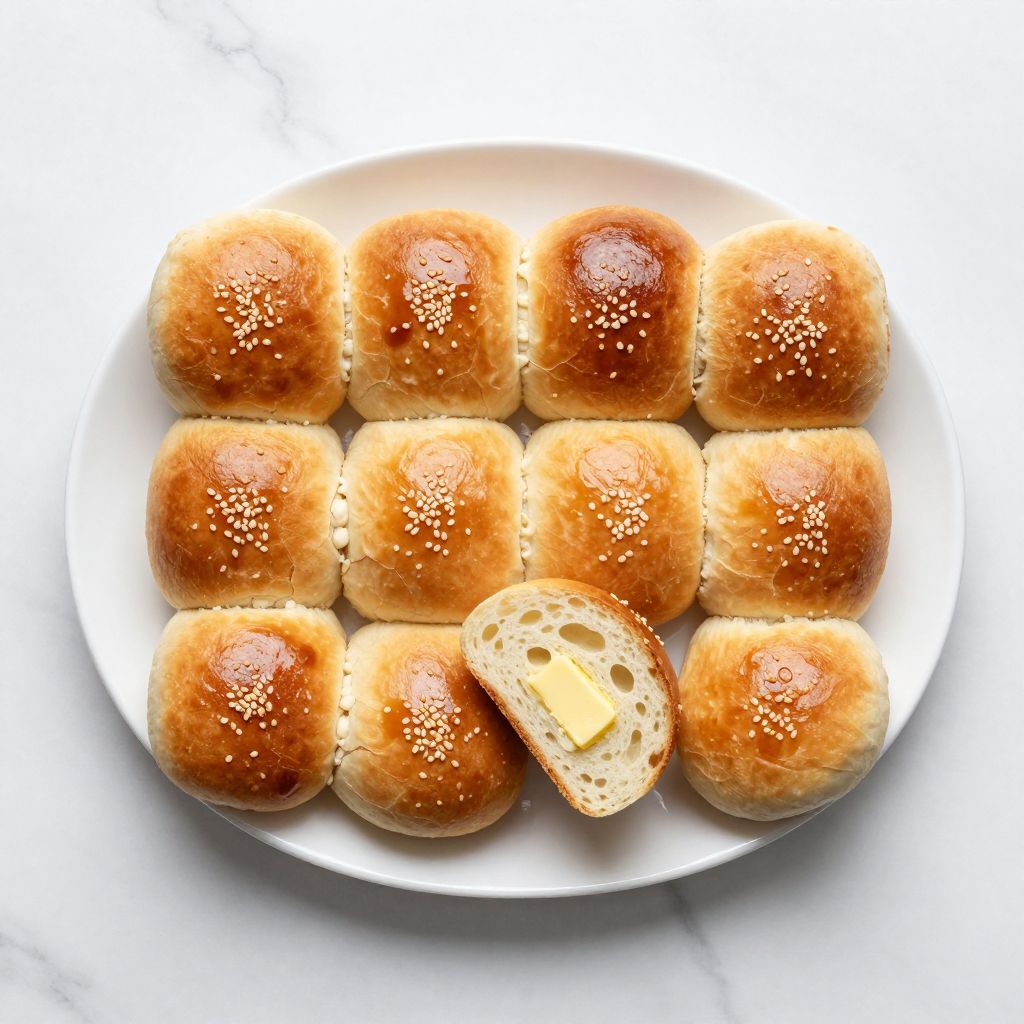
Sandwich rolls are the backbone of a killer lunch, and homemade versions blow store-bought versions out of the water. These soft, pillowy rolls take just a few hours from start to finish and fill your kitchen with an aroma that no bakery can match.
Once you master this simple dough, you’ll never go back to pre-packaged bread again. Let me walk you through exactly how to bake these golden beauties.
Why You’ll Love This Recipe
Homemade sandwich rolls taste infinitely better than anything from a plastic bag, and you control every ingredient that goes into them.
- Soft, pillowy texture that stays fresh for days
- Simple ingredients you likely have in your pantry right now
- Perfect for deli sandwiches, burgers, or pulled meat
- Budget-friendly when made in batches
- Freezer-friendly for grab-and-go convenience
My Experience Making This Recipe
The first time I made these rolls, I was skeptical that homemade could match the commercial versions. Within 20 minutes of baking, my entire house smelled like a bakery, and I knew I was onto something special.
My family devoured the first batch at lunch, and I caught my teenager actually putting down his phone to eat a second roll. The texture is what gets people every time: crispy golden crust outside, pillowy soft crumb inside that holds up to any filling without falling apart.
I now bake these every other week because they disappear that fast. Guests are always shocked when I casually mention I made the bread, and honestly, it fuels my baker’s ego more than it should.
Recipe Overview
- Recipe Name: Sandwich Rolls
- Servings: 8 rolls
- Prep Time: 15 minutes
- Rise Time: 90 minutes
- Cook Time: 18 minutes
- Total Time: 2 hours 15 minutes
- Course: Bread
- Cuisine: American
- Calories per Serving: 210
Equipment You Will Need
- Stand mixer with dough hook attachment
- Large mixing bowl
- Kitchen scale (optional but recommended)
- Measuring cups and spoons
- Two baking sheets
- Parchment paper
- Instant-read thermometer
- Pastry brush
- Plastic wrap or damp kitchen towel
- Wire cooling rack
Ingredients for Sandwich Rolls
- All-purpose flour: 500 grams (about 4 cups)
- Whole milk: 240 milliliters (1 cup), warmed to 110 degrees Fahrenheit
- Active dry yeast: 7 grams (2 1/4 teaspoons)
- Granulated sugar: 25 grams (2 tablespoons)
- Salt: 6 grams (1 1/4 teaspoons)
- Unsalted butter: 40 grams (3 tablespoons), softened
- Egg wash: 1 large egg mixed with 15 milliliters (1 tablespoon) water
- Sesame seeds or poppy seeds (optional): 30 grams (3 tablespoons)
Ingredient Notes and Substitutions
- All-purpose flour: This is the workhorse of the dough, providing structure and gluten development for that chewy crumb. You can swap in bread flour for a chewier roll, though the dough will require slightly more hydration.
- Whole milk: Whole milk adds richness and creates a softer crumb compared to water alone. Use 2% milk if that’s what you have, though whole milk produces the best texture and flavor.
- Active dry yeast: This is the leavening agent that makes the rolls rise and fluffy. Instant yeast (SAF) works fine as a one-to-one swap and may even perform slightly faster.
- Granulated sugar: Sugar feeds the yeast and adds subtle sweetness to balance the salt. Honey or agave can replace sugar in equal amounts for slightly different flavor.
- Unsalted butter: Butter enriches the dough and creates a tender crumb. Salted butter works if you reduce the salt in the recipe by half a teaspoon.
- Egg wash: This creates the shiny, golden crust everyone loves. Skip it for a matte finish, or use milk alone for a less glossy crust.
How to Make Sandwich Rolls
Step 1: Combine Yeast and Milk
Pour the warmed milk into the bowl of your stand mixer and sprinkle the active dry yeast over the surface. Wait 5 minutes for the yeast to bloom and activate, which signals that your yeast is alive and ready to work.
You should see a slight foam forming on top. If nothing happens, your yeast is dead, and you need fresh yeast before continuing.
Step 2: Mix the Dough
Add the flour, sugar, and salt to the bloomed yeast mixture. Attach the dough hook and mix on low speed for 8 minutes until the dough comes together and becomes slightly sticky.
The gluten develops during this mixing phase, which creates the structure that traps air bubbles and produces a light, airy crumb.
Step 3: Incorporate the Butter
With the mixer still running on low, add the softened butter one tablespoon at a time, waiting for each piece to fully incorporate before adding the next. This takes about 3 minutes total and might seem slow, but adding cold butter all at once breaks the dough.
Once all the butter is mixed in, increase the speed to medium and knead for 5 more minutes. The dough should be smooth, slightly tacky, and pull cleanly from the sides of the bowl.
Step 4: First Rise
Transfer the dough to a lightly oiled bowl and cover with plastic wrap or a damp kitchen towel. Let it rise at room temperature for 60 minutes until it roughly doubles in size.
This first rise develops flavor and allows the yeast to multiply, which creates more lift during the second rise.
Step 5: Shape the Rolls
Gently turn the dough out onto a lightly floured surface and divide it into 8 equal pieces using a bench scraper or knife. Shape each piece into a smooth, tight round by cupping your hands around the dough and rolling it toward you in quick motions against the work surface.
Tight shaping creates surface tension that helps the rolls rise upward instead of spreading outward, giving you nicely domed rolls instead of flat discs.
Step 6: Second Rise
Place the shaped rolls on parchment-lined baking sheets, spacing them about 2 inches apart. Cover loosely with plastic wrap and let them rise at room temperature for 30 to 40 minutes until they’re puffy and spring back slowly when you gently poke them with your finger.
A slow spring-back indicates proper proofing. If the dough doesn’t spring back at all, the rolls are under-proofed. If your finger leaves a permanent indent, they’re over-proofed.
Step 7: Prepare for Baking
Position your oven rack to the middle shelf and preheat to 400 degrees Fahrenheit. Gently brush each proofed roll with the egg wash, coating the top and sides evenly.
The egg wash creates that beautiful golden-brown crust that makes the rolls look bakery-quality. If you want seeds on top, sprinkle them now while the egg wash is still wet.
Step 8: Bake the Rolls
Bake on the middle rack for 16 to 18 minutes until the rolls are deeply golden brown and sound hollow when you tap the bottom. The internal temperature should reach 190 degrees Fahrenheit when measured with an instant-read thermometer inserted into the side of a roll.
The hollow sound indicates the crumb has set properly and the crust has caramelized to perfection.
Step 9: Cool
Remove the rolls from the oven and transfer them to a wire cooling rack. Let them cool for at least 15 minutes before slicing, which allows the crumb to set and makes slicing cleaner.
If you slice while they’re piping hot, the interior steam will rush out, and you’ll end up with a gummy crumb.
Pro Tip: Brush the warm rolls with melted butter immediately after removing them from the oven for an extra soft, tender crust that stays that way for days.
Tips for the Best Sandwich Rolls
- Weigh your flour if possible instead of measuring by cups, which can vary by up to 30 grams depending on how tightly you pack the flour. A kitchen scale removes guesswork and produces consistent results every single time.
- Use milk warmed to exactly 110 degrees Fahrenheit because yeast dies above 120 degrees but activates slowly below 105 degrees. A simple instant-read thermometer takes the confusion out of this step.
- Don’t skip the first rise even if it seems like an extra step. This develops flavor compounds and strengthens the gluten network, creating noticeably better rolls than if you skip straight to shaping.
- Shape the rolls on an unfloured surface or with minimal flour because excess flour prevents the dough pieces from sealing together, which can cause seams to split during baking.
- Brush the rolls with egg wash only on the top and sides, avoiding the bottoms, which prevents the bottoms from browning too quickly and becoming hard.
- Store baked rolls in an airtight container at room temperature for up to three days. They stay soft longer this way than sitting uncovered on a cooling rack.
Common Mistakes to Avoid
- Using milk that’s too hot kills the yeast, resulting in rolls that never rise properly. Always measure the milk temperature with a thermometer rather than guessing by feel.
- Skipping the blooming step with yeast wastes time because you won’t know if the yeast is alive until the rolls fail to rise. Five minutes of blooming saves you hours of baking disappointment.
- Over-kneading the dough after the butter is added creates a tough, dense crumb because the gluten becomes overdeveloped. Stop mixing once the dough is smooth and slightly tacky.
- Baking in a cold oven or on the wrong rack causes uneven browning and dense rolls. Preheat your oven fully and bake on the middle rack where heat circulates evenly.
- Slicing the rolls while they’re still hot releases steam and creates a gummy interior. Patience pays off here: wait at least 15 minutes before cutting.
Serving Suggestions
These rolls shine with classic sandwich fillings, but they’re versatile enough for breakfast, lunch, or dinner applications. Serve them warm with butter on the side, or split them for your favorite filling.
- Deli sandwiches with roasted turkey, Swiss cheese, and tomato
- Pulled pork or pulled chicken with coleslaw on the side
- Burgers topped with all the classics: lettuce, tomato, onion, pickles
- Breakfast sandwiches with scrambled eggs, bacon, and cheese
- Sliced in half and toasted with melted butter and garlic powder for a simple side bread
Variations to Try
- Whole Wheat Rolls: Replace 150 grams of all-purpose flour with whole wheat flour for a nuttier flavor and denser crumb. Whole wheat dough absorbs more water, so increase the milk by 30 milliliters and expect the rolls to be slightly less airy.
- Herb and Cheese Rolls: Knead 60 grams of shredded sharp cheddar and 1 teaspoon of dried Italian herbs into the dough after the butter is incorporated. The cheese adds richness and savory depth that makes these rolls incredible with sandwiches.
- Brioche-Style Rolls: Increase the butter to 60 grams and add 1 extra egg yolk to the dough. These rolls become noticeably richer and more tender, almost cake-like in texture.
- Multigrain Rolls: Add 75 grams of a multigrain flour blend and 30 grams of rolled oats to the dough, reducing all-purpose flour to 425 grams. Soak the oats in the warm milk for 5 minutes before mixing to soften them.
- Onion and Poppy Seed Rolls: Mix 60 grams of finely diced caramelized onions into the dough and top each roll with poppy seeds instead of sesame seeds for a deli-style roll.
Dietary Adaptations
- Gluten-Free: Swap the all-purpose flour for a 1-to-1 gluten-free flour blend designed for bread baking, and increase the water by 60 milliliters because gluten-free flour absorbs more liquid. The texture will be slightly less airy but still delicious.
- Dairy-Free: Replace the whole milk with unsweetened oat milk or almond milk warmed to 110 degrees Fahrenheit, and swap the butter for dairy-free butter in equal amounts. The rolls will taste nearly identical with minimal texture changes.
- Vegan: Use non-dairy milk, vegan butter, and skip the egg wash or brush with a mixture of aquafaba (chickpea liquid) and a teaspoon of sugar for shine. The rolls bake identically but with zero animal products.
- Low-Carb/Keto: This recipe doesn’t adapt well to low-carb diets because the structure depends on flour. Consider almond flour-based recipes designed specifically for keto if this is a dietary requirement.
Storage and Reheating
Refrigerator
Store cooled rolls in an airtight container or resealable bag in the refrigerator for up to one week. They’ll gradually dry out over time, but they stay soft and edible for several days.
- Place a piece of parchment between each roll to prevent them from sticking
- Remove rolls from the refrigerator 30 minutes before serving to reach room temperature
- Warm briefly in a 350-degree-Fahrenheit oven for 5 minutes if you want them just-baked texture
Freezer
Freeze cooled rolls in a freezer bag for up to three months with no loss of quality. Properly frozen rolls taste nearly identical to fresh ones when thawed and reheated.
- Cool rolls completely before freezing to prevent condensation
- Use a freezer bag and remove as much air as possible
- Label the bag with the date so you remember when you baked them
Reheating
Thaw frozen rolls at room temperature for 2 hours, then warm them in a preheated 350-degree-Fahrenheit oven for 8 to 10 minutes until heated through. Wrapping them in foil prevents the crust from hardening while the interior reheats.
- For a quicker option, microwave a single roll wrapped in a damp paper towel for 20 to 30 seconds
- Toast split rolls in a skillet with butter over medium heat for a crispy exterior and warm interior
Nutrition Information
| Nutrient | Amount |
|---|---|
| Calories | 210 |
| Total Fat | 5 grams |
| Saturated Fat | 3 grams |
| Carbohydrates | 35 grams |
| Fiber | 1 gram |
| Sugar | 2 grams |
| Protein | 7 grams |
| Sodium | 290 milligrams |
| Cholesterol | 15 milligrams |
These values are based on one roll out of eight and don’t include any fillings or toppings you add during serving.
Frequently Asked Questions
Can I make this dough in a food processor?
Yes, but the results won’t be quite as good because a food processor doesn’t knead the dough as effectively as a stand mixer. If you must use a food processor, pulse the dough for 30 seconds at a time and check frequently to avoid over-working the dough.
Can I make these rolls ahead and bake them later?
Absolutely. After shaping, place the rolls on a baking sheet, cover with plastic wrap, and refrigerate overnight. The next day, remove them from the refrigerator, let them sit for 30 minutes to take the chill off, then bake as directed without the second rise.
Why did my rolls turn out dense and hard?
Dense rolls usually result from over-kneading the dough, using yeast that’s too old, or baking in a too-hot oven. Check your yeast’s expiration date and make sure you’re not mixing past the point where the dough is smooth and tacky.
Can I use instant yeast instead of active dry yeast?
Yes, instant yeast works as a one-to-one swap and may actually perform
Sandwich Rolls
Ingredients
Equipment
Method
- Pour the warmed whole milk into the bowl of your stand mixer and sprinkle the active dry yeast over the surface. Wait 5 minutes for the yeast to bloom and activate; you should see slight foam forming on top.
- Add the all-purpose flour, granulated sugar, and salt to the bloomed yeast mixture. Attach the dough hook and mix on low speed for 8 minutes until the dough comes together and becomes slightly sticky.
- With the mixer still running on low, add the softened unsalted butter one tablespoon at a time, waiting for each piece to incorporate fully before adding the next. This takes about 3 minutes.
- Once all butter is mixed in, increase the mixer speed to medium and knead the dough for 5 more minutes until smooth, slightly tacky, and pulling cleanly from the bowl sides.
- Transfer the dough to a lightly oiled bowl and cover with plastic wrap or a damp kitchen towel. Let it rise at room temperature for 60 minutes until roughly doubled in size.
- Turn the dough out onto a lightly floured surface and divide into 8 equal pieces using a bench scraper or knife. Shape each piece into a smooth, tight round by rolling it toward you in quick motions.
- Place the shaped rolls on parchment-lined baking sheets about 2 inches apart. Cover loosely with plastic wrap and let them rise at room temperature for 30 to 40 minutes until puffy and springs back slowly when poked.
- Preheat the oven to 400 degrees Fahrenheit and position the rack to the middle shelf. Gently brush each proofed roll with the egg wash, coating the top and sides evenly. Sprinkle seeds on top if desired.
- Bake the rolls on the middle rack for 16 to 18 minutes until deeply golden brown and they sound hollow when tapped on the bottom. The internal temperature should reach 190 degrees Fahrenheit.
- Remove the rolls from the oven and transfer them to a wire cooling rack. Let cool for at least 15 minutes before slicing to allow the crumb to set and prevent a gummy interior.
- Optional: Brush warm rolls with melted butter immediately after baking for an extra soft and tender crust.