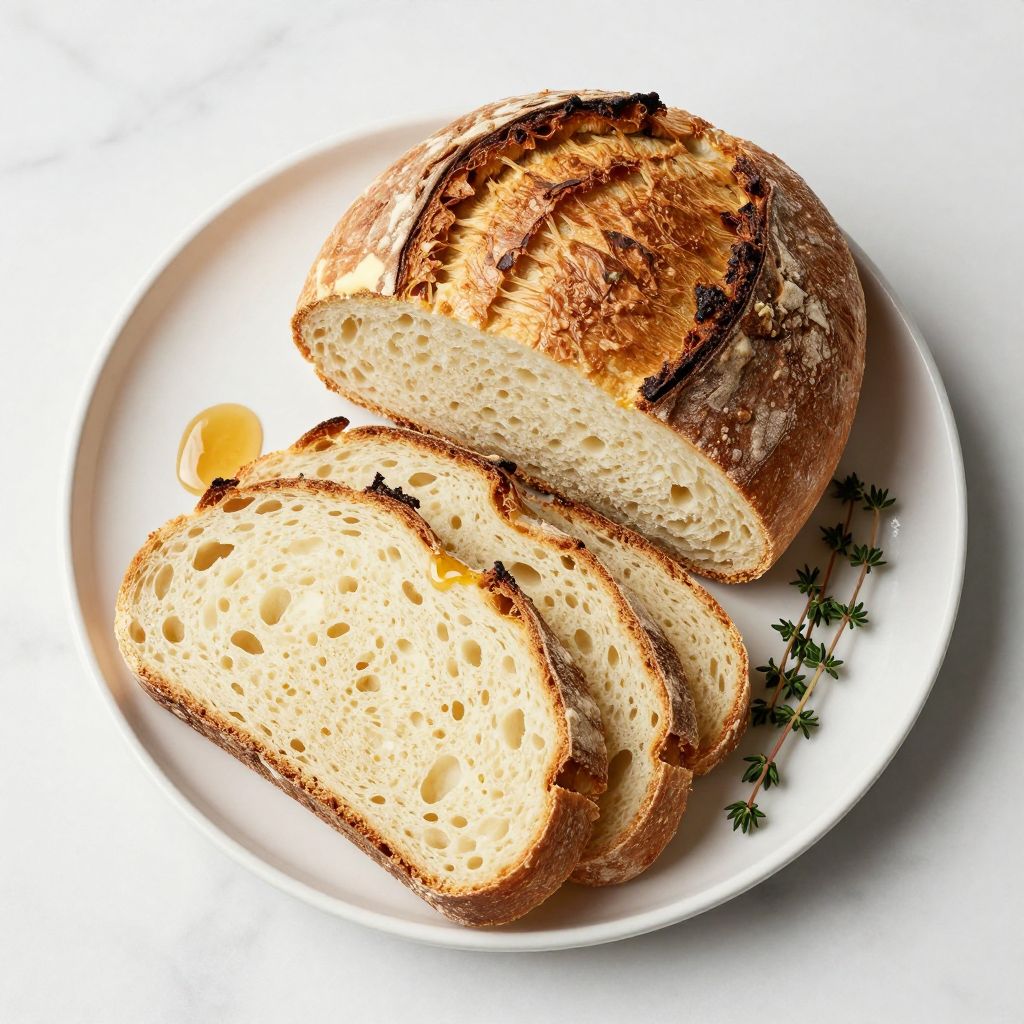
Self Rising Flour Bread is the easiest way to get homemade bread on your table without yeast, long rising times, or a mixer. With just a handful of pantry staples, you’ll have warm, fluffy bread ready in under an hour.
This recipe works because self-rising flour already contains salt and leavening agents built in, so you skip the complexity and go straight to mixing and baking. Whether you’re a beginner baker or someone short on time, this bread delivers tender crumb and a golden crust that tastes like you spent all day in the kitchen.
Why You’ll Love This Recipe
This bread hits all the marks for busy cooks who still want homemade results.
- No yeast required, no waiting for dough to rise overnight or for hours
- Ready from bowl to table in roughly 45 minutes total
- Soft, cloud-like texture that stays fresh for days
- Works with just five basic ingredients you likely already have
- Perfect for beginners because there’s almost no way to mess it up
My Experience Making This Recipe
I first made this bread on a lazy Sunday morning when I realized I’d forgotten to plan dinner. I mixed the dough in about three minutes and honestly didn’t expect much since there was no yeast involved.
Twenty minutes later, the aroma filled my kitchen and made me a believer. My kids devoured warm slices with butter before I could even slice the whole loaf.
Since then, I’ve baked this at least twice a month as a side for soups, stews, and weeknight dinners. The consistency is perfect every time, and guests always ask for the recipe when they taste how soft it is.
Recipe Overview
- Recipe Name: Self Rising Flour Bread
- Servings: 8 to 10 slices
- Prep Time: 10 minutes
- Cook Time: 30 to 35 minutes
- Total Time: 40 to 45 minutes
- Course: Bread
- Cuisine: American
- Calories per Serving: 145
Equipment You Will Need
- One 9 by 5 inch loaf pan
- Mixing bowl
- Measuring cups and spoons
- Wooden spoon or rubber spatula
- Oven
- Instant read thermometer (optional but helpful)
Ingredients for Self Rising Flour Bread
- Self-rising flour, 3 cups
- Whole milk, 1 1/4 cups, room temperature
- Butter, 2 tablespoons, melted
- Honey, 1 tablespoon
- Salt, 1/4 teaspoon (optional, adjust to taste)
Ingredient Notes and Substitutions
- Self-rising flour: This flour contains baking powder and salt already mixed in, which is why the dough rises without yeast. You cannot swap all-purpose flour directly without adding 1 1/2 teaspoons baking powder and 1/2 teaspoon salt per cup of flour.
- Whole milk: Whole milk creates a richer, more tender crumb than low-fat or skim milk. Buttermilk adds tang and helps activate the leavening for a slightly airier loaf.
- Butter: Melted butter adds richness and helps browning. Vegetable oil works if you need a neutral option, though the flavor will be slightly less rich.
- Honey: Honey feeds the leavening agents and adds subtle sweetness and a softer crust. Sugar works as a one-to-one swap if you prefer a less sweet flavor.
How to Make Self Rising Flour Bread
Step 1: Preheat the Oven
Set your oven to 425 degrees Fahrenheit and allow it to heat for about 5 minutes. A hot oven gives the bread a quick burst of rise at the start, which bakers call oven spring, creating a lighter crumb.
Step 2: Prepare Your Pan
Lightly grease a 9 by 5 inch loaf pan with butter or cooking spray. A well-greased pan prevents the bread from sticking and ensures even browning on all sides.
Step 3: Combine Dry Ingredients
Pour 3 cups of self-rising flour and 1/4 teaspoon of salt into a large mixing bowl. Stir with a spoon a few times to combine and break up any clumps in the flour.
Step 4: Add the Wet Ingredients
Pour 1 1/4 cups of room-temperature milk, 2 tablespoons of melted butter, and 1 tablespoon of honey into the dry ingredients. Mix everything together until a thick, slightly sticky dough forms, about 1 to 2 minutes of stirring.
Step 5: Keep the Dough Rustic
Stop mixing as soon as the flour disappears into the dough. Overmixing develops gluten and makes the bread tough and dense instead of light and fluffy.
Step 6: Transfer to the Pan
Scrape the entire dough into your prepared loaf pan using a rubber spatula. Use the spatula or your hand to gently press the dough into the pan and smooth the top into a rough loaf shape.
Step 7: Optional Topping
Brush the top of the dough with a little extra melted butter if you like a golden, shiny crust. This step adds flavor and helps the top brown evenly.
Step 8: Bake Until Golden Brown
Place the loaf pan in the preheated oven and bake for 30 to 35 minutes, until the top is deep golden brown and the bread sounds hollow when you tap it. An instant-read thermometer inserted into the center should read 200 to 210 degrees Fahrenheit.
Step 9: Cool Before Slicing
Remove the pan from the oven and let the bread rest in the pan for 5 minutes. Turn the loaf out onto a wire rack or cutting board and allow it to cool for at least 10 minutes before slicing, which helps the crumb set and makes slicing cleaner.
Pro Tip: Room-temperature milk blends more evenly with the flour and creates a more tender loaf than cold milk straight from the fridge.
Tips for the Best Self Rising Flour Bread
- Check your self-rising flour’s expiration date before baking, as old baking powder in the flour loses potency and won’t rise properly.
- Measure flour by spooning it into your measuring cup and leveling it off rather than scooping directly from the bag, which compacts the flour and makes your bread dense.
- Don’t skip the cooling step, as slicing into hot bread causes it to crumble and fall apart.
- Store cooled bread in an airtight container at room temperature to keep it soft for up to three days.
- A touch of garlic powder or Italian seasoning mixed into the dough creates a savory version that pairs well with pasta dinners.
Common Mistakes to Avoid
- Using cold milk straight from the fridge slows the mixing process and can result in lumpy, uneven dough that doesn’t rise evenly.
- Overmixing the dough after adding the wet ingredients develops gluten and creates a tough, chewy bread instead of a tender, fluffy one.
- Skipping the preheating step means your bread bakes more slowly and doesn’t get that critical oven spring boost that creates a light crumb.
- Substituting all-purpose flour without adding leavening agents results in a dense, heavy bread that tastes more like a biscuit.
- Slicing into the bread while it’s still hot causes the interior to compress and tear, making slices messy and uneven.
Serving Suggestions
This bread shines warm from the oven with butter, but it pairs beautifully with almost any meal. Serve it alongside your favorite comfort food or as part of a simple bread basket on the dinner table.
- Warm slices with softened butter and a drizzle of honey for a simple breakfast treat
- Torn into chunks and served alongside a hearty beef stew or chicken soup
- Toasted and topped with cream cheese and jam for a quick snack
- Cut into thick slices and used for open-faced sandwiches with cheese and roasted vegetables
- Served alongside chili or beans for a filling, stick-to-your-ribs dinner
Variations to Try
- Cheese and Herb Bread: Fold in 1 cup of shredded cheddar cheese and 1 teaspoon of dried herbs like thyme or rosemary before baking for a savory, flavorful loaf that pairs well with soups.
- Garlic Butter Bread: Mix the melted butter with minced garlic and brush it over the dough before baking for a fragrant, garlicky version that works as a side for Italian meals.
- Sweet Honey Walnut Bread: Increase honey to 2 tablespoons and stir in 3/4 cup of chopped walnuts for a slightly sweet bread with nutty texture and crunch.
- Jalapeño Cheddar Bread: Add 1/2 cup of diced fresh or canned jalapeños and 3/4 cup of sharp cheddar cheese for a spicy, bold bread that stands up to chili or barbecue.
- Whole Wheat Version: Replace 1 cup of self-rising flour with whole wheat self-rising flour for more fiber and a nuttier, earthier flavor with slightly denser texture.
Dietary Adaptations
- Gluten-Free: Substitute gluten-free self-rising flour in a one-to-one ratio, though the texture may be slightly more crumbly unless you use a blend with xanthan gum already included.
- Dairy-Free: Replace milk with unsweetened almond milk or oat milk and use melted coconut oil or vegan butter instead of dairy butter for a completely plant-based loaf.
- Vegan: Swap the honey for maple syrup and use dairy-free milk and plant-based butter, keeping all other amounts the same.
- Low-Carb/Keto: This recipe does not adapt well to low-carb diets since self-rising flour is carb-heavy, but almond flour keto bread recipes exist as a better alternative.
Storage and Reheating
Refrigerator
Wrap cooled bread tightly in plastic wrap or foil and store it in an airtight container for up to 5 days. The cold slows staling but may dry out the crumb slightly.
- Keep bread in an airtight container to prevent it from absorbing odors from the fridge
- Wrap individually sliced portions for easier grab-and-go servings
Freezer
Wrap the cooled loaf tightly in plastic wrap, then in foil, and freeze for up to 3 months. Thaw at room temperature for 2 to 3 hours or overnight in the refrigerator before serving.
- Slice the bread before freezing for easy portioning
- Use freezer bags to save space in a crowded freezer
Reheating
Warm slices in a toaster oven at 350 degrees for 5 to 8 minutes, or wrap the loaf in foil and warm it in a 325-degree oven for 15 to 20 minutes. Microwaving softens the crust, so avoid it unless absolutely necessary.
- Toast slices individually for a crispy exterior and warm center
- Wrap the whole loaf in foil to keep moisture in during reheating
Nutrition Information
| Nutrient | Amount |
|---|---|
| Calories | 145 |
| Total Fat | 3 grams |
| Saturated Fat | 1.5 grams |
| Carbohydrates | 26 grams |
| Fiber | 1 gram |
| Sugar | 2 grams |
| Protein | 3 grams |
| Sodium | 380 milligrams |
| Cholesterol | 5 milligrams |
These values are approximate and based on a loaf yielding 9 servings using the ingredients listed above. Actual nutrition varies depending on your specific brands and any additions or substitutions you make.
Frequently Asked Questions
Can I use all-purpose flour instead of self-rising flour?
You can, but you’ll need to add leavening agents manually. Mix 3 cups all-purpose flour with 4.5 teaspoons baking powder and 1.5 teaspoons salt to replicate self-rising flour.
How do I know when the bread is fully cooked?
The top should be golden brown and the loaf should sound hollow when you tap it lightly. An instant-read thermometer inserted into the center should reach 200 to 210 degrees Fahrenheit.
Can I make this bread ahead of time?
Yes, you can prepare the dough up to 2 hours ahead and store it covered at room temperature, though it’s best baked within 30 minutes for maximum rise. Baked bread freezes beautifully for up to 3 months.
Why is my bread dense instead of fluffy?
Overmixing the dough or using expired self-rising flour are the most common culprits. Make sure to stir just until the flour disappears and check your flour’s expiration date.
Can I add mix-ins like cheese, herbs, or nuts?
Absolutely, fold in up to 1 cup of add-ins after mixing the dough to keep the texture light. Cheese, fresh herbs, nuts, and seeds all work beautifully.
What’s the best way to store leftover bread?
Keep it in an airtight container at room temperature for up to 3 days, or wrap it well and freeze for up to 3 months. Room temperature storage keeps it softer than the fridge.
Final Thoughts
This Self Rising Flour Bread has earned a permanent spot in my weeknight rotation because it’s foolproof and consistently delicious. In less than an hour, you go from empty mixing bowl to a warm, golden loaf that tastes like you know what you’re doing in the kitchen.
Give this recipe a try this week with your next soup, stew, or family dinner. I promise your kitchen will smell incredible, and everyone at your table will be asking for seconds.
Self Rising Flour Bread
Ingredients
Equipment
Method
- Preheat the oven to 425 degrees Fahrenheit and let it heat for about 5 minutes.
- Lightly grease a 9 by 5 inch loaf pan with butter or cooking spray.
- In a large mixing bowl, pour 3 cups of self-rising flour and 1/4 teaspoon of salt. Stir a few times to combine and break up any clumps.
- Add 1 1/4 cups of room-temperature milk, 2 tablespoons of melted butter, and 1 tablespoon of honey into the dry ingredients.
- Mix everything together until a thick, slightly sticky dough forms, about 1 to 2 minutes of stirring. Stop mixing as soon as the flour disappears into the dough.
- Scrape the entire dough into the prepared loaf pan and gently press the dough into the pan, smoothing the top into a rough loaf shape.
- Optionally, brush the top with a little extra melted butter for a golden, shiny crust.
- Bake in the preheated oven for 30 to 35 minutes, until the top is deep golden brown and the bread sounds hollow when tapped. An instant-read thermometer inserted in the center should read 200 to 210 degrees Fahrenheit.
- Remove the pan from the oven and let the bread rest for 5 minutes in the pan.
- Turn the loaf out onto a wire rack or cutting board and allow it to cool for at least 10 minutes before slicing.