Raising Cane’s chicken recipe brings the beloved fast-casual chain’s signature crispy, juicy chicken right into your home kitchen. This copycat version captures that golden-fried exterior and tender meat that keeps customers coming back for more.
The secret lies in a simple brining technique and a perfectly seasoned breading that fries up to restaurant-quality crunch. If you’ve ever craved that specific Cane’s flavor profile at midnight, this recipe is your answer.
Why You’ll Love This Recipe
You get authentic, craveable chicken that tastes like the real thing without the drive-through line.
- Crispy golden exterior with juicy, tender meat inside
- Simple ingredient list you likely have at home
- Quick enough for weeknight dinners, impressive enough for guests
- Costs significantly less than ordering takeout multiple times
- Customize sauce and sides exactly how you want them
My Experience Making This Recipe
The first time I made this, I was skeptical that a home kitchen could replicate that specific Cane’s magic. Within minutes of dropping the first piece into hot oil, the aroma told me I was onto something real.
My family devoured it faster than I could fry the second batch, which honestly felt like a victory. The chicken stayed crispy even as it cooled, just like the original, and everyone asked for seconds.
What impressed me most was how forgiving the recipe is. You don’t need fancy equipment or technique, just good oil temperature and a little patience.
Recipe Overview
- Recipe Name: Raising Cane’s Copycat Chicken
- Servings: 4 servings
- Prep Time: 20 minutes
- Cook Time: 25 minutes
- Total Time: 45 minutes plus 2 hours brining
- Course: Main
- Cuisine: American
- Calories per Serving: 385
Equipment You Will Need
- Large mixing bowl for brining
- Shallow dish for breading
- Meat thermometer
- Heavy-bottomed pot or deep skillet
- Deep-fry or candy thermometer
- Paper towels for draining
- Tongs for turning chicken
- Cutting board
Ingredients for Raising Cane’s Chicken
For the Brine
- 4 cups water
- 3 tablespoons kosher salt
- 2 tablespoons sugar
- 1 tablespoon garlic powder
- 1 tablespoon onion powder
- 1 teaspoon black pepper
- 1/2 teaspoon paprika
For the Chicken and Frying
- 2 pounds boneless, skinless chicken tenders
- 2 cups all-purpose flour
- 2 tablespoons garlic powder
- 2 tablespoons onion powder
- 1 tablespoon paprika
- 1 tablespoon black pepper
- 1 tablespoon kosher salt
- Vegetable oil for frying (about 2 quarts)
Ingredient Notes and Substitutions
- Chicken tenders are ideal because they cook evenly and stay moist. You can substitute boneless chicken breasts cut into strips, though they may be slightly drier.
- Kosher salt dissolves better than table salt in the brine and seasons more evenly. Sea salt works as a one-to-one swap with similar results.
- All-purpose flour creates the right texture and crunch. Bleached flour gives a whiter crust if appearance matters; unbleached works identically.
- Vegetable oil has a high smoke point needed for frying. Canola or peanut oil are direct replacements with the same outcome.
- Paprika adds subtle color and mild flavor. Smoked paprika intensifies the depth, while omitting it slightly weakens the spice profile.
How to Make Raising Cane’s Chicken
Step 1: Prepare the Brine Solution
Combine water, kosher salt, sugar, garlic powder, onion powder, black pepper, and paprika in a large mixing bowl. Stir until the salt and sugar dissolve completely, which takes about one minute of mixing.
Step 2: Brine the Chicken
Submerge the chicken tenders fully in the brine solution, ensuring no pieces float above the liquid. Cover and refrigerate for at least 2 hours, though overnight gives even better flavor penetration.
Step 3: Remove and Dry the Chicken
Take the chicken out of the brine and pat each piece thoroughly dry with paper towels. Moisture on the surface prevents proper crisping during frying, so this step matters more than you’d think.
Step 4: Mix the Breading
Combine flour, garlic powder, onion powder, paprika, black pepper, and kosher salt in a shallow dish. Mix with a fork until the seasonings are evenly distributed throughout the flour.
Step 5: Heat the Oil
Pour vegetable oil into your pot or deep skillet and heat to 350 degrees Fahrenheit. Use a thermometer rather than guessing, since temperature makes the difference between golden-crispy and greasy.
Step 6: Coat the Chicken
Working with one piece at a time, dredge each chicken tender in the seasoned flour, coating all sides evenly. Shake off excess flour before moving to the next piece; too much buildup creates thick, doughy spots.
Step 7: Fry the Chicken
Carefully lower the breaded chicken into the hot oil, frying 4 to 5 pieces at a time without crowding. Overcrowding drops oil temperature and creates soggy, undercooked chicken instead of the crispy exterior you want.
Step 8: Cook Until Golden
Fry for 12 to 15 minutes, turning halfway through, until the coating reaches a deep golden-brown color. The internal temperature should hit 165 degrees Fahrenheit when checked with a meat thermometer.
Step 9: Drain and Rest
Transfer cooked chicken to a paper-towel-lined plate to drain excess oil. Let it rest for 2 minutes before serving, which helps the coating set and keeps the meat juicier.
Pro Tip: Don’t skip the brining step. It seasons the chicken all the way through and keeps the meat impossibly moist even after frying.
Tips for the Best Raising Cane’s Chicken
- Maintain consistent oil temperature throughout cooking. If it dips below 340 degrees, your chicken absorbs too much oil and tastes greasy rather than crispy.
- Use fresh oil or oil you’ve filtered previously. Repeatedly used oil darkens and picks up burnt flavors that muddy the chicken’s taste.
- Don’t rush the brining time. Two hours is the minimum, but 8 to 12 hours in the refrigerator delivers noticeably juicier results.
- Double-coat smaller pieces if you prefer extra crunch. Dip them in flour again before frying for a thicker crust that rivals the real thing.
- Serve immediately with your favorite dipping sauce. The chicken stays best when eaten within an hour of frying, while the crust is still at its crispiest.
Common Mistakes to Avoid
- Skipping the brining step speeds things up but leaves the chicken dry and one-dimensional in flavor. The brine truly transforms the texture and taste.
- Overcrowding the pot lowers oil temperature too much, resulting in soggy, oil-logged chicken. Fry in smaller batches if needed.
- Using wet chicken straight from the brine ruins the crust. Dry it thoroughly or moisture creates steam that prevents the coating from crisping.
- Frying at temperatures below 340 degrees makes the breading absorb too much oil and tastes heavy. Invest in a thermometer and use it.
Serving Suggestions
Serve this chicken with classic sides that let the main dish shine. The crispy exterior pairs beautifully with cool, fresh accompaniments.
- Creamy coleslaw with a tangy vinegar dressing cuts through the richness perfectly
- Crispy French fries with sea salt and your favorite seasoning
- Buttered corn on the cob or creamed corn for comfort food vibes
- Fresh green salad with a bright lemon vinaigrette to balance the fried element
- Mac and cheese made with sharp cheddar for an indulgent pairing
Variations to Try
- Spicy version: Add cayenne pepper, hot sauce powder, and a pinch of ghost pepper to the breading for serious heat that builds with each bite.
- Herb-crusted chicken: Mix dried oregano, thyme, and basil into the flour breading for an Italian-inspired twist with herbaceous notes.
- Lemon pepper crust: Incorporate lemon zest and cracked black pepper into the breading for bright citrus flavor that cuts through the richness.
- Buttermilk-soaked version: Replace the brine with a buttermilk soak for a tangier, slightly softer crust that some people prefer.
- Gluten-free option: Substitute cornstarch mixed with almond flour for all-purpose flour to create a crispy crust without gluten.
Dietary Adaptations
- Gluten-free: Use a one-to-one gluten-free flour blend in place of all-purpose flour, or mix cornstarch with rice flour for crispiness without compromise.
- Dairy-free: The recipe contains no dairy, so it’s naturally compliant if you avoid creamy dipping sauces.
- Lower-carb or keto: Replace flour with a mix of crushed pork rinds and almond flour for similar crispiness with minimal carbs, though the texture shifts slightly.
- Vegetarian: Substitute chicken tenders with pressed tofu or cauliflower florets cut into similar sizes and follow the same breading and frying process.
Storage and Reheating
Refrigerator
Store cooked chicken in an airtight container for up to 3 days. The crust softens slightly over time, but the chicken itself stays safe and edible.
- Keep chicken in a single layer rather than stacked to minimize moisture and maintain texture
- Store dipping sauce separately to prevent the coating from getting soggy
Freezer
Freeze cooked chicken in a freezer bag or airtight container for up to 3 months. It thaws and reheats better than you’d expect from fried food.
- Flash-freeze pieces on a baking sheet before bagging to prevent clumping
- Thaw overnight in the refrigerator before reheating for best results
Reheating
The oven or air fryer restores crispiness far better than the microwave. Microwave will make the crust rubbery and the chicken dry.
- Oven: Place on a baking sheet and heat uncovered at 375 degrees for 10 to 12 minutes until warmed through
- Air fryer: Heat at 350 degrees for 5 to 7 minutes for nearly perfect crust restoration
Nutrition Information
| Nutrient | Amount |
|---|---|
| Calories | 385 |
| Total Fat | 18g |
| Saturated Fat | 4g |
| Carbohydrates | 22g |
| Fiber | 0g |
| Sugar | 1g |
| Protein | 38g |
| Sodium | 680mg |
| Cholesterol | 95mg |
These values assume standard portions using the ingredients listed. Actual nutrition varies based on oil absorption during frying and specific brand variations in ingredients.
Frequently Asked Questions
Can I Use Boneless Chicken Breasts Instead of Tenders?
Yes, but slice them into tender-sized pieces first. Whole breasts cook unevenly and may dry out before the coating fully crisps.
How Long Can I Brine the Chicken?
Overnight or up to 24 hours is fine and actually improves flavor. Beyond 24 hours, the salt makes the meat mushy.
What’s the Best Oil for Frying?
Vegetable, canola, or peanut oil all work equally well. Choose whichever has the best smoke point and is most available in your kitchen.
Why Does My Chicken Come Out Soggy?
Most commonly, the oil temperature is too low or you’re frying too many pieces at once. Both situations cause oil absorption instead of moisture sealing.
Can I Make This Recipe Without Deep Frying?
Air frying at 400 degrees for 12 minutes produces surprisingly good results, though the crust won’t be quite as thick. Baking doesn’t replicate the texture properly.
Final Thoughts
Making Raising Cane’s chicken at home delivers that craveable fast-casual experience without leaving your kitchen. The simple brining and seasoning approach proves that restaurant food doesn’t require secret ingredients or complex techniques.
Your family will request this recipe regularly once they taste it, and you’ll enjoy the cost savings compared to repeated takeout orders. Give this copycat version a try this week and discover why this chain has such a devoted following.
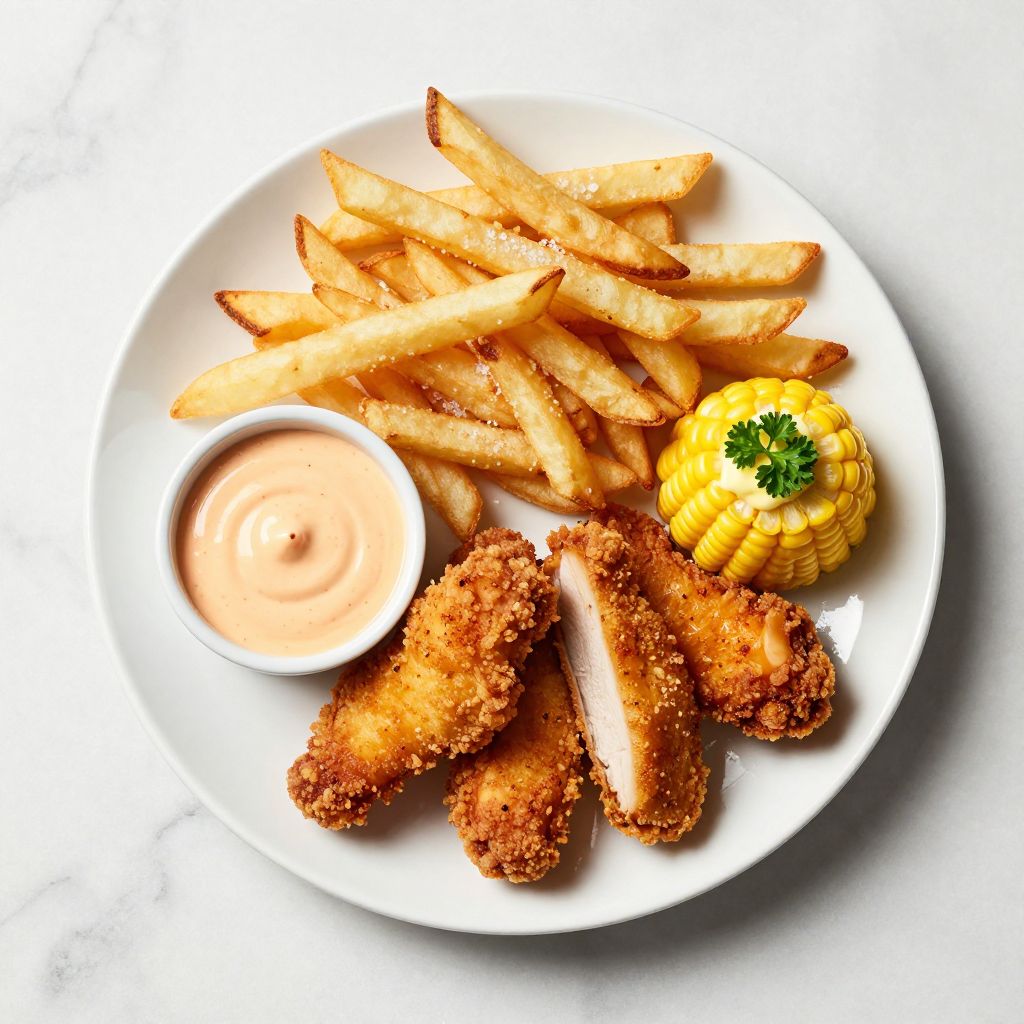
Raising Cane's Copycat Chicken
Ingredients
Equipment
Method
- Combine water, kosher salt, sugar, garlic powder, onion powder, black pepper, and paprika in a large mixing bowl. Stir until salt and sugar dissolve completely, about one minute.
- Submerge chicken tenders fully in the brine solution. Cover and refrigerate for at least 2 hours, preferably overnight for best flavor.
- Remove chicken from brine and pat each piece thoroughly dry with paper towels.
- In a shallow dish, combine flour, garlic powder, onion powder, paprika, black pepper, and kosher salt. Mix evenly.
- Pour vegetable oil into a heavy-bottomed pot or deep skillet; heat to 350 degrees Fahrenheit using a deep-fry thermometer.
- Dredge each chicken tender in the seasoned flour, coating all sides evenly. Shake off excess flour.
- Carefully lower the breaded chicken into the hot oil, frying 4 to 5 pieces at a time without crowding.
- Fry for 12 to 15 minutes, turning halfway through, until coating is deep golden-brown and internal temperature reaches 165 degrees Fahrenheit.
- Transfer cooked chicken to a paper-towel-lined plate to drain excess oil. Let rest for 2 minutes before serving.