Old Fashioned Fresh Apple Cake is a rustic, moist dessert that celebrates fresh apples in every bite. This homemade cake combines tender crumb with chunks of tart apple and warm spices that transport you straight to autumn comfort.
If you love the simplicity of vintage desserts that taste like they came from a grandmother’s kitchen, this recipe delivers exactly that. Let’s explore how to bake this timeless cake from scratch.
Why You’ll Love This Recipe
This cake wins hearts because it requires basic pantry ingredients and delivers incredible flavor with minimal fuss. The fresh apples keep the cake naturally moist, so you skip the extra oil or frosting.
- Uses fresh apples instead of applesauce for bright, authentic flavor
- Simple one-bowl mixing method saves cleanup and stress
- Naturally moist crumb that stays tender for days
- Warm spices like cinnamon and nutmeg add cozy depth
- Works for weeknight desserts or casual entertaining
My Experience Making This Recipe
The first time I baked this cake, my kitchen filled with the smell of cinnamon and caramelizing apples within minutes. My family circled the cooling rack like hungry birds, and by evening, half the cake had vanished.
What struck me most was how forgiving the recipe feels. I’ve made it with Granny Smith apples, Honeycrisp, and even a mix of whatever I had on hand, and every version turned out golden and tender. The texture stays moist for three days sitting on the counter, which makes it perfect for busy weeks.
I serve it plain or with a drizzle of glaze, and honestly, the cake shines either way. Friends always ask if I used a box mix because they can’t believe something this good comes from scratch.
Recipe Overview
- Recipe Name: Old Fashioned Fresh Apple Cake
- Servings: 12 servings
- Prep Time: 15 minutes
- Cook Time: 50 minutes
- Total Time: 65 minutes
- Course: Dessert
- Cuisine: American
- Calories per Serving: 285 calories
Equipment You Will Need
- 9-inch round cake pan or 8×8-inch square baking pan
- Parchment paper or cooking spray
- Large mixing bowl
- Medium mixing bowl
- Whisk
- Wooden spoon or spatula
- Measuring cups and spoons
- Vegetable peeler or knife
- Cutting board
- Toothpick or cake tester
- Cooling rack
Ingredients for Old Fashioned Fresh Apple Cake
- All-purpose flour, 2 cups
- Granulated sugar, 1 3/4 cups
- Vegetable oil, 1/2 cup
- Large eggs, 2 room temperature
- Vanilla extract, 1 1/2 teaspoons
- Baking soda, 1 teaspoon
- Baking powder, 1/2 teaspoon
- Ground cinnamon, 1 1/2 teaspoons
- Ground nutmeg, 1/4 teaspoon
- Sea salt, 1/2 teaspoon
- Fresh apples, 3 medium (about 1 1/2 pounds), peeled, cored, and diced
- Hot water, 1/4 cup
Ingredient Notes and Substitutions
- Fresh apples: Tart varieties like Granny Smith hold their shape and provide bright flavor that cuts through the sweet cake. If using sweeter apples like Gala or Fuji, reduce sugar by 2 tablespoons to balance the cake.
- Vegetable oil: Oil keeps the cake moist and tender longer than butter. You can substitute with melted coconut oil or light olive oil, though the flavor will shift slightly.
- Baking soda: This reacts with the acidic apples to create lift and ensure a tender crumb. You cannot replace it with baking powder alone without affecting texture.
- Ground cinnamon and nutmeg: These warm spices anchor the apple flavor and add cozy depth. If you prefer less spice intensity, reduce by half, or swap nutmeg for allspice.
- All-purpose flour: You can use cake flour for an even softer crumb, but reduce the amount to 1 3/4 cups to avoid a dense cake.
How to Make Old Fashioned Fresh Apple Cake
Step 1: Preheat and Prepare the Pan
Heat your oven to 350 degrees Fahrenheit and position a rack in the center. Line a 9-inch round or 8×8-inch square pan with parchment paper, or spray it generously with cooking spray.
Step 2: Mix the Dry Ingredients
In a large mixing bowl, whisk together the flour, baking soda, baking powder, cinnamon, nutmeg, and salt. This distributes the leavening agents and spices evenly throughout the batter, so you get consistent lift and flavor in every slice.
Step 3: Prepare the Apples
Peel, core, and dice the apples into roughly 1/2-inch pieces while you have the dry ingredients mixed. Slightly smaller pieces distribute the apple flavor more evenly and soften faster during baking.
Step 4: Combine the Wet Ingredients
In a separate medium bowl, whisk together the oil, eggs, and vanilla extract until the mixture is smooth and slightly frothy. The vigorous whisking helps incorporate air, which contributes to a lighter, more tender crumb.
Step 5: Create the Batter
Pour the wet mixture into the dry ingredients and fold together gently with a spatula until just combined. Overmixing develops gluten and makes the cake tough, so stop as soon as you see no flour streaks.
Step 6: Add the Apples and Hot Water
Fold the diced apples into the batter along with the hot water. The hot water loosens the batter slightly and helps the apples cook through evenly during baking, preventing dry spots around the apple chunks.
Step 7: Pour and Spread the Batter
Transfer the batter into the prepared pan and smooth the top with a spatula. Make sure the batter fills the corners and the surface is level so the cake bakes evenly.
Step 8: Bake Until Golden
Bake for 48 to 55 minutes, until a toothpick inserted in the center comes out with just a few moist crumbs, not wet batter. The cake will rise slightly and turn light golden brown on top; this is your visual cue that it’s done.
Step 9: Cool in the Pan
Let the cake rest in the pan on a cooling rack for 15 minutes. This resting time allows the crumb to set and makes the cake sturdy enough to turn out without crumbling.
Step 10: Turn Out and Cool Completely
Run a thin knife around the edges of the pan, then place a cooling rack on top and invert the cake onto it. Remove the parchment paper and let the cake cool to room temperature, about 1 hour, before slicing or glazing.
Pro Tip: Dice your apples as close to mixing time as possible to prevent browning, and toss them lightly in a teaspoon of lemon juice if you’re preparing them ahead to maintain their bright color and flavor.
Tips for the Best Old Fashioned Fresh Apple Cake
- Use apples at room temperature rather than cold from the fridge; room temperature apples incorporate into the batter more smoothly and bake more evenly.
- Don’t skip the hot water. It might seem odd, but it keeps the cake moist and prevents dense pockets around the apple pieces.
- Measure your flour by spooning it into the measuring cup and leveling off, not by scooping directly from the bag, which compacts the flour and can make the cake dry.
- Bake on the center oven rack and avoid opening the oven door in the first 35 minutes to prevent the cake from sinking in the middle.
- Test for doneness starting at 48 minutes; ovens vary, and a few extra minutes can dry out the cake if you’re not careful.
- Store the completely cooled cake under a cake dome or in a covered container at room temperature to lock in moisture.
Common Mistakes to Avoid
- Overmixing the batter: Stirring too much develops gluten and creates a tough, dense cake instead of the tender crumb you want. Mix just until the dry and wet ingredients combine.
- Using cold eggs straight from the fridge: Cold eggs don’t blend smoothly into the batter and can result in lumps and uneven crumb. Set eggs out 30 minutes before baking.
- Chopping apples too small: Tiny apple pieces break down completely during baking and disappear into the crumb, leaving you with no apple texture. Aim for consistent 1/2-inch chunks.
- Skipping the hot water: Without it, the batter is too thick and dense, and the apples don’t have enough moisture around them to cook properly.
- Testing doneness too early: Checking the cake before 48 minutes lets heat escape and can result in a sunken center and raw interior.
Serving Suggestions
This cake tastes wonderful on its own, but a simple glaze or a scoop of vanilla ice cream takes it from everyday to special. Serve it at room temperature with a cup of coffee or tea for an afternoon treat, or as dessert after a casual dinner.
- Dust with powdered sugar just before serving for an elegant, simple finish
- Drizzle with a basic vanilla glaze made from powdered sugar, milk, and vanilla extract
- Serve alongside vanilla or cinnamon ice cream while the cake is still slightly warm
- Pair with a dollop of whipped cream and a sprinkle of cinnamon for extra indulgence
- Pack slices in a lunchbox for a homemade snack that travels well
Variations to Try
- Spiced Cake with Walnuts: Add 1 cup of chopped walnuts to the batter before baking for crunch and a nutty depth that complements the apples beautifully.
- Caramel Drizzle Cake: After the cake cools, drizzle warm caramel sauce over the top to add richness and a hint of bitter-sweet flavor.
- Applesauce Swirl: Layer half the batter in the pan, add a swirl of unsweetened applesauce, then top with remaining batter for a marbled effect and intensified apple flavor.
- Brown Sugar Version: Replace half the granulated sugar with packed brown sugar for deeper molasses notes and a softer, chewier texture.
- Whole Wheat Apple Cake: Substitute up to 1 cup of the all-purpose flour with whole wheat pastry flour for a nuttier flavor and added fiber.
Dietary Adaptations
- Gluten-Free: Replace all-purpose flour with a one-to-one gluten-free flour blend and add 1/4 teaspoon of xanthan gum to improve structure; the texture will be slightly softer but still moist.
- Dairy-Free: This recipe contains no dairy, so it’s naturally dairy-free as written; just confirm your baking soda and powder are certified dairy-free.
- Vegan: Replace the 2 eggs with a flax egg (2 tablespoons ground flaxseed mixed with 5 tablespoons water, let sit 5 minutes) or applesauce; the cake will be slightly less fluffy but still tender.
- Low-Carb or Keto: Swap flour for almond flour and use a low-carb sweetener like erythritol in a one-to-one ratio; reduce baking soda to 1/2 teaspoon and expect a denser, more almond-forward crumb.
Storage and Reheating
Refrigerator
Store the completely cooled cake in an airtight container or cover it tightly with plastic wrap. It keeps fresh for up to 5 days in the refrigerator.
- Let chilled slices come to room temperature for 20 minutes before eating to restore tenderness
- Wrap individual slices in plastic wrap for grab-and-go portions
Freezer
Wrap the entire cake or individual slices tightly in plastic wrap, then place in a freezer-safe container or bag. Frozen cake keeps for up to 3 months.
- Thaw at room temperature for 2 to 3 hours before serving
- Do not freeze a cake that has already been frosted or glazed, as the glaze may crack
Reheating
If you prefer warm cake, wrap a slice in foil and heat it in a 300-degree oven for about 10 minutes. You can also microwave a slice on a microwave-safe plate for 20 to 30 seconds, though the oven method preserves texture better.
- Never reheat the whole cake in the microwave, as it will dry out unevenly
- A gently warmed slice tastes wonderful with vanilla ice cream
Nutrition Information
| Nutrient | Amount |
|---|---|
| Calories | 285 |
| Total Fat | 11g |
| Saturated Fat | 1.5g |
| Carbohydrates | 45g |
| Fiber | 1g |
| Sugar | 32g |
| Protein | 3g |
| Sodium | 250mg |
| Cholesterol | 32mg |
The nutrition values above are estimates based on a 12-serving yield using standard ingredients. Actual values may vary based on specific brands and preparation methods.
Frequently Asked Questions
Can I Make This Cake Without Eggs?
Yes, replace each egg with a flax egg or 1/4 cup of unsweetened applesauce. The texture will be slightly less fluffy but still moist and tender thanks to the oil and apples in the recipe.
Can I Prepare This Cake the Day Before?
Absolutely. Bake and cool the cake completely, then store it in an airtight container at room temperature or in the refrigerator. It actually tastes even better the next day as the flavors meld.
How Should I Store Leftover Slices?
Wrap individual slices tightly in plastic wrap and keep them at room temperature for 2 days, or refrigerate for up to 5 days. Freezing works great too for up to 3 months.
What If My Cake Turns Out Dense?
A dense cake usually results from overmixing the batter or using too much flour. Next time, measure flour by spooning and leveling, and fold the wet and dry ingredients just until no flour streaks remain.
Can I Use Apple Juice Instead of Water?
You can, though it will add sweetness and make the cake less balanced. If you do, reduce the granulated sugar by 2 tablespoons to compensate for the added sweetness from the juice.
Is There a Way to Make This Cake More Moist?
The cake is naturally moist thanks to the fresh apples and oil. If you find your version dry, ensure you’re not overbaking it; test for doneness starting at 48 minutes and pull it out as soon as a toothpick shows just a few moist crumbs.
Final Thoughts
This Old Fashioned Fresh Apple Cake proves that simple recipes deliver the best results when you use quality ingredients and follow a few key techniques. The warmth of cinnamon and nutmeg paired with fresh apples creates a cake that tastes like home, no matter where you’re baking it.
Give this recipe a try this week and watch it become a regular request from family and friends. Your kitchen will smell amazing, and you’ll have a tender, moist cake that’s gone in days.
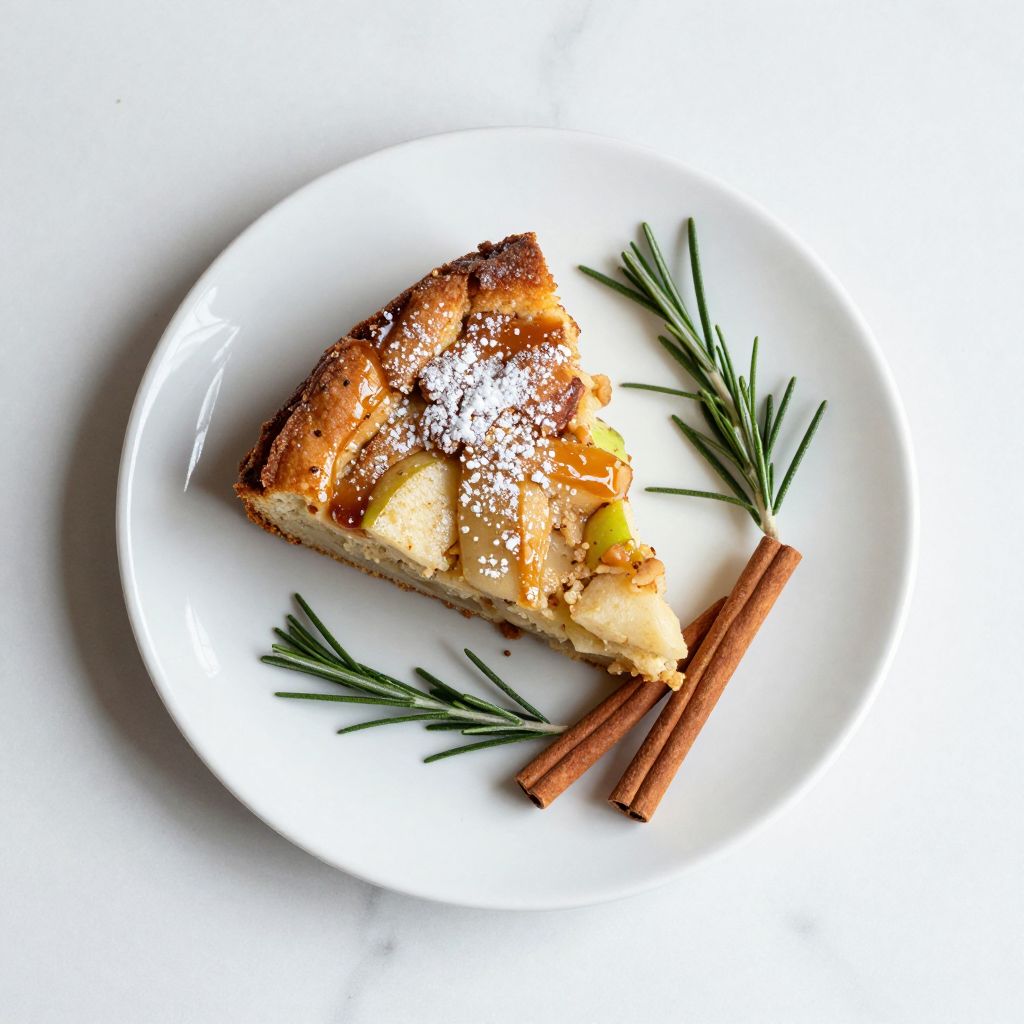
Old Fashioned Fresh Apple Cake
Ingredients
Equipment
Method
- Preheat your oven to 350 degrees Fahrenheit and position a rack in the center. Line a 9-inch round or 8x8-inch square pan with parchment paper, or spray it generously with cooking spray.
- In a large mixing bowl, whisk together the all-purpose flour, baking soda, baking powder, ground cinnamon, ground nutmeg, and sea salt until evenly distributed.
- Peel, core, and dice the fresh apples into roughly 1/2-inch pieces.
- In a medium mixing bowl, whisk together the vegetable oil, large eggs, and vanilla extract until smooth and slightly frothy.
- Pour the wet mixture into the dry ingredients and gently fold together with a spatula until just combined, stopping when no flour streaks remain.
- Fold the diced apples and hot water into the batter evenly, taking care not to overmix.
- Transfer the batter into the prepared pan and smooth the top with a spatula, ensuring the batter fills the corners evenly.
- Bake the cake for 48 to 55 minutes, or until a toothpick inserted in the center comes out with just a few moist crumbs.
- Allow the cake to rest in the pan on a cooling rack for 15 minutes to set the crumb.
- Run a thin knife around the edges, invert the cake onto a cooling rack, remove parchment paper, and let cool completely for about 1 hour before slicing or glazing.