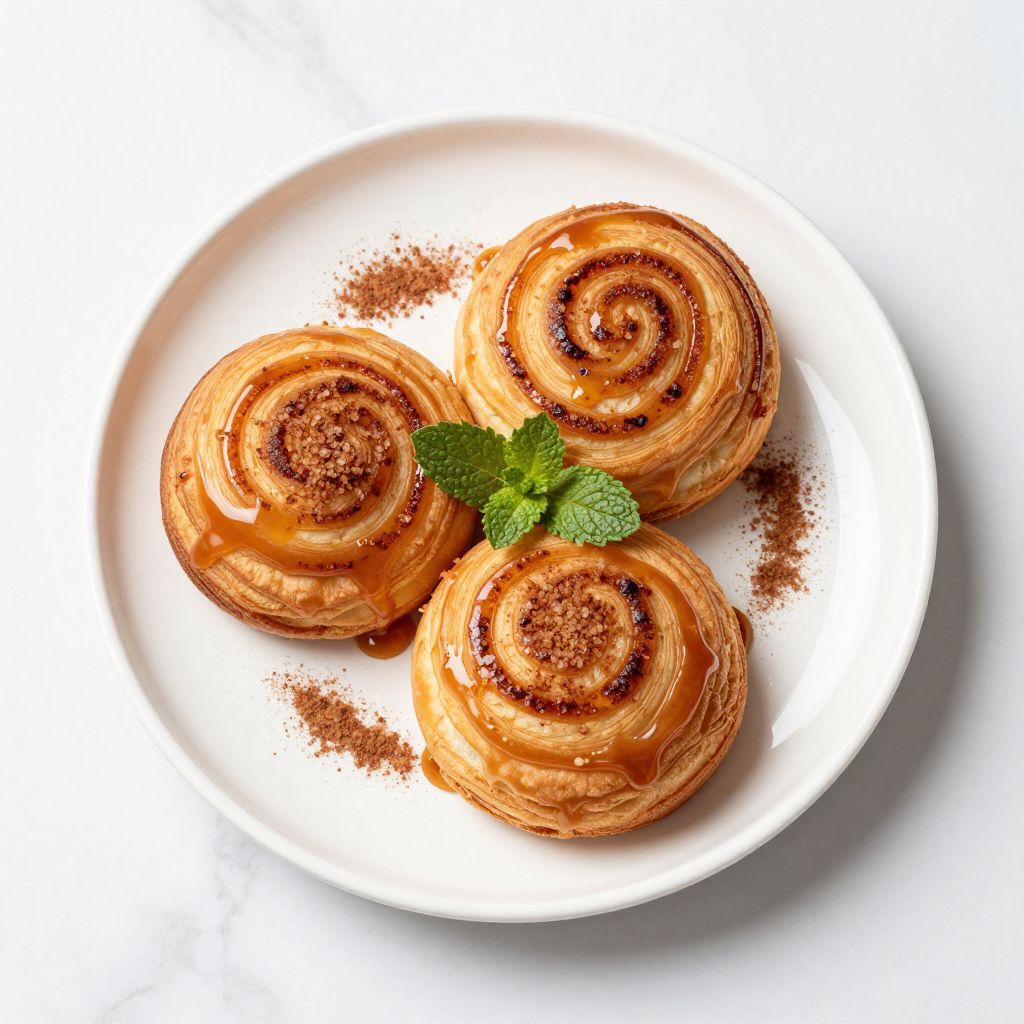
Morning bun recipe delivers buttery, flaky pastry with swirls of cinnamon sugar and a sticky caramel glaze that makes breakfast feel like a treat. These tender rolls are the answer when you crave that bakery-quality pastry at home without the bakery price tag.
What makes these buns special is the laminated dough, which creates those gorgeous layers everyone loves. The combination of warm spices and caramel keeps people coming back for seconds, and yes, thirds.
Why You’ll Love This Recipe
This morning bun recipe strikes the perfect balance between impressive technique and achievable results for home bakers.
- Buttery, flaky layers that rival any professional bakery
- Warm cinnamon-sugar filling with a sticky caramel glaze on top
- Make-ahead friendly: prepare the night before and bake fresh in the morning
- Freezer-friendly for grab-and-go breakfasts throughout the month
- Impresses guests while tasting indulgent and comforting
My Experience Making This Recipe
The first time I made these, I was nervous about the lamination process, but honestly, it’s far simpler than it sounds. Watching the dough transform into those perfect spiral layers gave me genuine baking satisfaction.
When I pulled the first batch from the oven, the smell alone had my entire family awake and waiting in the kitchen. The caramel glaze set to a perfect sticky finish while the pastry stayed crispy on the outside and tender within.
I’ve made them dozens of times since, sometimes prepping the dough the night before and baking fresh in the morning. Every single time, people ask for the recipe, and I love knowing I can hand them something that feels fancy but isn’t overly complicated.
Recipe Overview
- Recipe Name: Morning Bun Recipe
- Servings: 12 buns
- Prep Time: 30 minutes plus 4 hours chilling
- Cook Time: 20 minutes
- Total Time: 4 hours 50 minutes
- Course: Breakfast or Dessert
- Cuisine: French-inspired
- Calories per Serving: 285
Equipment You Will Need
- Large mixing bowl
- Stand mixer with dough hook attachment (or mix by hand)
- Rolling pin
- Bench scraper or sharp knife
- 9×13 inch baking dish
- Parchment paper
- Measuring cups and spoons
- Small saucepan for caramel
- Pastry brush
- Oven thermometer (optional but helpful)
Ingredients for Morning Bun Recipe
For the Dough
- 2 1/2 cups all-purpose flour
- 1/2 teaspoon salt
- 2 tablespoons granulated sugar
- 1 teaspoon instant yeast
- 1 cup whole milk, warmed to 110 degrees F
- 3 tablespoons unsalted butter, melted
- 1 cup cold unsalted butter, cubed for lamination
For the Filling and Topping
- 1/4 cup granulated sugar
- 2 tablespoons ground cinnamon
- 1/2 cup unsalted butter, softened
For the Caramel Glaze
- 1/2 cup unsalted butter
- 1 cup light brown sugar, packed
- 1/4 cup heavy cream
- 1/2 teaspoon vanilla extract
- 1/4 teaspoon sea salt
Ingredient Notes and Substitutions
- All-purpose flour: Provides structure and gluten development for tender layers. Bread flour creates tougher buns, while pastry flour results in flakier but more delicate dough.
- Instant yeast: Works faster than active dry yeast and requires no blooming. Substitute 3/4 teaspoon active dry yeast if needed, but allow a bit more rising time.
- Cold butter for lamination: The temperature difference between cold butter and warm dough creates distinct layers. Room-temperature butter will blend in rather than create separation.
- Ground cinnamon: Adds warmth and spice to the filling. You can reduce to 1 tablespoon if you prefer subtle flavor, or swap half for pumpkin pie spice for fall variation.
- Heavy cream in glaze: Adds richness and smooth texture to the caramel. Whole milk works in a pinch, though the glaze becomes slightly thinner and less luxurious.
How to Make Morning Bun Recipe
Step 1: Create Your Base Dough
Mix flour, salt, sugar, and yeast in a large bowl. The salt stops yeast activity, keeping fermentation controlled, while the small amount of sugar feeds the yeast without making the dough sweet.
Pour warm milk and melted butter into the dry ingredients. Mix with a stand mixer on low speed for 2 minutes until shaggy dough forms, then increase speed to medium and knead for 5 minutes until smooth.
Step 2: Rest the Dough
Transfer dough to a lightly floured surface and shape into a ball. Cover with plastic wrap and let rest at room temperature for 30 minutes.
This short rest relaxes the gluten and makes rolling easier later. You’re not trying to get much rise at this stage, just enough to relax the dough.
Step 3: Laminate the Dough
Roll the rested dough into a 10×16 inch rectangle on a floured surface. Spread the cold cubed butter evenly over two-thirds of the rectangle, leaving one-third uncovered on the left side.
This is the key step for creating layers. The butter must be cold so it stays separate from the dough rather than blending in.
Step 4: Complete the Fold Sequence
Fold the uncovered third of dough (without butter) onto the middle third, then fold the right third (with all the butter) over both layers. You now have three layers with butter enclosed.
Rotate the dough 90 degrees so the seam faces you. Roll gently into a 10×16 inch rectangle again, then repeat the three-fold one more time for a total of two folds.
Step 5: Chill Between Folds
Wrap the folded dough tightly in plastic wrap and refrigerate for at least 1 hour. The butter needs to firm up between folds so the layers stay distinct and don’t merge together.
This waiting period feels long, but it’s absolutely necessary for proper lamination. Cold butter creates separation; warm butter creates dense, greasy dough.
Step 6: Shape the Buns
Remove dough from refrigerator and roll into a 12×16 inch rectangle. Mix softened butter, cinnamon, and sugar in a small bowl until you have a paste.
Spread the cinnamon-butter mixture evenly across the entire rectangle. Starting from the long side closest to you, roll the dough tightly into a log, keeping the tension even as you roll.
Step 7: Cut and Arrange
Slice the log into 12 equal pieces using a sharp, lightly floured knife. Wipe the knife between cuts to ensure clean, even pieces.
Make the caramel glaze while buns are being shaped. In a small saucepan, combine butter, brown sugar, and cream over medium heat, stirring occasionally until everything melts and combines.
Step 8: Prepare the Pan and Final Rise
Pour the caramel glaze evenly into a 9×13 inch baking dish. Arrange the shaped buns cut-side up on top of the caramel, leaving small gaps between each bun.
Cover loosely with plastic wrap and let rise at room temperature for 2 to 3 hours, or until the buns have puffed up and look nearly doubled. You can also refrigerate overnight and bake the next morning, which actually improves flavor.
Step 9: Bake Until Golden
Preheat oven to 375 degrees F. Remove plastic wrap from buns and bake for 18 to 22 minutes, until the tops are deep golden brown and the caramel bubbles around the edges.
Don’t overbake or the caramel hardens. The buns should feel soft to the touch and smell intensely buttery and caramel-sweet when done.
Step 10: Cool and Serve
Let buns cool in the pan for 5 minutes. Run a thin knife around the edges, then carefully invert the entire pan onto a serving platter so the caramel-coated side faces up.
Serve warm or at room temperature. The caramel glaze sets slightly as it cools, creating that signature sticky, clingy texture that makes these buns so irresistible.
Pro Tip: Keep your lamination butter cold by chilling the dough between folds, and you’ll get those beautiful, distinct layers that make morning buns special.
Tips for the Best Morning Bun Recipe
- Use a kitchen thermometer to ensure milk is exactly 110 degrees F, not hotter. Hot milk kills yeast; cold milk slows fermentation to a crawl.
- Don’t rush the lamination process. Those folds require chilling, and skipping rest time results in a dense, greasy texture rather than flaky layers.
- Cut buns with a sharp, thin-bladed knife or dental floss for clean edges that won’t seal during baking and trap steam.
- If preparing ahead, shape buns, cover tightly, and refrigerate up to 12 hours before baking. Cold dough bakes more evenly and develops better flavor.
- Watch the oven closely during the last few minutes. Every oven runs differently, and caramel can go from perfect to burnt quickly.
- Let buns cool in the pan just long enough to set slightly before inverting. Too long and the caramel hardens and becomes difficult to flip.
Common Mistakes to Avoid
- Warm butter during lamination: If butter blends into the dough instead of staying in distinct layers, you lose the flaky texture and end up with dense, heavy buns.
- Skipping or rushing the chilling steps: Chilling allows the dough to relax and the butter to firm up, creating proper lamination. Without it, layers don’t form properly.
- Over-rolling the dough: Aggressive rolling deflates the air bubbles you’ve built up. Use gentle, even pressure and let the dough relax if it resists.
- Baking at too high a temperature: The exterior browns before the interior bakes through, leaving gummy, underbaked centers.
- Letting buns over-proof: If they rise too long, the structure becomes weak and buns spread flat instead of rising upward in the pan.
Serving Suggestions
Morning buns are stunning on their own, but pairing them with complementary flavors makes breakfast feel like a special occasion. Serve warm for the best caramel-sticky experience.
- Black coffee or espresso cuts through the sweetness and enhances the buttery, toasty flavors
- Vanilla yogurt alongside adds cool creaminess that contrasts with warm caramel
- Fresh fruit such as sliced strawberries or raspberries provides brightness and lightness
- Scrambled eggs or savory breakfast meat balance the sweetness and create a complete meal
- Whipped cream or crème fraiche adds richness if you’re treating these as a dessert
Variations to Try
- Brown butter and pecan: Brown the butter before laminating and add chopped toasted pecans to the cinnamon filling for nuttier, deeper flavor and nice crunch.
- Cardamom and orange: Replace half the cinnamon with ground cardamom and add zest of one orange to the filling for warm, sophisticated spice.
- Maple and bourbon: Add 2 tablespoons bourbon and 1 tablespoon maple syrup to the caramel glaze for complex sweetness and subtle boozy undertone.
- Chocolate-hazelnut: Spread a thin layer of chocolate-hazelnut spread alongside the cinnamon-butter mixture for those who love chocolate with breakfast.
- Salted caramel with fleur de sel: Top baked buns with a sprinkle of fleur de sel right after inverting them for a sweet-salty contrast.
Dietary Adaptations
- Gluten-free: Use a high-quality gluten-free all-purpose flour blend with xanthan gum included, and chill the dough longer between folds because it’s more fragile. The texture will be slightly less flaky.
- Dairy-free: Substitute dairy butter with vegan butter (must be cold-pressed and high-fat) and use unsweetened oat milk warmed to 110 degrees F. The result is slightly less rich but still delicious.
- Vegan: Use vegan butter and oat milk as above, and replace the heavy cream in caramel with full-fat canned coconut milk for similar richness.
- Low-carb or keto: This recipe is high in carbs and difficult to adapt successfully. Consider swapping for a keto-friendly laminated dough using almond flour and psyllium husk if you want to experiment.
Storage and Reheating
Refrigerator
Store baked morning buns in an airtight container for up to 3 days. The caramel keeps them moist, though they’re best eaten within the first 24 hours when texture is optimal.
- Cover tightly with plastic wrap or foil to prevent drying out
- Stack them gently with parchment between layers to prevent sticking
Freezer
Freeze baked buns in an airtight container for up to 1 month. They thaw beautifully and don’t significantly lose quality.
- Flash-freeze on a sheet pan before transferring to a freezer-safe container to prevent clumping
- Thaw at room temperature for 2 to 3 hours before reheating
Reheating
Warm buns in a 325-degree F oven for 8 to 10 minutes, covered loosely with foil to prevent over-browning. The microwave works in a pinch but makes them slightly less flaky.
- Don’t overheat or the caramel will become too runny and the pastry dry
- A toaster oven is ideal for reheating a single bun without heating your entire kitchen
Nutrition Information
| Nutrient | Amount |
|---|---|
| Calories | 285 |
| Total Fat | 18g |
| Saturated Fat | 11g |
| Carbohydrates | 32g |
| Fiber | 1g |
| Sugar | 18g |
| Protein | 4g |
| Sodium | 185mg |
| Cholesterol | 45mg |
Nutrition values are approximate and calculated for one bun from a batch of twelve. Individual results may vary based on ingredient brands and preparation methods.
Frequently Asked Questions
Can I prepare the dough ahead of time?
Yes, you can shape the buns and refrigerate them overnight before the final rise. This actually improves flavor because the cold fermentation develops better taste.
Just cover them tightly with plastic wrap and bake the next morning at room temperature or straight from the cold.
What if my dough tears during lamination?
A small tear is fine; just pinch it closed. If the tear is large and butter is exposed all over, chill the dough for 15 minutes and continue folding carefully.
The torn area may not be as flaky, but the bun will still taste delicious.
Why did my buns not rise properly?
Dead yeast, dough that was too cold, or not enough time during the final rise are the main culprits. Make sure yeast is fresh and within its expiration date.
Allow 2 to 3 hours for the final rise at room temperature, and the buns should nearly double in size before baking.
Can I use a food processor to make the dough?
Yes, a food processor works well for combining ingredients, but knead briefly by hand afterward to ensure proper gluten development. Over-processing creates tough dough.
Morning Bun Recipe
Ingredients
Equipment
Method
- Mix flour, salt, sugar, and yeast in a large bowl. The salt stops yeast activity, keeping fermentation controlled, while the small amount of sugar feeds the yeast without making the dough sweet.
- Pour warm milk and melted butter into the dry ingredients. Mix with a stand mixer on low speed for 2 minutes until shaggy dough forms, then increase speed to medium and knead for 5 minutes until smooth.
- Transfer dough to a lightly floured surface and shape into a ball. Cover with plastic wrap and let rest at room temperature for 30 minutes to relax gluten.
- Roll the rested dough into a 10x16 inch rectangle on a floured surface. Spread the cold cubed butter evenly over two-thirds of the rectangle, leaving one-third uncovered on the left side.
- Fold the uncovered third of dough onto the middle third, then fold the right third (with all the butter) over both layers. You now have three layers with butter enclosed.
- Rotate the dough 90 degrees so the seam faces you. Roll gently into a 10x16 inch rectangle again, then repeat the three-fold once more for a total of two folds.
- Wrap the folded dough tightly in plastic wrap and refrigerate for at least 1 hour to chill between folds.
- Remove dough from refrigerator and roll into a 12x16 inch rectangle. Mix softened butter, cinnamon, and sugar in a small bowl until you have a paste.
- Spread the cinnamon-butter mixture evenly across the entire rectangle. Starting from the long side closest to you, roll the dough tightly into a log, keeping even tension.
- Slice the log into 12 equal pieces using a sharp, lightly floured knife. Wipe the knife between cuts for clean edges.
- In a small saucepan, combine butter, brown sugar, heavy cream, vanilla extract, and sea salt over medium heat, stirring occasionally until everything melts and combines to make caramel glaze.
- Pour the caramel glaze evenly into a 9x13 inch baking dish. Arrange the shaped buns cut-side up on top of the caramel, leaving small gaps between each bun.
- Cover loosely with plastic wrap and let rise at room temperature for 2 to 3 hours, or until the buns have puffed up and look nearly doubled. Alternatively, refrigerate overnight and bake the next morning.
- Preheat oven to 375 degrees F. Remove plastic wrap from buns and bake for 18 to 22 minutes, until the tops are deep golden brown and the caramel bubbles around the edges.
- Let buns cool in the pan for 5 minutes. Run a thin knife around the edges, then carefully invert the entire pan onto a serving platter so the caramel-coated side faces up.
- Serve warm or at room temperature. The caramel glaze sets slightly as it cools, creating a sticky, clingy texture.