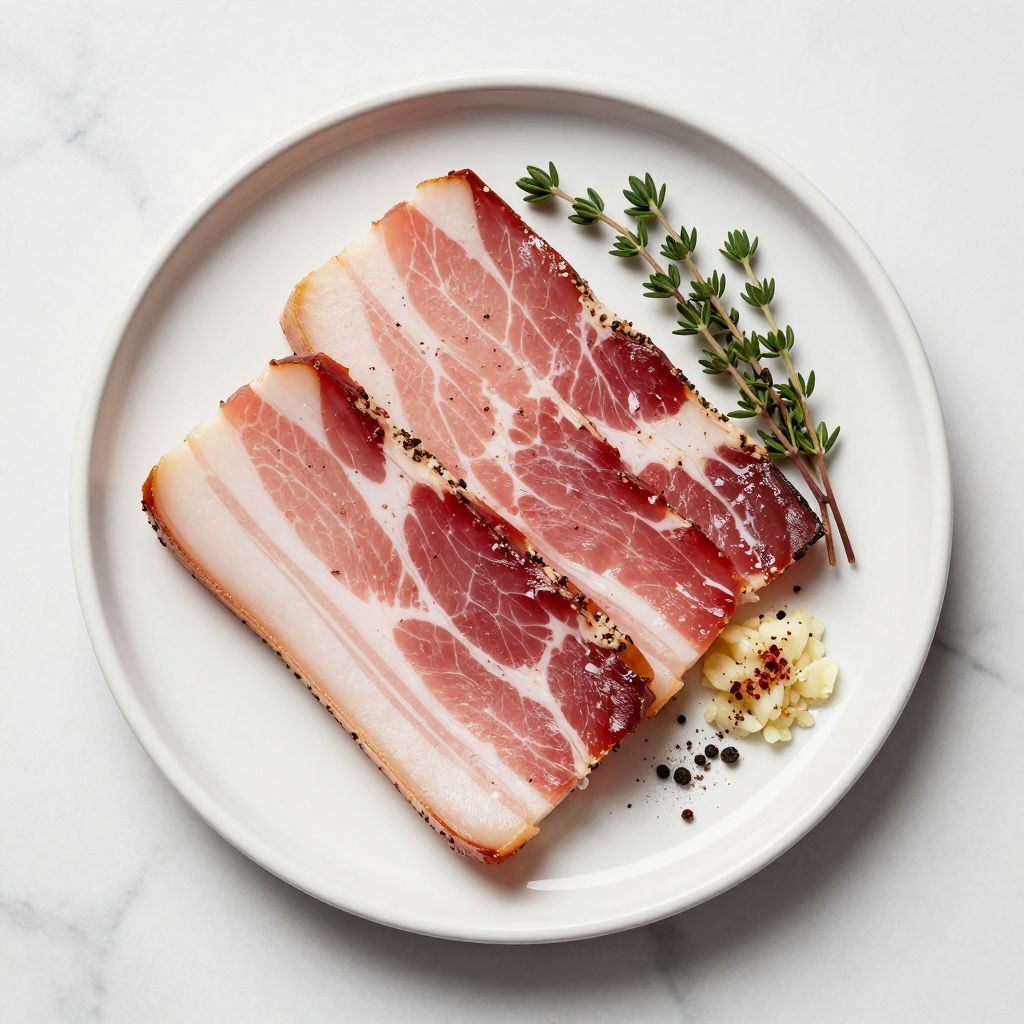
Guanciale is the crown jewel of Italian cured meats, and making it at home is far easier than you might think. This pork jowl delicacy brings unmatched richness to pasta carbonara, amatriciana, and countless other dishes. With just a few simple ingredients, some patience, and the right technique, you can craft restaurant-quality guanciale in your own kitchen.
The flavor profile delivers a perfect balance of savory pork, warm black pepper, and subtle aromatic spices. Once you taste homemade guanciale, the store-bought versions will never quite measure up again. Let me walk you through every step of this rewarding curing project.
Why You Will Love This Recipe
Making guanciale at home gives you complete control over quality and flavor. The process is surprisingly hands-off once you get started.
- Only 5 ingredients needed for authentic Italian results
- No special equipment required beyond a refrigerator and a place to hang
- Costs a fraction of what specialty shops charge
- Customizable spice blend to match your taste preferences
- Keeps for months when stored properly
My Experience Making This Recipe
The first time I cured guanciale, I was honestly nervous about the whole process. Curing meat felt like serious business, and I worried about everything that could go wrong.
When I finally sliced into that first batch after three weeks of waiting, the aroma hit me immediately. The fat had transformed into something silky and aromatic, while the meat had developed a deep, concentrated pork flavor.
I rendered some down for a quick carbonara that evening, and my kitchen smelled like a Roman trattoria. My family devoured every bite and asked when the next batch would be ready.
Recipe Overview
- Recipe Name: Homemade Guanciale
- Servings: Approximately 1.5 pounds finished product
- Prep Time: 30 minutes
- Cure Time: 7 days
- Dry Time: 2 to 3 weeks
- Total Time: 3 to 4 weeks
- Course: Charcuterie, Ingredient
- Cuisine: Italian
- Calories per Serving: 180 per 1 ounce serving
Equipment You Will Need
- Sharp boning knife or chef knife
- Kitchen scale with gram measurements
- Large glass or plastic container with lid
- Butcher twine
- Meat hook or S hook
- Cheesecloth
- Spray bottle with white wine or distilled water
- Cool, dark space for hanging with 60 to 70 percent humidity
Ingredients for Guanciale
- 2 pounds pork jowl, skin on, trimmed of glands
- 50 grams kosher salt (about 2.5 percent of meat weight)
- 3 grams pink curing salt (Instacure No. 1)
- 15 grams coarsely ground black pepper
- 5 grams fresh thyme leaves, roughly chopped
- 2 cloves garlic, minced (optional)
- 2 grams red pepper flakes (optional)
Ingredient Notes and Substitutions
- Pork jowl: This cut provides the essential fat to meat ratio that defines guanciale. Ask your butcher to source it, as most grocery stores do not stock it regularly.
- Kosher salt: The large flakes dissolve slowly and cure evenly. Do not substitute table salt, which will make the meat too salty.
- Pink curing salt: This prevents bacterial growth during the long curing process. You cannot substitute regular salt here as it serves a safety function.
- Black pepper: Coarse ground provides better texture and visual appeal. Pre-ground fine pepper works but lacks the same punch.
- Thyme: Adds an earthy, slightly floral note traditional to many versions. Rosemary or juniper berries offer nice alternatives.
How to Make Guanciale
Step 1: Prepare the Pork Jowl
Inspect your pork jowl and trim away any glands, which appear as small, firm nodules usually near the thicker end. Rinse the jowl under cold water and pat it completely dry with paper towels.
Removing excess moisture helps the cure penetrate evenly and prevents unwanted bacterial growth during the process.
Step 2: Mix the Cure
Combine the kosher salt, pink curing salt, black pepper, thyme, and any optional ingredients in a small bowl. Mix everything thoroughly so the curing salts distribute evenly throughout the spice blend.
Accurate measurement matters here because too little cure creates safety risks while too much makes the final product unpleasantly salty.
Step 3: Apply the Cure
Place the jowl on a clean work surface and rub the cure mixture firmly into every surface. Work the cure into any crevices and folds, making sure the entire piece gets coated.
The salt needs direct contact with the meat to draw out moisture and prevent spoilage, so be thorough.
Step 4: Refrigerate During the Cure Phase
Place the coated jowl in your container and cover it tightly. Refrigerate for 7 days, flipping the meat once daily and draining any liquid that accumulates.
This flipping ensures even curing and prevents one side from sitting in pooled liquid, which could affect texture.
Step 5: Rinse and Dry the Jowl
After 7 days, remove the jowl and rinse off all the cure under cold running water. Pat the meat completely dry, then let it sit uncovered in the refrigerator for 24 hours to form a tacky surface called the pellicle.
This pellicle helps smoke and seasonings adhere if you choose to smoke it, and it promotes even drying.
Step 6: Add Fresh Pepper Coating
Press additional coarsely ground black pepper onto all surfaces of the jowl. This outer coating adds flavor and creates the classic guanciale appearance.
Some traditional recipes also add additional thyme or fennel pollen at this stage for extra complexity.
Step 7: Prepare for Hanging
Pierce a hole through the thicker end of the jowl and thread butcher twine through it. Tie a secure loop for hanging, then wrap the entire piece loosely in cheesecloth.
The cheesecloth protects against dust and pests while still allowing crucial airflow around the meat.
Step 8: Hang and Dry the Guanciale
Hang the wrapped jowl in a cool space between 50 and 60 degrees Fahrenheit with 60 to 70 percent humidity. A basement, wine cellar, or even a dedicated curing chamber works well.
The guanciale needs 2 to 3 weeks to lose approximately 30 percent of its original weight, which concentrates flavor and develops the proper firm yet pliable texture.
Step 9: Monitor and Adjust
Check your guanciale every few days during the drying phase. If the surface feels too dry or develops hard spots, mist it lightly with white wine or water.
White mold is normal and safe, but green or black mold indicates a problem and the affected area should be cut away or the batch discarded.
Step 10: Test for Doneness
Press the guanciale firmly with your fingers after two weeks. It should feel firm on the outside but still give slightly when pressed, similar to a firm cheese.
Weigh the piece and compare it to the starting weight. When it has lost about 30 percent, your guanciale is ready to enjoy.
Pro Tip: Keep a curing log with the date, starting weight, and environmental conditions for each batch. This helps you replicate successes and troubleshoot any issues in future batches.
Tips for the Best Guanciale
- Source the highest quality pork jowl you can find, ideally from heritage breed pigs with good fat marbling.
- Weigh your salt using a kitchen scale rather than measuring by volume for consistent results every time.
- Keep humidity levels steady during drying to prevent case hardening, where the outside dries too fast and traps moisture inside.
- Patience pays off here, so resist the urge to cut into your guanciale before it reaches proper weight loss.
- Store finished guanciale wrapped in parchment paper rather than plastic to let it breathe.
- Freeze portions you will not use within a month to preserve peak quality.
Common Mistakes to Avoid
- Skipping the pink curing salt: This is not optional for safety during extended curing at refrigerator temperatures.
- Hanging in a space that is too warm: Temperatures above 60 degrees Fahrenheit encourage bacterial growth and spoilage.
- Insufficient airflow: Stagnant air promotes mold growth and uneven drying that ruins texture.
- Cutting too soon: Under-cured guanciale tastes raw and has an unpleasant mushy texture.
- Using iodized table salt: The iodine can give the meat an off flavor and interfere with the curing process.
Serving Suggestions
Guanciale shines when rendered slowly to release its flavorful fat before crisping. Slice it thin or cut it into small cubes depending on your dish.
- Classic pasta carbonara with eggs, Pecorino Romano, and black pepper
- Pasta all’amatriciana with tomatoes, pecorino, and a touch of chili
- Rendered and crisped as a topping for soups and salads
- Wrapped around vegetables or seafood before roasting
- Diced and added to bean dishes or braises for depth
Variations to Try
- Smoked guanciale: Cold smoke the cured jowl for 4 to 6 hours before hanging to add a subtle smoky dimension.
- Fennel and citrus version: Add fennel seeds and dried orange zest to the cure for a Sicilian-inspired twist.
- Spicy guanciale: Increase the red pepper flakes and add a pinch of cayenne for noticeable heat.
- Herb-crusted style: Coat the outside with a mixture of dried herbs like rosemary, sage, and oregano before hanging.
- Juniper and bay: Include crushed juniper berries and ground bay leaves in the cure for a Northern Italian profile.
Dietary Adaptations
- Gluten-free: This recipe is naturally gluten-free as written with no modifications needed.
- Dairy-free: Guanciale contains no dairy, making it suitable for dairy-free diets.
- Vegan or vegetarian: No true substitution exists for this pork product, though mushroom-based bacon alternatives can provide some umami in recipes.
- Low-carb and keto: Guanciale is ideal for low-carb diets as it contains zero carbohydrates and high fat content.
Storage and Reheating
Refrigerator
Wrap the cut surface in parchment paper and store in the refrigerator for up to 2 months.
- Rewrap after each use to prevent drying
- Keep away from strong-smelling foods
- Check periodically for any mold development
Freezer
Guanciale freezes beautifully for up to 6 months without quality loss.
- Portion into usable amounts before freezing
- Wrap tightly in plastic wrap, then foil
- Label with the date for tracking
Reheating
Guanciale is typically cooked from its cured state rather than reheated.
- Slice thin and render slowly over medium-low heat
- Let the fat melt before increasing heat to crisp
- Thaw frozen portions in the refrigerator overnight before cooking
Nutrition Information
| Nutrient | Amount |
|---|---|
| Calories | 180 |
| Total Fat | 16g |
| Saturated Fat | 6g |
| Carbohydrates | 0g |
| Fiber | 0g |
| Sugar | 0g |
| Protein | 8g |
| Sodium | 420mg |
| Cholesterol | 35mg |
Nutritional values are estimates based on a 1 ounce serving and may vary depending on the specific pork jowl used and final moisture content.
Frequently Asked Questions
Can I make guanciale without pink curing salt?
I strongly advise against it for food safety reasons. The pink curing salt prevents harmful bacterial growth during the extended curing and drying period at temperatures where pathogens could thrive.
What if I cannot find pork jowl locally?
Ask your butcher to special order it, or check online specialty meat suppliers. Some Italian delis and Asian grocery stores also carry pork jowl regularly.
Can I make guanciale in my regular refrigerator?
Yes, though the low humidity will cause faster drying. Wrap the jowl more loosely in cheesecloth and mist it with water every other day to compensate.
How do I know if my guanciale has gone bad?
Trust your senses here. Off odors, slimy texture, or green and black mold indicate spoilage, and the batch should be discarded.
Is the white mold on my guanciale safe?
White, powdery mold is completely normal and actually beneficial during dry curing. You can wipe it off with a vinegar-dampened cloth or simply leave it, as it adds flavor complexity.
Can I use pork belly instead of jowl?
Pork belly would technically give you pancetta, not guanciale. The jowl has a different fat composition and flavor profile that makes authentic guanciale unique.
Final Thoughts
Making your own guanciale is one of those kitchen projects that feels intimidating at first but becomes second nature after your first successful batch. The waiting is the hardest part, but that first slice of homemade guanciale makes every day of patience worthwhile.
Give this recipe a try and discover why Italian cooks have treasured this humble pig jowl for generations. Once you experience the difference homemade guanciale makes in your carbonara or amatriciana, you will never look back.
Homemade Guanciale
Ingredients
Equipment
Method
- Inspect your pork jowl and trim away any glands, which appear as small, firm nodules usually near the thicker end. Rinse the jowl under cold water and pat it completely dry with paper towels.
- Combine the kosher salt, pink curing salt, black pepper, thyme, and any optional ingredients in a small bowl. Mix everything thoroughly so the curing salts distribute evenly throughout the spice blend.
- Place the jowl on a clean work surface and rub the cure mixture firmly into every surface. Work the cure into any crevices and folds, making sure the entire piece gets coated.
- Place the coated jowl in your container and cover it tightly. Refrigerate for 7 days, flipping the meat once daily and draining any liquid that accumulates.
- After 7 days, remove the jowl and rinse off all the cure under cold running water. Pat the meat completely dry, then let it sit uncovered in the refrigerator for 24 hours to form a tacky surface called the pellicle.
- Press additional coarsely ground black pepper onto all surfaces of the jowl. This outer coating adds flavor and creates the classic guanciale appearance.
- Pierce a hole through the thicker end of the jowl and thread butcher twine through it. Tie a secure loop for hanging, then wrap the entire piece loosely in cheesecloth.
- Hang the wrapped jowl in a cool space between 50 and 60 degrees Fahrenheit with 60 to 70 percent humidity. A basement, wine cellar, or dedicated curing chamber works well.
- Check your guanciale every few days during the drying phase. If the surface feels too dry or develops hard spots, mist it lightly with white wine or water. Allow 2 to 3 weeks for drying.
- Press the guanciale firmly with your fingers after two weeks. It should feel firm on the outside but still give slightly when pressed. Weigh the piece and compare it to the starting weight. When it has lost about 30 percent, your guanciale is ready to enjoy.