Easy Brown Gravy is a silky, savory sauce that transforms any weeknight dinner into something restaurant-worthy. This simple recipe uses just a few pantry staples and takes less than 15 minutes from start to finish.
Whether you’re pouring it over mashed potatoes, roasted chicken, or beef, this gravy delivers rich, deep flavor without fussy techniques or complicated steps. Let’s build your confidence in the kitchen with a recipe that actually works.
Why You’ll Love This Recipe
This gravy hits all the right notes: quick to make, foolproof, and genuinely delicious.
- Takes just 10 to 15 minutes from start to table
- Uses ingredients you likely have on hand right now
- No lumps, no stress, no culinary degree required
- Works perfectly with beef, chicken, turkey, or pork
- Tastes like you spent hours simmering stock
My Experience Making This Recipe
I learned this gravy method from my grandmother, who made it every Sunday without thinking twice about it. She’d stand at the stove stirring constantly, telling me that patience and a steady hand beat any fancy trick every single time.
The first time I made it solo, I was terrified of lumps ruining everything. I whisked like my life depended on it, and somehow, it came together perfectly.
Now I make this gravy at least twice a month, and friends always ask for the recipe because they assume it’s harder than it actually is. That’s the best part: watching their faces light up when they realize they can make this at home.
Recipe Overview
- Recipe Name: Easy Brown Gravy
- Servings: Makes about 2 cups (8 servings)
- Prep Time: 5 minutes
- Cook Time: 10 minutes
- Total Time: 15 minutes
- Course: Sauce
- Cuisine: American
- Calories per Serving: 45
Equipment You Will Need
- Medium saucepan
- Whisk
- Measuring cups and spoons
- Wooden spoon
- Ladle or serving spoon
Ingredients for Easy Brown Gravy
- 3 tablespoons butter
- 3 tablespoons all-purpose flour
- 2 cups beef broth or chicken broth
- 1/2 cup pan drippings (from roasted meat, optional but recommended)
- 1/2 teaspoon salt
- 1/4 teaspoon black pepper
- 1/4 teaspoon garlic powder
- 1/8 teaspoon onion powder
Ingredient Notes and Substitutions
- Butter: It creates a rich roux base that thickens the gravy and adds flavor. You can swap it for bacon fat or beef fat for deeper, meatier notes.
- All-purpose flour: This is your thickening agent and gives gravy its silky body. Cornstarch works as a substitute at half the amount, though the texture will be slightly more glossy.
- Beef broth: It provides savory depth and authentic beef flavor. Chicken broth works fine if that’s what you have, but the taste will be milder and less rich.
- Pan drippings: These caramelized bits from roasting add incredible depth and authenticity. If you don’t have them, increase broth by 1/2 cup and add a splash of Worcestershire sauce for complexity.
- Salt and pepper: Season to your taste and adjust at the end. Some broths are saltier than others, so start low and add more as needed.
How to Make Easy Brown Gravy
Step 1: Melt the Butter
Place your saucepan over medium heat and add the butter, allowing it to melt completely. Once melted, you’ll have a foamy, golden base ready for the next step.
Step 2: Add the Flour
Sprinkle the flour into the melted butter while whisking constantly to combine. Keep whisking for about one minute to cook out the raw flour taste and create what’s called a roux.
Step 3: Cook the Roux
Let the roux bubble gently on medium heat for another minute or two, stirring occasionally with your wooden spoon. This step is crucial because it removes that pasty flour flavor and creates a slightly darker, nuttier base for your gravy.
Step 4: Add Pan Drippings
Pour in your pan drippings slowly while whisking to prevent lumps from forming. If the mixture looks too thick, that’s perfect; you’re about to add the liquid.
Step 5: Whisk in the Broth
Gradually add your broth while whisking continuously to break up any lumps that might try to sneak in. Once all the broth is incorporated, increase the heat to medium-high.
Step 6: Bring to a Simmer
Let the gravy come to a gentle simmer, which should happen within two to three minutes. You’ll see it thicken noticeably as it heats, and that’s exactly what you want.
Step 7: Season Your Gravy
Add the salt, pepper, garlic powder, and onion powder, stirring well to distribute the seasonings evenly. Taste it and adjust the seasoning to your preference, adding more salt or pepper as needed.
Step 8: Finish and Serve
Let the gravy simmer for one more minute to ensure all flavors meld together beautifully. Pour it into a serving bowl and ladle it warm over your favorite dishes.
Pro Tip: If your gravy comes out too thick, whisk in a little more broth to thin it; if it’s too thin, make a slurry by mixing one tablespoon of flour with two tablespoons of cold water, then whisk it in and simmer for one minute.
Tips for the Best Easy Brown Gravy
- Whisk constantly during the roux stage to avoid lumpy texture and ensure even cooking of the flour.
- Use warm or room-temperature broth rather than cold, which helps prevent lumps from forming when combined with the roux.
- Don’t skip the roux cooking step; that minute or two makes the difference between harsh flour taste and rich, nutty flavor.
- If you have pan drippings, use them; they’re liquid gold for authentic, complex gravy that tastes homemade.
- Taste and adjust seasoning at the end; different broths have different salt levels, so you need to control the final flavor.
- Keep your heat at medium to medium-high; too high and your gravy might scorch, too low and it’ll take forever to thicken.
Common Mistakes to Avoid
- Adding flour to cold butter creates clumps that refuse to break up; always let the butter melt and stay warm before adding flour.
- Dumping all the broth in at once causes lumps no matter how much you whisk; add it gradually and steadily.
- Skipping the initial roux cooking leaves your gravy tasting raw and floury rather than rich and savory.
- Using broth straight from the refrigerator shocks the roux and creates lumps; let it come to room temperature or use warm broth.
- Over-cooking the gravy causes it to break down and become thin; simmer gently for just 10 to 15 minutes total.
Serving Suggestions
This gravy pairs beautifully with almost any savory main dish, transforming simple sides into something special. Ladle it generously over whatever you’re serving.
- Creamy mashed potatoes for the ultimate comfort food pairing
- Crispy fried chicken or roasted chicken pieces for restaurant-quality flavor
- Beef brisket, roast, or steak for a steakhouse dinner at home
- Egg noodles or egg pasta for a quick stroganoff-style dish
- Turkey, ham, or pork roast for holiday dinners that taste amazing
Variations to Try
- Mushroom gravy: Saute sliced mushrooms in the butter before adding the flour, then proceed as normal for an earthy, elegant sauce.
- Herb gravy: Add one teaspoon of dried thyme, rosemary, or sage during the seasoning step for herbaceous depth.
- Worcestershire gravy: Whisk in one tablespoon of Worcestershire sauce after adding the broth for tangy, umami-rich flavor.
- Creamy gravy: Replace half the broth with heavy cream or sour cream added at the very end for rich, luxurious texture.
- Spicy gravy: Add a pinch of cayenne pepper or hot sauce to the seasonings for a warming kick.
Dietary Adaptations
- Gluten-free: Swap all-purpose flour for cornstarch or a gluten-free flour blend, using slightly less since both thicken more efficiently.
- Dairy-free: Replace butter with olive oil or coconut oil, though the flavor will shift away from the traditional savory richness.
- Vegan: Use vegetable broth and replace butter with vegan butter or olive oil, then season boldly with extra spices to make up for lost richness.
- Low-carb/keto: The roux uses flour, which you’ll need to replace with xanthan gum (use one quarter teaspoon) or allulose flour for similar thickening.
Storage and Reheating
Refrigerator
Store cooled gravy in an airtight container for up to four days. A thin layer of fat on top actually helps preserve it and adds flavor when you reheat.
- Pour into a glass jar or plastic container with a tight lid
- Label with the date so you know how long it’s been stored
- Keep away from strong-smelling foods in your fridge
Freezer
Gravy freezes beautifully for up to three months when stored properly. Ice cube trays are perfect for portion control if you want small amounts.
- Pour into freezer-safe containers or ice cube trays
- Leave a little headspace since gravy expands slightly when frozen
- Thaw in the refrigerator overnight before reheating
Reheating
Reheat gently over medium-low heat, stirring occasionally and adding a splash of broth if it’s too thick. Never boil it rapidly or the gravy might break.
- Microwave works fine: heat for one to two minutes, stirring halfway through
- Stovetop is gentler: place in a saucepan over medium-low heat and stir frequently
- Add broth one tablespoon at a time if the gravy seems too thick after reheating
Nutrition Information
| Nutrient | Amount |
|---|---|
| Calories | 45 |
| Total Fat | 3.5g |
| Saturated Fat | 2g |
| Carbohydrates | 2.5g |
| Fiber | 0g |
| Sugar | 0g |
| Protein | 1g |
| Sodium | 320mg |
| Cholesterol | 10mg |
These values are approximate and based on using beef broth and standard ingredients. Variations will change the nutrition slightly, especially if you use cream or different broths.
Frequently Asked Questions
Can I make this gravy without pan drippings?
Absolutely, though the flavor won’t be quite as deep and meaty. Use all broth instead of the drippings mixture, and boost the flavor by adding one tablespoon of Worcestershire sauce or soy sauce for umami punch.
Why is my gravy lumpy?
Lumps happen when cold broth hits hot roux or when you don’t whisk enough during combining. Next time, add the broth slowly while whisking constantly, and use room-temperature broth if possible.
How can I make the gravy darker and richer?
Cook the roux a bit longer over medium heat until it turns slightly deeper brown, or stir in one teaspoon of tomato paste or soy sauce for darker color and deeper flavor. Be careful not to burn the roux.
Can I use cornstarch instead of flour?
Yes, use only one tablespoon of cornstarch instead of three tablespoons of flour since cornstarch thickens more efficiently. Mix it with cold water to make a slurry before adding it to the hot gravy.
How do I know when the gravy is thick enough?
It should coat the back of a spoon without running off immediately, and it should slowly drip off when you tilt the spoon. If it’s too thin, let it simmer longer or add a flour-water slurry.
Is it better to make gravy from scratch each time or ahead of time?
Both work great; fresh gravy tastes slightly better, but making it ahead frees up your hands during busy meal prep. It reheats beautifully, so either method works for your schedule.
Final Thoughts
You now have all the knowledge to make silky, savory brown gravy that tastes like you’ve been perfecting it for years. This recipe proves that restaurant-quality food doesn’t require fancy ingredients or complicated steps.
The next time you roast chicken or cook a pot roast, make this gravy and watch your family dig in with genuine enthusiasm. Once you nail this basic technique, you’ll feel confident experimenting with variations and making it your own.
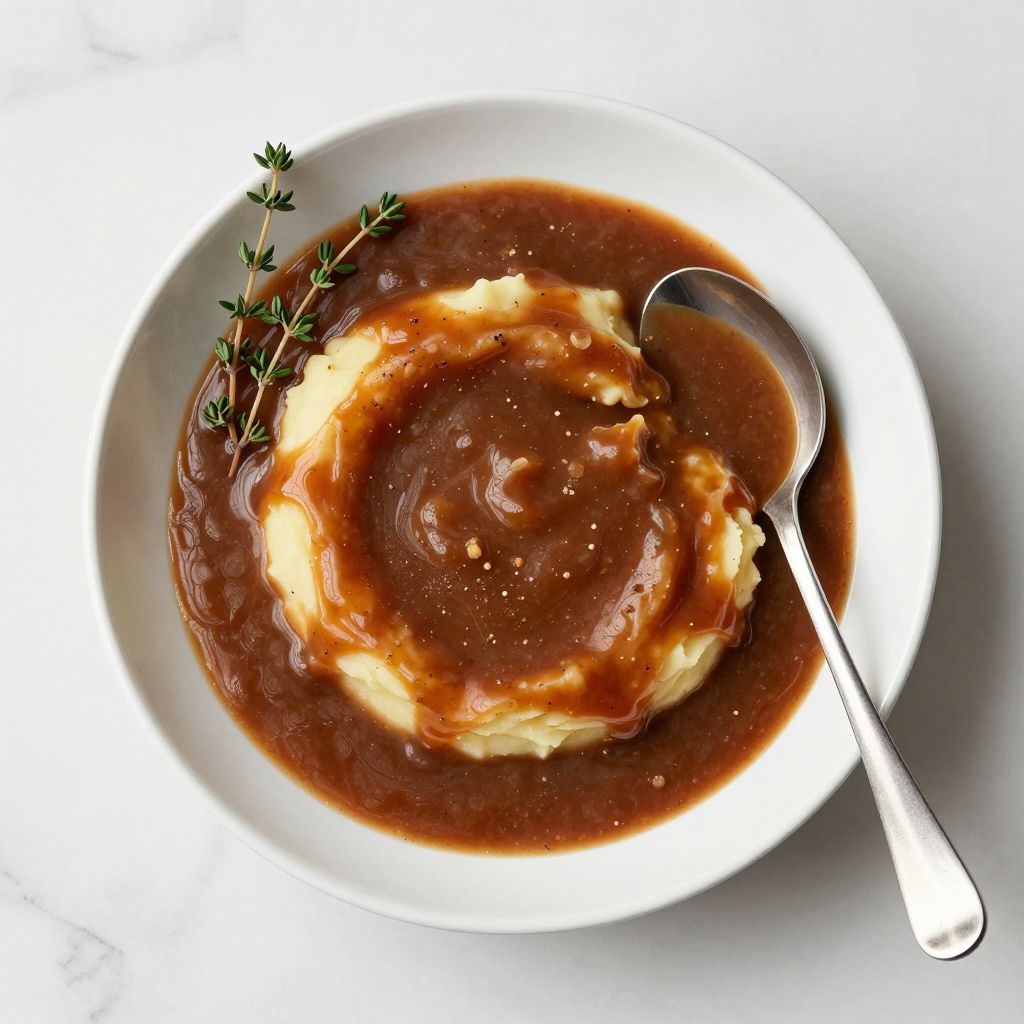
Easy Brown Gravy
Ingredients
Equipment
Method
- Place your medium saucepan over medium heat and add 3 tablespoons of butter, allowing it to melt completely until foamy and golden.
- Sprinkle 3 tablespoons of all-purpose flour into the melted butter while whisking constantly. Continue whisking for about 1 minute to cook out the raw flour taste and create a roux.
- Let the roux bubble gently on medium heat for an additional 1 to 2 minutes, stirring occasionally with a wooden spoon to develop a slightly darker, nuttier base.
- Slowly pour in 1/2 cup pan drippings while whisking to prevent lumps. If pan drippings are not available, increase broth by 1/2 cup and add a splash of Worcestershire sauce.
- Gradually whisk in 2 cups of beef or chicken broth continuously to break up any lumps. Once incorporated, increase heat to medium-high.
- Bring the gravy to a gentle simmer within 2 to 3 minutes, allowing it to thicken noticeably.
- Add 1/2 teaspoon salt, 1/4 teaspoon black pepper, 1/4 teaspoon garlic powder, and 1/8 teaspoon onion powder. Stir well to evenly distribute seasonings and adjust taste as needed.
- Let the gravy simmer for 1 more minute to meld flavors. Serve warm, ladled over your favorite dishes.
- Pro Tip: If gravy is too thick, whisk in more broth a little at a time. If too thin, make a slurry by mixing 1 tablespoon flour with 2 tablespoons cold water, then whisk into gravy and simmer for 1 minute.