Deer sausage recipe transforms lean wild game into a flavorful, shelf-stable staple that hunters and meat lovers crave. This recipe balances venison with pork fat and classic spices to create sausage that tastes incredible in breakfast skillets, sandwiches, or grilled alongside vegetables.
Making homemade sausage at home takes just a few hours and requires minimal equipment, yet delivers restaurant-quality results that store beautifully in your freezer. Read on to learn how to grind, season, and stuff venison sausage like a pro.
Why You’ll Love This Recipe
Homemade deer sausage recipe gives you total control over flavor, fat content, and ingredients, letting you skip the preservatives found in commercial versions. You’ll save money, impress friends at dinner, and use every part of your harvest.
- Uses lean venison efficiently without wasting meat.
- Customizable seasoning lets you match your taste preferences exactly.
- Freezes beautifully for months, giving you quick breakfast or dinner options year-round.
- No special skills required; just basic kitchen tools and patience.
- Costs far less per pound than buying pre-made sausage at specialty shops.
My Experience Making This Recipe
The first time I made venison sausage, I was nervous about grinding and stuffing, worried the texture would turn out mushy or the seasoning would be off. Once I got the temperature right and kept everything cold, the entire process flowed smoothly and the results tasted even better than my local butcher’s version.
I remember pulling the first batch of links from the stuffer and smiling at how plump and professional they looked. My family devoured a skillet of sliced sausage at breakfast the next morning, and I’ve been making batches ever since.
The sensory payoff is real: the snap of the casing when you bite into it, the savory aroma filling your kitchen, the way a slice of warm venison sausage melts into a soft scrambled egg. Once you taste homemade venison sausage alongside store-bought, you’ll never go back.
Recipe Overview
- Recipe Name: Deer Sausage Recipe
- Servings: Makes about 5 pounds (roughly 20 links)
- Prep Time: 45 minutes
- Cook Time: 20 minutes (for testing one link)
- Total Time: About 3 hours (including chilling and stuffing)
- Course: Breakfast, Lunch, Dinner
- Cuisine: American, Game Cookery
- Calories per Serving: Approximately 320 per link (3 ounces)
Equipment You Will Need
- Meat grinder with grinding plate and blade
- Sausage stuffer with casing tube attachment
- Large stainless steel mixing bowl
- Meat thermometer
- Large cutting board
- Sharp butcher’s knife
- Hog casings (natural or collagen)
- Paper towels
- Kitchen scale (optional but recommended)
- Large skillet or grill for testing
Ingredients for Deer Sausage Recipe
- Venison shoulder or front quarter meat: 4 pounds, trimmed of sinew and silver skin, cut into 1-inch cubes, kept very cold
- Pork shoulder (or pork belly): 1 pound, cut into 1-inch cubes, kept very cold
- Pink curing salt (sodium nitrite): 1 teaspoon
- Sea salt: 2 tablespoons
- Black pepper: 2 teaspoons, freshly ground
- Garlic powder: 1 tablespoon
- Onion powder: 2 teaspoons
- Paprika: 1 teaspoon
- Sage: 1 teaspoon, dried and crushed
- Thyme: 1/2 teaspoon, dried
- Red pepper flakes: 1/2 teaspoon (optional, for heat)
- Ice water: 1/2 cup, kept cold
- Hog casings: 1 package, soaked in warm water for 30 minutes before stuffing
Ingredient Notes and Substitutions
- Venison: Lean wild game provides rich, slightly gamey flavor and minimal fat; venison is why you’re making this instead of buying pork sausage. If you don’t have venison, substitute beef chuck, but you’ll lose the distinctive wild taste that makes this recipe worth the effort.
- Pork shoulder: The pork fat binds the venison and keeps the sausage from drying out during cooking and storage. Pork belly works equally well and adds even more richness; you could swap it one-to-one with the shoulder.
- Pink curing salt: This ingredient prevents botulism and gives traditional sausage its pink color and cured flavor; omit it only if you plan to cook and eat the sausage immediately or freeze it without long-term storage plans. Morton’s Tender Quick is a common home-use substitute that contains curing salt, salt, and sugar mixed together.
- Garlic and onion powder: These provide consistent seasoning throughout the meat mixture without adding moisture that fresh minced garlic would contribute. Fresh minced garlic can work if you reduce the amount to 2 teaspoons total and add it during the final mixing stage, though powdered versions distribute more evenly.
- Sage: This herb is classic in breakfast sausage and pairs beautifully with wild game’s natural flavors. If you dislike sage, substitute an equal amount of dried thyme, marjoram, or a poultry seasoning blend.
How to Make Deer Sausage Recipe
Step 1: Chill Your Grinder and Bowl
Place your grinder parts, mixing bowl, and the meat cubes in the freezer for at least 1 hour before you begin. Cold meat grinds cleanly without smearing, which keeps the sausage texture light and prevents the fat from breaking down into an oily paste.
Step 2: Grind the Venison and Pork
Remove the chilled grinder from the freezer and assemble it with the fine grinding plate attached. Working in batches, feed the cold venison and pork cubes through the grinder into the chilled bowl, alternating between venison and pork every few cubes so they mix as they grind.
Step 3: Mix in the Spices and Curing Salt
Add the pink curing salt, sea salt, black pepper, garlic powder, onion powder, paprika, sage, thyme, and red pepper flakes to the ground meat. Use your cold hands or a wooden spoon to fold and mix the spices throughout until the meat turns slightly tacky and begins to hold together; this should take 3 to 5 minutes of mixing.
Step 4: Add Ice Water Gradually
Pour half the cold ice water into the meat mixture and continue folding and squeezing the meat with your hands for another 2 to 3 minutes. Add the remaining water slowly while mixing; the meat should become stickier and start to form a cohesive paste that holds together when squeezed.
Step 5: Test the Seasoning
Pinch off a small amount of sausage mixture and form it into a patty about 1 inch thick. Heat a small skillet over medium-high heat and cook the patty until the internal temperature reaches 160 degrees Fahrenheit (about 5 to 7 minutes total), then taste it and adjust seasonings if needed by mixing in more salt, garlic powder, or sage.
Step 6: Prepare the Casings
Remove the hog casings from their salt packaging and soak them in warm water for 30 minutes to soften. Run cold water through each casing gently by threading it onto a faucet or using a casing filler tool; this rinses out excess salt and checks for holes or weak spots.
Step 7: Stuff the Sausage
Attach the casing tube to your sausage stuffer and thread a casing onto it, leaving about 2 inches hanging off the end. Begin feeding the cold meat mixture into the hopper; as the mixture enters the casing, gently guide and support the casing with your other hand to keep it moving smoothly and filling evenly without air pockets.
Stop before completely filling the last 2 inches of each casing, then slide the casing off the tube and tie the end with butcher’s twine. Work slowly and use gentle, even pressure; rushing creates air pockets that burst during cooking.
Step 8: Prick the Casings and Chill
Using a clean, thin needle or sausage pricker, gently poke the surface of each link in 4 or 5 spots to release any trapped air bubbles. Place the finished sausage links on a parchment-lined baking sheet and refrigerate them for at least 4 hours or overnight before cooking or freezing; this allows the flavors to meld and the casings to set firmly.
Pro Tip: Keep everything as cold as possible throughout the process; warm meat produces sausage with a mushy, broken texture, so work quickly and return ingredients to the freezer if they warm up.
Tips for the Best Deer Sausage Recipe
- Trim every bit of silver skin and connective tissue from the venison before grinding, or the sausage will be tough and stringy with unpleasant texture.
- Use pink curing salt if you plan to store the sausage long-term in the freezer or refrigerator; it prevents harmful bacteria growth and adds authentic cured flavor.
- Test your seasoning on a single patty before stuffing the entire batch so you can adjust salt and spices without wasting meat.
- Don’t skip the cold-holding step after stuffing; it helps the casing set and the flavors bond more completely, improving texture and taste when you cook them.
- Freeze fresh sausage on the baking sheet before moving it to freezer bags, which prevents the links from sticking together and makes portioning easier.
- Cook frozen sausage directly without thawing for the most even cooking and best casing texture; just add 5 to 7 minutes to the cooking time.
Common Mistakes to Avoid
- Grinding warm meat: Warm venison and pork turn into a mushy paste instead of grinding into distinct particles, resulting in sausage with poor texture and poor casing hold.
- Skipping the curing salt: Without pink curing salt, your sausage can develop off-flavors during storage and poses a food safety risk if kept in the refrigerator for more than a few days.
- Overfilling the casings: Casings stuffed too full burst during cooking, leaving you with loose meat instead of intact links and an unpleasant cooking experience.
- Using too much venison without pork fat: Pure venison sausage dries out and tastes tough because venison contains almost no fat; the pork shoulder provides essential fat that keeps the sausage moist and tender.
- Forgetting to prick air pockets: Small air bubbles trapped in the casings expand during cooking and cause the casing to rupture, destroying the link shape and appearance.
Serving Suggestions
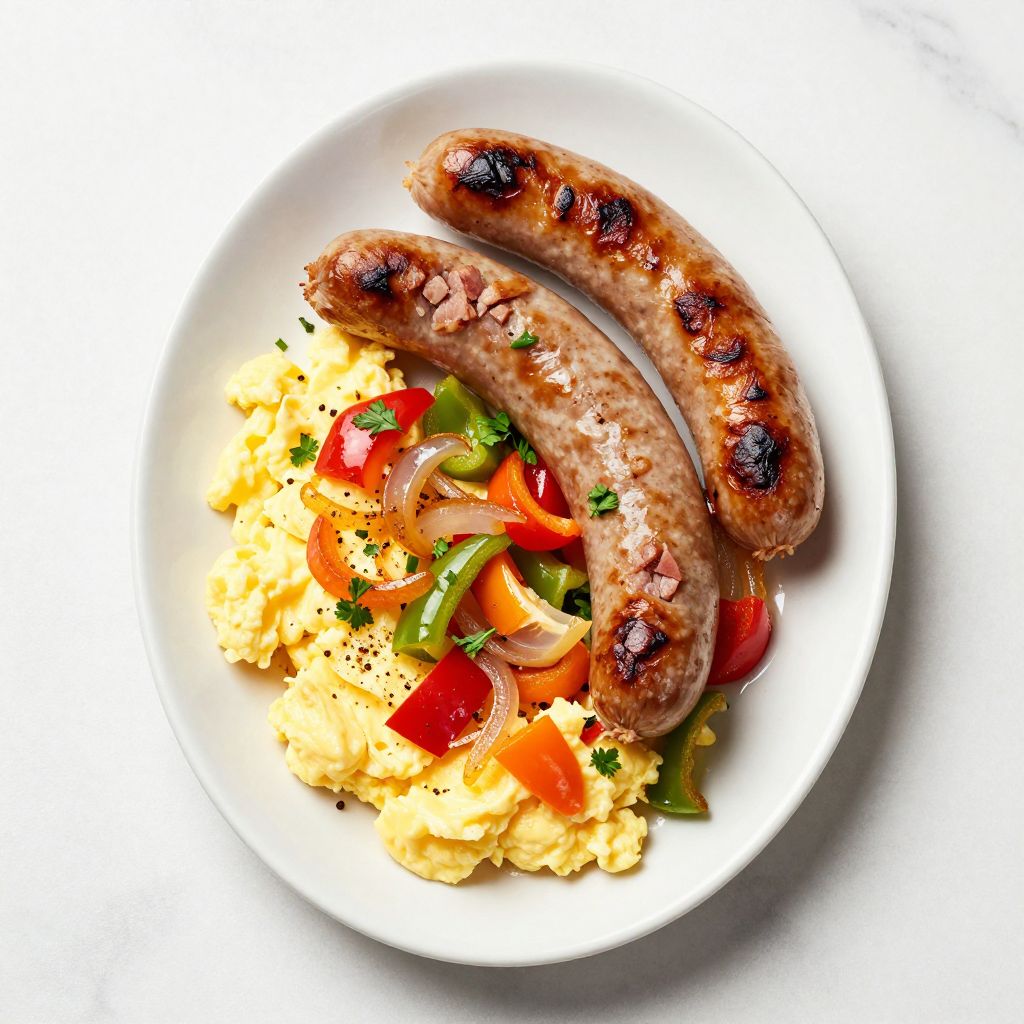
Venison sausage works beautifully in breakfast skillets with eggs and potatoes, nestled alongside grilled vegetables, or sliced into pasta dishes and stews. Try serving a platter of sliced links alongside crusty bread and whole-grain mustard for a simple but impressive appetizer.
- Breakfast skillet with scrambled eggs, potatoes, onions, and bell peppers
- Grilled links served with sauteed mushrooms and caramelized onions on a bun
- Sliced sausage tossed into pasta primavera or a hearty vegetable soup
- Cold sliced sausage on a charcuterie board with aged cheeses and fresh fruit
- Crumbled raw sausage browned and mixed into a savory cornbread or biscuit dough
Variations to Try
- Maple and Black Pepper Sausage: Add 2 tablespoons of pure maple syrup and increase black pepper to 3 teaspoons for a slightly sweet, peppery link that pairs beautifully with pancakes and syrup.
- Spicy Jalapeño and Cheddar: Fold in 1/2 cup of finely diced fresh jalapeños and 1/2 cup of shredded sharp cheddar cheese after grinding for a bold, Southwest-inspired link with a kick of heat.
- Italian Herb Venison Sausage: Replace the sage, thyme, and paprika with 2 teaspoons of Italian seasoning and 1 teaspoon of fennel seed for a more Continental flavor profile that works well in Italian dishes.
- Smoked Sausage: Make the sausage as written, then smoke the finished links in a smoker at 225 degrees Fahrenheit for 2 to 3 hours until the internal temperature reaches 160 degrees for a deeply flavored, shelf-stable product.
- Breakfast Sausage Patties: Skip the casings entirely and form the seasoned meat mixture into 2-ounce patties by hand, then wrap and freeze them for quick weekday breakfasts that cook in minutes.
Dietary Adaptations
- Gluten-Free: This recipe is naturally gluten-free as written; verify that your garlic powder and onion powder do not contain added starches or anti-caking agents that might contain gluten.
- Dairy-Free: The recipe contains no dairy, so it is already dairy-free unless you choose the jalapeño and cheddar variation; substitute nutritional yeast or nutritional cheese powder if desired.
- Vegan or Vegetarian: Venison sausage requires meat, so this recipe does not adapt to a vegan or vegetarian diet; look for plant-based meat alternatives designed specifically for sausage-making instead.
- Low-Carb and Keto: Venison sausage is naturally very low in carbohydrates and fits perfectly into keto meal plans; skip any sweetened variations and enjoy the meat-based links without modification.
Storage and Reheating
Refrigerator
Store freshly made sausage links in an airtight container on the coldest shelf of your refrigerator for up to 3 days if cured with pink curing salt, or only 1 to 2 days if uncured. Place parchment paper between layers to prevent them from sticking together.
- Keep the container away from the door where temperature fluctuates.
- Check the links before cooking for any sour smell or discoloration.
Freezer
Venison sausage freezes beautifully for up to 3 months in an airtight container or vacuum-sealed bag. Freeze the links on a baking sheet first, then transfer them to freezer bags once solid so they don’t stick together.
- Label the container with the date and contents for easy identification.
- Stack frozen links flat to save space in your freezer.
Reheating
Cook frozen sausage directly in a skillet over medium heat without thawing, adding 5 to 7 minutes to the usual cooking time. For cooked leftovers, reheat gently in a low oven at 300 degrees Fahrenheit until warmed through, about 10 minutes.
- Pan-frying brings back the best texture and browning.
- Microwaving works in a pinch but may dry out the links slightly.
Nutrition Information
| Nutrient | Amount |
|---|---|
| Calories | 320 |
| Total Fat | 18 grams |
| Saturated Fat | 7 grams |
| Carbohydrates | 1 gram |
| Fiber | 0 grams |
| Sugar | 0 grams |
| Protein | 36 grams |
| Sodium | 650 milligrams |
| Cholesterol | 95 milligrams |
Nutritional values are estimates based on a 3-ounce serving (one raw link) and may vary depending on the exact cut of venison used and the ratio of pork fat to meat. These figures account for pink curing salt but not for any oil used in cooking.
Frequently Asked Questions
Can I make venison sausage without a sausage stuffer?
Yes, you can form the seasoned meat mixture into patties by hand and skip the casings entirely, or you can shape it into loose bulk sausage for crumbling into dishes. Alternatively, hand-crank or electric stuffers are inexpensive entry points if you want to try casings without a large investment.
What if I don’t have pink curing salt?
You can make the sausage without it if you plan to cook it immediately or freeze it for short-term use
Deer Sausage Recipe
Ingredients
Equipment
Method
- Chill your grinder parts, mixing bowl, and the meat cubes in the freezer for at least 1 hour before beginning.
- Remove chilled grinder from freezer and assemble with fine grinding plate attached. Working in batches, feed cold venison and pork cubes through grinder into chilled bowl, alternating between venison and pork every few cubes.
- Add pink curing salt, sea salt, black pepper, garlic powder, onion powder, paprika, sage, thyme, and red pepper flakes to the ground meat. Fold and mix spices throughout with cold hands or wooden spoon for 3 to 5 minutes, until meat turns slightly tacky and holds together.
- Pour half the cold ice water into the meat mixture and continue folding and squeezing for 2 to 3 minutes. Add remaining water slowly while mixing until mixture becomes sticky and cohesive.
- Pinch off a small amount of mixture and form into a 1-inch thick patty. Heat a small skillet over medium-high heat and cook patty until internal temperature reaches 160°F (about 5 to 7 minutes). Taste and adjust seasoning if desired.
- Remove hog casings from salt packaging and soak in warm water for 30 minutes. Rinse each casing under cold running water to remove excess salt and check for holes.
- Attach casing tube to sausage stuffer and thread casing onto it, leaving about 2 inches hanging off the end. Feed cold meat mixture into hopper, gently guiding casing to fill evenly without air pockets.
- Stop before filling last 2 inches of casing, slide casing off tube, and tie end with butcher's twine.
- Using a clean, thin needle or sausage pricker, poke 4 to 5 small holes in each sausage link to release trapped air.
- Place finished sausage links on parchment-lined baking sheet and refrigerate for at least 4 hours or overnight before cooking or freezing.