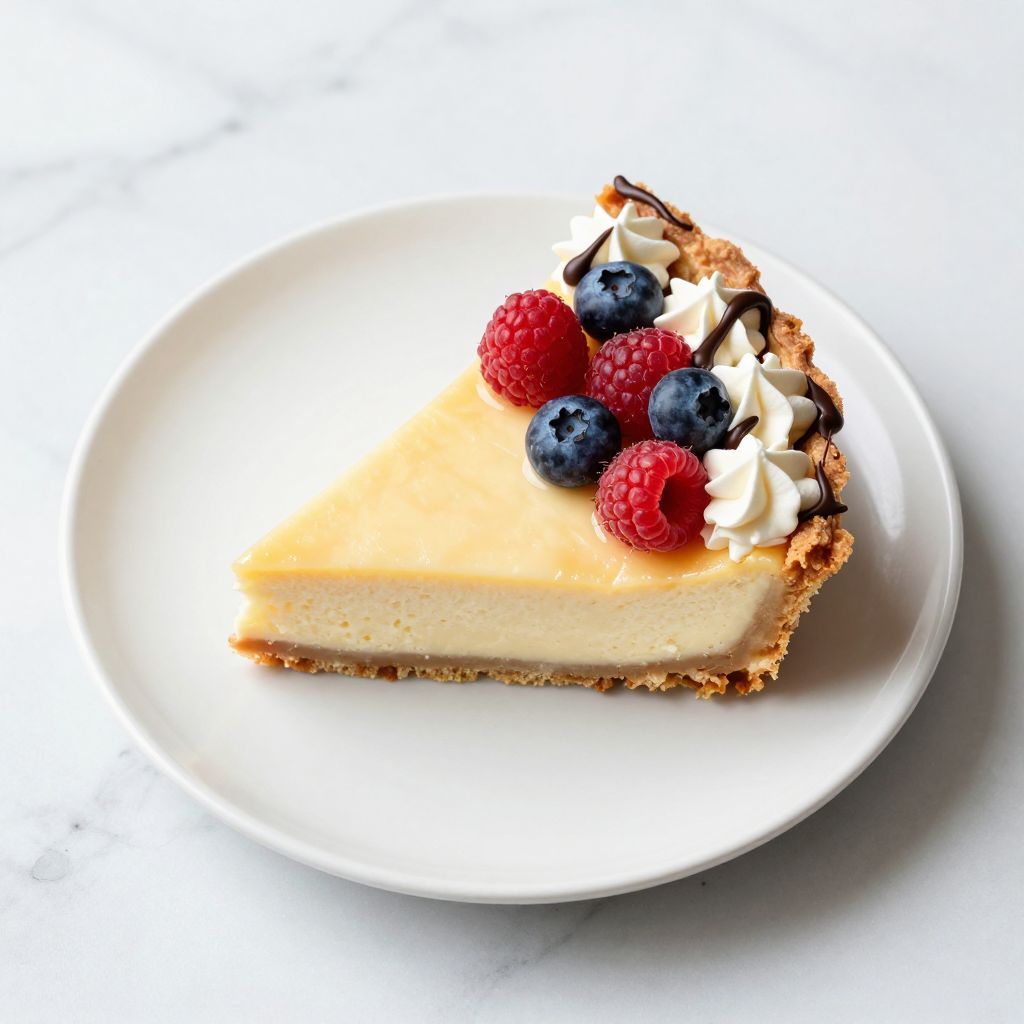
Cheesecake pie combines the best of two desserts: creamy, tangy cheesecake filling meets a buttery, crumbly crust in one showstopping dessert.
This recipe delivers a foolproof way to impress at dinner parties without requiring a springform pan or water bath. Whether you’re baking for a special occasion or simply craving something indulgent, this cheesecake pie offers restaurant-quality results with minimal fuss.
Why You’ll Love This Recipe
This cheesecake pie strikes the perfect balance between simplicity and sophistication.
- No water bath needed, unlike traditional cheesecake
- Uses a standard pie dish, making cleanup easier
- Creamy, rich filling that slices cleanly
- Works with countless topping variations
- Bakes in under an hour with minimal active prep
My Experience Making This Recipe
I first made this cheesecake pie on a lazy Sunday afternoon when I wanted dessert but lacked the patience for a traditional springform cheesecake. The results shocked me: it tasted every bit as decadent as the original, but came together faster and with zero fuss.
My family devoured it within hours, and now it’s the dessert I turn to when I need something elegant but don’t want to stress. The filling firms up beautifully overnight in the fridge, making it perfect for planning ahead.
The smell while it bakes is absolutely intoxicating, filling your entire kitchen with that unmistakable vanilla and cream aroma. People assume you spent hours in the kitchen, when really you’ve just cracked the code on restaurant-quality dessert at home.
Recipe Overview
- Recipe Name: Cheesecake Pie
- Servings: 10 to 12 slices
- Prep Time: 15 minutes
- Cook Time: 45 minutes
- Total Time: 3 hours (including chilling)
- Course: Dessert
- Cuisine: American
- Calories per Serving: 385
Equipment You Will Need
- 9-inch pie dish
- Mixing bowls (at least two)
- Electric mixer or whisk
- Rubber spatula
- Measuring cups and spoons
- Pie crust (store-bought or homemade)
- Fork or pie weights for blind baking
- Oven thermometer (optional but recommended)
Ingredients for Cheesecake Pie
For the Crust
- 1 unbaked 9-inch pie crust (or homemade graham cracker crust)
For the Filling
- 32 ounces cream cheese, softened to room temperature
- 1 cup granulated sugar
- 1/4 cup cornstarch
- 2 large eggs
- 1 large egg yolk
- 1 teaspoon vanilla extract
- 1/4 teaspoon salt
- 1/2 cup sour cream
- 2 tablespoons fresh lemon juice
For Topping (Optional)
- 1 cup fresh berries or fruit compote
- Chocolate ganache or caramel drizzle
- Whipped cream
Ingredient Notes and Substitutions
- Cream cheese: Room temperature cream cheese blends smoothly without lumps, creating silky filling. You can substitute with mascarpone for a tangier flavor, though the texture will be slightly softer.
- Cornstarch: This prevents cracking by reducing shrinkage during cooling. Arrowroot powder works as a 1:1 swap with nearly identical results.
- Sour cream: Adds tang and richness while keeping the filling tender. Greek yogurt creates a lighter version, though it adds more moisture.
- Pie crust: Store-bought saves time, but homemade graham cracker crust adds extra flavor and texture. For gluten-free baking, use a certified gluten-free crust.
- Lemon juice: Brightens the flavor and prevents an overly sweet finish. Fresh is best, but bottled works in a pinch.
How to Make Cheesecake Pie
Step 1: Prepare Your Crust
Preheat your oven to 350 degrees Fahrenheit. Place your pie crust in a 9-inch pie dish, pressing it gently into the bottom and sides without stretching it.
Prick the bottom with a fork several times to allow steam to escape, preventing a soggy base. If using a store-bought crust, follow package instructions for pre-baking, typically 5 to 8 minutes until just set but not browned.
Step 2: Beat the Cream Cheese
Add softened cream cheese to a large mixing bowl and beat on medium-low speed for about 2 minutes until completely smooth and creamy. Scrape down the bowl frequently to catch any lumps hiding at the bottom or sides.
This step matters because any lumps will remain in your final filling, creating an unpleasant grainy texture. Take your time here for the silkiest possible result.
Step 3: Mix Sugar and Cornstarch
In a small bowl, whisk together the granulated sugar and cornstarch until combined. This prevents the cornstarch from clumping when you add it to the wet ingredients.
The cornstarch absorbs moisture that would otherwise cause the filling to split or crack as it cools, so don’t skip this step even if it seems fussy.
Step 4: Add Sugar Mixture to Cream Cheese
Gradually add the sugar and cornstarch mixture to the beaten cream cheese while mixing on low speed. Beat for about 1 minute until combined, then increase speed to medium and mix for another minute until light and fluffy.
Stop halfway through and scrape down the bowl again to ensure everything is fully incorporated. Overmixing can add too much air, which causes cracks, so stop once everything is just combined.
Step 5: Add Eggs and Flavorings
Add the eggs one at a time, beating on low speed after each addition just until combined. Then add the egg yolk, vanilla extract, and salt, mixing on low until smooth.
Each egg should be fully incorporated before adding the next, but avoid overbeating at this stage. Excessive mixing incorporates air bubbles that expand in the oven and collapse as the pie cools, creating cracks.
Step 6: Fold in Sour Cream and Lemon Juice
Pour the sour cream into the filling and gently fold it in with a rubber spatula using about 10 to 12 strokes. Add the lemon juice and fold another 5 to 8 times until just combined.
Folding rather than beating preserves the smooth texture you’ve built up to this point. The tang of both ingredients balances the sweetness perfectly without making the filling taste overtly lemony.
Step 7: Pour Filling into Crust
Pour the filling into your pre-baked pie crust, spreading it evenly with a spatula. Tap the filled pie gently on the counter a few times to release any large air bubbles trapped inside.
These bubbles expand in the oven and create crater-like cracks, so this small step saves you from that frustration. Don’t skip it just because the surface looks perfect already.
Step 8: Bake the Cheesecake Pie
Bake at 350 degrees Fahrenheit for 40 to 45 minutes until the edges are set but the center still jiggles slightly when you gently shake the pan. The center should move like soft Jello, not like a puddle.
The carryover heat will continue cooking the filling as it cools, so pulling it out slightly underdone prevents overcooking. An overcooked filling becomes dense and develops cracks, so this timing is crucial.
Step 9: Cool Gradually
Turn off the oven and crack the door open about 2 inches, leaving the pie inside for 30 minutes. This gradual temperature change prevents rapid contraction that causes cracks.
Remove the pie from the oven and let it cool at room temperature for another 30 minutes. The slower you cool it, the prettier it will be when you slice into it.
Step 10: Chill Overnight
Cover the pie loosely with plastic wrap and refrigerate for at least 8 hours, ideally overnight. This chilling time allows the filling to fully set and the flavors to meld beautifully.
Cold cheesecake pie is infinitely easier to slice cleanly and tastes fresher than a room temperature slice. Plan your timing accordingly so you can serve it chilled and perfect.
Pro Tip: The key to crack-free cheesecake pie is keeping air bubbles to a minimum, avoiding overmixing the batter, and cooling the pie slowly and gradually.
Tips for the Best Cheesecake Pie
- Bring cream cheese to room temperature for 30 to 45 minutes before baking, ensuring it blends smoothly without lumps that ruin your texture.
- Use an oven thermometer to verify your oven temperature, since many ovens run hot or cold, which affects baking time and can cause overcooking.
- Don’t open the oven door during baking, as sudden temperature drops can cause the filling to collapse and crack.
- Use a sharp, thin knife dipped in hot water and wiped clean between each slice for neat, professional-looking portions.
- Make this pie a day ahead since it needs overnight chilling, plus the flavors deepen and improve after sitting in the fridge.
- If you notice cracks forming after baking, don’t panic; a layer of sour cream topping or fruit compote hides them beautifully.
Common Mistakes to Avoid
- Using cold cream cheese causes lumps that create a grainy texture no amount of mixing fixes.
- Overmixing the filling after adding eggs incorporates too much air, leading to cracks and a less dense crumb.
- Baking at too high a temperature cooks the edges too fast while leaving the center raw, or worse, overcooking the entire pie.
- Skipping the gradual cooling process causes rapid contraction that splits the surface into dramatic cracks.
- Cutting the pie while it’s still warm results in a mushy slice and an overall collapsed appearance on the plate.
Serving Suggestions
Serve chilled slices with your favorite toppings to create a customized dessert experience.
- Fresh berries like strawberries, blueberries, or raspberries add tartness that cuts through the richness
- Berry coulis or compote drizzled over the slice adds elegant color and fruity flavor
- Chocolate ganache or dark chocolate shavings create a sophisticated contrast to the cream filling
- Whipped cream on the side lets guests add as much or as little as they prefer
- Caramel drizzle and candied nuts add crunch and depth to each bite
Variations to Try
- Chocolate Cheesecake Pie: Mix 3 ounces melted dark chocolate into the filling before baking for a decadent chocolate version that tastes like luxury.
- Salted Caramel Cheesecake Pie: Drizzle salted caramel over the filling before baking and add fleur de sel on top for sweet and salty sophistication.
- Pumpkin Cheesecake Pie: Blend 3/4 cup pumpkin puree into the filling with 1 teaspoon pumpkin pie spice for a fall-inspired dessert that feels seasonal.
- New York Style Cheesecake Pie: Increase the cream cheese to 36 ounces and reduce sour cream to 1/4 cup for a denser, richer filling reminiscent of classic deli cheesecake.
- Lemon Blueberry Cheesecake Pie: Fold 1 cup fresh blueberries into the filling after step 6 and increase lemon juice to 3 tablespoons for a bright, fruity version.
Dietary Adaptations
- Gluten-Free: Use a certified gluten-free pie crust or make one with gluten-free flour, almond flour, and butter; the filling remains unchanged and tastes identical.
- Dairy-Free: Replace cream cheese with dairy-free cream cheese and sour cream with coconut cream or cashew cream; the texture will be slightly different but still delicious.
- Vegan: Use vegan cream cheese, vegan sour cream, and replace eggs with a flax egg mixture (3 tablespoons ground flaxseed mixed with 9 tablespoons water); bake an extra 5 minutes.
- Low-Carb/Keto: Substitute sugar with erythritol or monk fruit sweetener in a 1:1 ratio and use a low-carb crust; carbs drop to about 8 grams per slice.
Storage and Reheating
Refrigerator
Store covered cheesecake pie in the fridge for up to 5 days, keeping the crust crispy and the filling perfectly set.
- Cover tightly with plastic wrap to prevent absorbing odors from other foods
- Slice only what you need each day rather than cutting the entire pie at once
- Cold pie tastes better than room temperature, so serve straight from the fridge
Freezer
Wrap the whole pie or individual slices tightly in plastic wrap then foil, and freeze for up to 2 months without significant quality loss.
- Thaw overnight in the refrigerator before serving for best texture
- Frozen slices can go directly to a plate and thaw in about 30 minutes at room temperature
- Don’t refreeze after thawing
Reheating
Cheesecake pie is best served cold directly from the fridge and doesn’t require reheating, but you can warm slices gently if preferred.
- Microwave a slice on 50% power for 15 to 20 seconds for a slightly warm texture
- Low oven heat at 250 degrees Fahrenheit for 5 to 10 minutes works for whole pies if you must warm them
- Never use high heat, which dries out the filling and creates a rubbery texture
Nutrition Information
| Nutrient | Amount |
|---|---|
| Calories | 385 |
| Total Fat | 28g |
| Saturated Fat | 16g |
| Carbohydrates | 32g |
| Fiber | 0g |
| Sugar | 28g |
| Protein | 6g |
| Sodium | 285mg |
| Cholesterol | 92mg |
Nutrition values are estimates based on a 12-slice serving and may vary depending on specific ingredients and brands used.
Frequently Asked Questions
Can I use a graham cracker crust instead of pie crust?
Absolutely, and many people prefer it for extra texture and flavor. Mix 2 cups graham cracker crumbs with 6 tablespoons melted butter and 2 tablespoons sugar, press into your pie dish, and pre-bake at 350 degrees for 5 minutes before adding the filling.
How do I prevent cracks in my cheesecake pie?
The main culprits are overmixing the batter, baking at too high a temperature, and cooling too quickly. Follow the gradual cooling method in step 9 and 10, avoid mixing after adding eggs, and use an oven thermometer for accuracy.
Can I make this pie a day or two ahead?
Yes, it actually tastes better when made a day ahead since the flavors meld and deepen. Cover it tightly and refrigerate for up to 5 days before serving, making it perfect for party planning.
What should the center look like when it’s done baking?
The center should jiggle like soft gelatin when you gently shake the pan, not stay completely still. A bit of jiggle means carryover cooking will finish it perfectly as it cools, resulting in a creamy rather than dense texture.
Can I add toppings before baking or should I add them after?
Fruit toppings are best added after baking to prevent them from sinking or burning. Chocolate swirls or other mix-ins can go into the raw filling, but save fresh berries and delicate toppings for plating and serving.
Final Thoughts
This cheesecake pie delivers impressive results without the fuss of traditional springform cheesecakes, making it a practical choice for busy home bakers. The creamy filling, buttery crust, and endless topping possibilities mean you’ll want to make this again and again.
Cheesecake Pie
Ingredients
Equipment
Method
- Preheat your oven to 350 degrees Fahrenheit.
- Place your pie crust in a 9-inch pie dish, pressing it gently into the bottom and sides without stretching it.
- Prick the bottom of the crust with a fork several times to allow steam to escape.
- If using a store-bought crust, pre-bake according to package instructions, typically 5 to 8 minutes until just set but not browned.
- In a large mixing bowl, beat the softened cream cheese on medium-low speed for about 2 minutes until completely smooth and creamy, scraping down the bowl frequently.
- In a small bowl, whisk together the granulated sugar and cornstarch until combined to prevent clumping.
- Gradually add the sugar and cornstarch mixture to the beaten cream cheese while mixing on low speed; beat for about 1 minute until combined, then increase to medium speed and mix for another minute until light and fluffy. Scrape down the bowl halfway through.
- Add the eggs one at a time, beating on low speed after each addition just until combined.
- Add the egg yolk, vanilla extract, and salt, mixing on low speed until smooth, avoiding overmixing.
- Pour the sour cream into the filling and gently fold it in using about 10 to 12 strokes with a rubber spatula.
- Add the lemon juice and fold another 5 to 8 times until just combined.
- Pour the filling evenly into the pre-baked pie crust and spread with a spatula.
- Tap the filled pie gently on the counter a few times to release any large air bubbles.
- Bake at 350 degrees Fahrenheit for 40 to 45 minutes until the edges are set but the center jiggles slightly when gently shaken.
- Turn off the oven and crack the door open about 2 inches, leaving the pie inside for 30 minutes to cool gradually.
- Remove the pie from the oven and let it cool at room temperature for another 30 minutes.
- Cover the pie loosely with plastic wrap and refrigerate for at least 8 hours, ideally overnight, to let the filling fully set and flavors meld.
- Serve chilled slices with your choice of toppings such as fresh berries, chocolate ganache, caramel drizzle, or whipped cream.