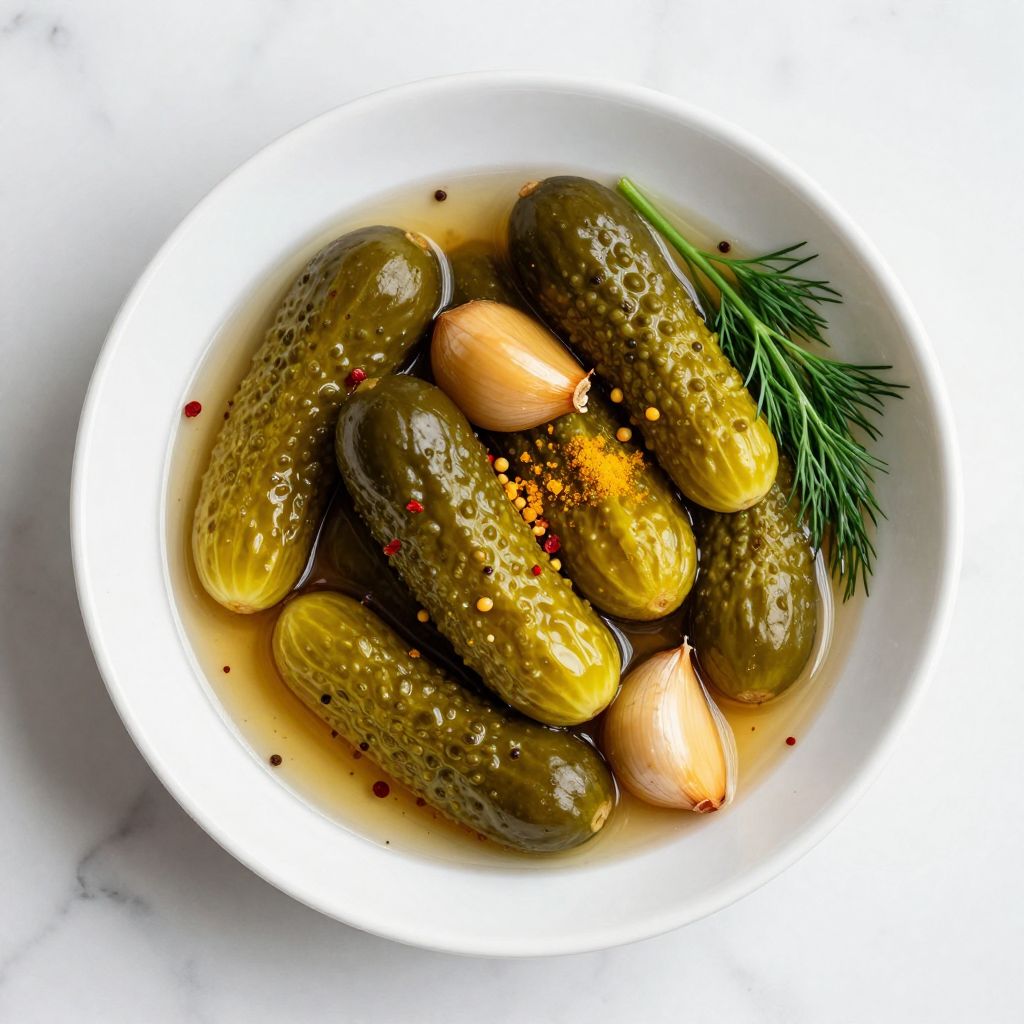
Sweet pickles are a delightful pantry staple that balances tangy vinegar with brown sugar and warm spices for a perfect condiment.
Whether you serve them alongside a charcuterie board, pair them with pulled pork sandwiches, or eat them straight from the jar as a snack, homemade sweet pickles taste infinitely better than store-bought versions and cost a fraction of the price.
Let me walk you through how to make a batch that your family will finish faster than you can say “pass the pickles.”
Why You’ll Love This Recipe
This recipe delivers a perfect balance of sweetness and tang with minimal fuss.
- No canning equipment or special skills required; simple boiling-water processing works great
- Ready to eat within 24 hours, though flavor deepens over time
- Customizable spice blends let you adjust heat and warmth to your taste
- Makes multiple jars, so you can gift them or stock your pantry
- Shelf-stable for months when properly sealed, giving you crispy pickles anytime
My Experience Making This Recipe
I first made sweet pickles on a whim after buying more pickling cucumbers than I could eat fresh. The kitchen filled with the most amazing aroma of vinegar and spices simmering together, and I knew immediately this was worth repeating.
My partner actually tried one warm from the jar before they fully cooled and declared them “dangerously addictive.” The crunch combined with that sweet, tangy kick made them disappear within two weeks.
What surprised me most was how simple the process actually is; I spent maybe 20 minutes of hands-on time and let the stovetop do the heavy lifting. Now I make a double batch every summer and keep jars in my fridge year-round.
Recipe Overview
- Recipe Name: Sweet Pickles
- Servings: 4 jars (approximately 32 ounces total)
- Prep Time: 20 minutes
- Cook Time: 15 minutes
- Total Time: 35 minutes, plus cooling and curing
- Course: Condiment
- Cuisine: American
- Calories per Serving: 45 calories per 2-ounce serving
Equipment You Will Need
- Large stainless steel pot
- Cutting board and sharp knife
- Measuring cups and spoons
- Four clean glass jars (quart or pint size)
- Wooden spoon for stirring
- Slotted spoon for packing jars
- Funnel (optional but helpful)
- Kitchen towels
- Large bowl for soaking cucumbers
Ingredients for Sweet Pickles
- 3 pounds pickling cucumbers, cut into spears or left whole if small
- 2 cups brown sugar, packed
- 2 cups white vinegar
- 1 cup apple cider vinegar
- 2 tablespoons pickling spice
- 1 tablespoon mustard seeds
- 1 teaspoon red pepper flakes, or more if you like heat
- 1 teaspoon turmeric
- 6 garlic cloves, smashed
- 4 fresh dill sprigs or 2 teaspoons dried dill
- 1 teaspoon kosher salt
- 1/2 cup water
Ingredient Notes and Substitutions
- Pickling cucumbers are small, thin-skinned varieties bred for crunchiness and thin skin; regular slicing cucumbers will become mushy because they contain too much water and have thicker skin that resists brine penetration.
- Brown sugar adds molasses notes that white sugar cannot; white sugar creates a cleaner sweetness, but you lose some depth and complexity.
- White vinegar and apple cider vinegar together create balanced acidity; using only one type works, but the blend delivers better roundness and a subtle fruity undertone.
- Pickling spice blends vary, but mustard seeds, coriander, and peppercorns form the core; you can buy it premixed or swap it for equal parts of your favorite whole spices.
- Fresh dill brightens the brine, while dried dill works in a pinch; fresh delivers more floral notes, but dried still adds herbal complexity.
How to Make Sweet Pickles
Step 1: Prepare and Soak the Cucumbers
Rinse your pickling cucumbers under cool water and scrub them gently with a soft brush to remove any dirt or blossom end debris. Soak them in a large bowl of ice water for at least 2 hours or overnight, as this keeps them crisp and hydrated.
Step 2: Trim and Cut the Cucumbers
Remove the cucumbers from the ice bath and pat them completely dry with clean towels; any excess moisture dilutes your brine and makes pickles less crunchy. Cut off the blossom ends (the opposite end from the stem) and discard them, since they contain enzymes that soften pickles.
Step 3: Prepare Your Jars
Wash four glass jars thoroughly with hot soapy water and rinse well, then let them air dry or place them in a 200-degree oven for 10 minutes to sterilize them. Having warm jars prevents the glass from cracking when you pour in the hot brine.
Step 4: Build the Brine Base
In your large pot, combine 2 cups white vinegar, 1 cup apple cider vinegar, 1/2 cup water, and 2 cups brown sugar over medium heat. Stir constantly until the sugar dissolves completely, then add your pickling spice, mustard seeds, red pepper flakes, turmeric, smashed garlic, and fresh dill.
Step 5: Simmer the Brine
Once the brine reaches a gentle simmer, let it bubble softly for 5 minutes so the spices infuse their flavors into the liquid. This short simmer extracts essential oils from the spices without cooking off the vinegar’s sharpness.
Step 6: Pack the Jars with Cucumbers
Working quickly, pack your prepared cucumber spears or whole cucumbers tightly into each warm jar, distributing them evenly. Leave about 1/2 inch of headspace at the top of each jar, as this allows room for the brine and prevents overflow when sealing.
Step 7: Pour the Hot Brine
Carefully ladle the hot brine and spices into each jar, pouring until the brine covers the cucumbers completely and leaves 1/2 inch of headspace. Make sure each jar gets some of the whole spices and garlic pieces scattered throughout for even flavor.
Step 8: Seal and Cool
Wipe the rim of each jar clean with a damp cloth to remove any brine drips, then screw the lids on firmly but not so tight that you strip the threads. Place the jars upright on a clean kitchen towel and let them cool to room temperature for at least 1 hour before refrigerating.
Step 9: Cure and Store
Once cooled, refrigerate your jars; the pickles are ready to eat after 24 hours, but their flavor deepens and becomes more complex after 3 to 5 days. The flavor continues to improve for up to 2 weeks, so resist eating them all at once if you have willpower.
Pro Tip: Keep at least one or two sliced garlic cloves in each jar for the strongest flavor punch and a beautiful visual presentation.
Tips for the Best Sweet Pickles
- Use the freshest cucumbers possible, ideally picked or purchased the same day you plan to pickle them; older cucumbers become hollow and won’t stay crisp.
- Do not skip the ice water soak; it firms up the cucumber cells and ensures your pickles stay crunchy no matter how long they sit in the brine.
- Measure your spices carefully the first time you make this recipe, then adjust to your preference the next batch; some people love extra heat, while others prefer more dill.
- If you want deeper sweetness, increase the brown sugar slightly, but remember that too much sugar can make the brine too thick and syrupy.
- Store your finished pickles in the coldest part of your refrigerator, away from the door where temperature fluctuates; this maintains crunchiness and extends shelf life.
- Taste a pickle after 3 days and every few days after; this helps you understand how the flavors develop and tells you when they reach your personal sweet spot.
Common Mistakes to Avoid
- Using waxy or slicing cucumbers instead of pickling varieties results in mushy, disappointing pickles; pickling cucumbers have thinner skins and less water content, making them ideal for this recipe.
- Skipping the blossom end removal leaves behind softening enzymes that compromise crunchiness even after pickling; always cut this off completely.
- Packing jars too loosely means some cucumbers won’t absorb enough brine and will taste bland and mealy; pack them snugly but not so tight that they crack.
- Using water that is not hot enough when filling the jars fails to properly heat-process the pickles, risking spoilage; always use brine fresh from the stove.
- Storing pickles at room temperature or in warm areas speeds degradation and softening; keep them refrigerated for consistent crunch and safety.
Serving Suggestions
These sweet pickles shine alongside rich or savory foods that need a bright, tangy counterpoint. Serve them as part of a summer picnic spread, chop them into relish for hot dogs, or layer them into sandwiches with deli meat and cheese.
- Charcuterie and cheese boards, paired with aged cheddar and prosciutto
- Pulled pork or brisket sandwiches for a fresh, acidic contrast
- Burgers and hot dogs as a classic condiment or chopped relish
- Cheese and charcuterie appetizers at cocktail parties
- Grain bowls and salads as a crunchy, sweet-tart topping
Variations to Try
- Spicy Sweet Pickles: Add 2 tablespoons of fresh jalapeño slices or increase red pepper flakes to 2 teaspoons for a fiery kick that complements the sweetness beautifully.
- Bread-and-Butter Pickles: Slice cucumbers into 1/4-inch rounds and reduce cook time to 8 minutes; the thinner slices create a softer texture with more surface area for brine absorption.
- Herb Garden Pickles: Add fresh tarragon, basil, or thyme along with the dill; fresh herbs create a garden-fresh flavor that feels elegant and sophisticated.
- Ginger-Spiced Sweet Pickles: Add 3 tablespoons of sliced fresh ginger and 1 teaspoon of ground cloves to the brine for warm, complex spice notes that pair beautifully with fall meats.
- Garlic-Heavy Sweet Pickles: Increase garlic to 12 cloves and layer them throughout the jars; this creates an assertive garlic presence that transforms the pickles into a bold condiment.
Dietary Adaptations
- Gluten-Free: This recipe is naturally gluten-free; pickling spice blends sometimes contain gluten additives, so verify your blend or buy certified gluten-free spices.
- Dairy-Free: This recipe contains no dairy, making it perfect for anyone avoiding milk products or maintaining a vegan diet.
- Vegan: No animal products are used in this recipe, so it fits seamlessly into any plant-based eating plan.
- Low-Carb/Keto: Reduce brown sugar to 1 cup and substitute with erythritol or monk fruit sweetener; the pickles will be less sweet, but still flavorful and very low in carbs.
Storage and Reheating
Refrigerator
Store sealed jars in the coldest part of your refrigerator away from the door, where they stay fresh and crunchy for up to 3 months.
- Keep lids sealed between uses to maintain crunchiness and prevent flavor absorption from other foods
- If pickles develop a film or smell sour, discard them immediately
- Pickles naturally soften over time, so eat them within the first 2 months for optimal crunch
Freezer
Freezing is not recommended for whole pickles, as the brine expands when frozen and ruptures the cell structure, resulting in mushy pickles when thawed.
- You can freeze drained pickles (without brine) for up to 3 months in an airtight container for use in relish or chopped applications
- Thawed frozen pickles work well blended into tartar sauce or pickle relish but not as standalone condiments
Reheating
These pickles are best served cold straight from the jar and do not require reheating under any circumstances.
- Warming pickles causes them to lose their essential crunchiness and defeats the purpose of pickling
- If you want warm pickles as a side dish, consider heating a small portion gently, then allowing it to cool slightly before serving
Nutrition Information
| Nutrient | Amount |
|---|---|
| Calories | 45 |
| Total Fat | 0g |
| Saturated Fat | 0g |
| Carbohydrates | 11g |
| Fiber | 1g |
| Sugar | 9g |
| Protein | 0g |
| Sodium | 150mg |
| Cholesterol | 0mg |
Nutrition values are approximate and based on a 2-ounce serving size; actual values may vary depending on your specific ingredients and jar yield.
Frequently Asked Questions
Can I use regular vinegar instead of a mix of white and apple cider vinegar?
Yes, you can use 3 cups of white vinegar alone; your pickles will taste slightly sharper and more straightforward. The apple cider vinegar blend adds subtle fruity depth that many people prefer, but single-vinegar batches work perfectly fine.
How long does it take for the pickles to be ready to eat?
You can taste them after 24 hours, but their flavor truly develops and rounds out after 3 to 5 days. If you want maximum flavor complexity, wait a full week before eating.
Can I make these pickles without refrigerating them afterward?
Not safely; the sugar and vinegar content is not high enough for shelf-stable canning without proper pressure canning equipment. Always refrigerate these pickles for safety and optimal crunchiness.
Why did my pickles turn soft or mushy?
This usually happens when you use the wrong cucumber variety, skip the ice water soak, or fail to remove the blossom end. Soft water or storing at room temperature can also soften pickles over time.
Can I reuse the brine for a second batch of pickles?
You can strain out the old cucumbers and spices, then top up the brine with fresh vinegar and sugar; however, fresh brine delivers cleaner, brighter flavor. Reused brine tastes fine but loses some of its punch and clarity.
What if I want my pickles sweeter or less sweet?
Increase brown sugar to 2.5 cups for sweeter pickles or reduce it to 1.5 cups for a more tart result. Taste a pickle from each batch to dial in your exact preference.
Can I use honey or other sweeteners instead of brown sugar?
Honey creates a darker color and deeper flavor that some people love, but it also affects the brine’s clarity. Experiment with equal parts honey by weight, though results vary slightly from brown sugar pickles.
Final Thoughts
Making your own sweet pickles is genuinely one of those kitchen projects that feels fancier than it actually is. You’ll spend less than an hour of your time and get jars of homemade goodness that beat any store-bought version sitting on a shelf.
The best part is that once you master this recipe, you can play with spices and flavors to create your own signature version. Go ahead and make a batch this week, and I promise your friends will ask for the recipe before they ask for seconds.
Sweet Pickles
Ingredients
Equipment
Method
- Rinse your pickling cucumbers under cool water and scrub them gently with a soft brush to remove any dirt or blossom end debris.
- Soak cucumbers in a large bowl of ice water for at least 2 hours or overnight to keep them crisp and hydrated.
- Remove cucumbers from the ice bath and pat them completely dry with clean towels.
- Cut off the blossom ends and discard them, as these contain enzymes that soften pickles.
- Wash four glass jars thoroughly with hot soapy water and rinse well, then let them air dry or place them in a 200-degree Fahrenheit oven for 10 minutes to sterilize.
- In a large pot, combine 2 cups white vinegar, 1 cup apple cider vinegar, 1/2 cup water, and 2 cups brown sugar over medium heat.
- Stir constantly until the sugar dissolves completely.
- Add pickling spice, mustard seeds, red pepper flakes, turmeric, smashed garlic, and fresh dill to the pot.
- Bring the brine to a gentle simmer and let it bubble softly for 5 minutes to infuse the flavors.
- Working quickly, pack prepared cucumber spears or whole cucumbers tightly into each warm jar, leaving about 1/2 inch of headspace.
- Ladle the hot brine and spices into each jar, covering cucumbers completely and leaving 1/2 inch headspace.
- Wipe the rim of each jar clean and screw the lids on firmly but not overly tight.
- Place jars upright on a clean kitchen towel and let them cool to room temperature for at least 1 hour.
- Refrigerate the jars; pickles are ready to eat after 24 hours, with flavor deepening over 3 to 5 days.