Kransekake is a stunning Norwegian almond ring cake that stacks into a towering, show-stopping centerpiece for any celebration. This traditional dessert combines delicate almond-flavored rings held together with royal icing, creating a texturally interesting cake that’s crispy on the outside and tender within.
If you’ve ever wanted to make something that looks impossibly fancy but comes together with straightforward technique, this is your recipe. Let me walk you through building this beautiful cake from the ground up.
Why You’ll Love This Recipe
Kransekake feels like a culinary magic trick that impresses everyone at the table.
- Dramatic presentation that demands attention and photos
- Naturally gluten-free thanks to almond flour as the base
- Crispy exterior with a tender, almost marzipan-like crumb
- The royal icing “glue” keeps everything stable and adds subtle sweetness
- Can be made several days ahead, reducing last-minute stress
My Experience Making This Recipe
I first encountered kransekake at a Norwegian wedding, where it arrived at the reception looking like a golden architectural marvel. The bride’s grandmother had spent half the morning stacking those rings while the family cheered her on, and watching people demolish it with forks was comedy gold.
My first attempt at home was humbling but oddly fun, like a delicious puzzle. The batter itself is simple (almonds, sugar, egg whites, a touch of cardamom), but piping it into perfect rings requires patience and a steady hand.
What surprised me most was how sturdy the finished cake actually is once the icing sets. I’d expected a wobbly tower, but kransekake sits proudly for hours, looking every bit as impressive as it tastes.
Recipe Overview
- Recipe Name: Kransekake (Norwegian Almond Ring Cake)
- Servings: 12 to 15 people
- Prep Time: 30 minutes
- Cook Time: 35 to 40 minutes
- Total Time: 1 hour 15 minutes (plus cooling and assembly)
- Course: Dessert
- Cuisine: Norwegian
- Calories per Serving: 185
Equipment You Will Need
- Electric mixer (stand or hand mixer)
- Piping bag with a round tip (size 12 or 1/2 inch)
- Two large baking sheets
- Parchment paper
- Small bowls for mixing
- Measuring cups and spoons
- Whisk or fork
- Wire cooling racks
- Offset spatula or small knife
- Wooden dowel or thin skewer (optional, for centering rings)
Ingredients for Kransekake
For the Rings
- Ground almonds (almond flour): 2 cups (200g)
- Powdered sugar: 1 1/2 cups (180g)
- Egg whites: 5 large (about 150ml)
- Cardamom pods: 5 or 6 pods, crushed and seeds ground, or 1/2 teaspoon ground cardamom
- Salt: a pinch
For the Royal Icing
- Egg whites: 2 large (about 60ml)
- Powdered sugar: 2 cups (240g)
- Lemon juice: 1 tablespoon
- Water: 1 to 2 tablespoons (for consistency adjustment)
Ingredient Notes and Substitutions
- Ground almonds: These form the cake’s tender crumb and delicate flavor. Blanched almond flour (finely ground with skins removed) gives the lightest result and the most elegant pale color. You can substitute with a mix of ground hazelnuts and almonds if you prefer a slightly different flavor, though the texture may shift slightly.
- Powdered sugar: This dissolves completely into the batter for a smooth, refined texture. Granulated sugar won’t incorporate smoothly and will create a grainier cake. Icing sugar is the only suitable replacement.
- Egg whites: They create structure and lift without adding yolks’ richness, keeping the cake light and crispy. If you’re uncomfortable using raw egg whites in the icing, use pasteurized eggs or substitute with meringue powder mixed with water per package directions.
- Cardamom: This warm spice is traditional and gives kransekake its distinctive flavor. If you dislike it, omit it entirely or use 1/4 teaspoon almond extract for a different but equally valid direction.
How to Make Kransekake
Step 1: Prepare Your Equipment and Oven
Preheat your oven to 350 degrees Fahrenheit (175 degrees Celsius). Line two large baking sheets with parchment paper and have a piping bag fitted with a round tip (size 12 or 1/2 inch) ready on your counter. Starting with everything prepped prevents scrambling mid-batter and ensures even baking across all your rings.
Step 2: Whip the Egg Whites for the Rings
In a large, scrupulously clean bowl, begin beating 5 egg whites with a pinch of salt on medium-high speed. Beat them until they form stiff, glossy peaks that hold their shape when you lift the whisk, about 3 to 4 minutes total. Stiff peaks are crucial here because they provide the lift and structure that keeps the rings crispy rather than dense.
Step 3: Combine Dry Ingredients for the Rings
While the eggs beat, sift together the 2 cups ground almonds, 1 1/2 cups powdered sugar, and cardamom (or 1/2 teaspoon ground cardamom) into a separate bowl. Sifting breaks up any lumps and distributes the cardamom evenly throughout so every ring tastes consistent.
Step 4: Fold the Dry Mixture Into the Egg Whites
Using a rubber spatula or large metal spoon, gently fold the almond mixture into the whipped egg whites in two additions. Fold deliberately but without overworking; you want to keep as much air in the batter as possible because that air creates the signature crispy texture when it expands in the oven.
Step 5: Transfer Batter to the Piping Bag
Spoon the batter into your piping bag fitted with the round tip. Don’t overfill it; fill it only about two-thirds full so you have control and can apply even pressure throughout piping.
Step 6: Pipe the Rings Onto Baking Sheets
Starting with the largest ring, pipe a 5-inch diameter circle of batter onto your prepared baking sheet by squeezing out the batter in a continuous circle. Then pipe progressively smaller rings, making each ring about 0.5 inches smaller in diameter than the one before it, until you have about 18 to 20 rings ranging from 5 inches down to about 1 inch across. Spacing them about 1 inch apart prevents them from touching as they expand during baking.
Step 7: Bake the Rings Until Golden and Set
Bake the rings for 35 to 40 minutes, until they’re pale golden and the edges feel slightly firm to a light touch. They’ll continue to firm up as they cool, so don’t overbake them to the point of deep browning or they’ll become too hard and brittle for stacking.
Step 8: Cool the Rings Completely
Remove the baking sheets from the oven and let the rings cool on the sheets for about 5 minutes. Then carefully transfer each ring to a wire cooling rack using an offset spatula, and let them cool completely before assembling, about 30 minutes. Complete cooling is vital because warm rings are fragile and will break or lose their shape when you try to stack them.
Step 9: Make the Royal Icing
While the rings cool, prepare your royal icing glue. In a clean bowl, whisk 2 egg whites with 2 cups sifted powdered sugar and 1 tablespoon lemon juice on low speed for about 1 minute. The mixture will look dry initially, so gradually add 1 to 2 tablespoons water (just a teaspoon at a time) until you reach a thick, spreadable consistency that holds peaks but flows slightly when piped. The icing should be stiff enough to hold the rings in place but not so thick that it’s hard to work with.
Step 10: Assemble the Kransekake
Place your largest ring on a flat serving plate or cake board. Pipe a thin line of royal icing around the inside edge of that ring, then carefully place the next smaller ring directly on top, centering it as best you can. Repeat this process with each successive ring, working from largest to smallest, until all rings are stacked into a tall, dramatic tower. The icing will set within a few minutes and hold everything stable, so don’t panic if rings feel precarious at first.
Pro Tip: If you’re nervous about centering the rings, insert a thin wooden dowel or skewer vertically through the center of your stack before you start piping icing. It acts as an invisible guide and keeps your tower from leaning. Remove it gently once the icing begins to set.
Tips for the Best Kransekake
- Use blanched almond flour for the palest, most elegant color. Unblanched flour tastes equally good but looks speckled, which some people find beautiful and others find less pristine.
- Don’t skip sifting the dry ingredients; lumps of powdered sugar bake into hard spots that crack the rings and make assembly frustrating.
- Keep your piping bag moving at a steady, even pressure as you pipe the rings. Uneven pressure creates wobbly, misshapen rings that won’t stack neatly.
- If you’re making this more than a few hours ahead, store the baked rings in an airtight container at room temperature and assemble them just before serving. Fresh icing and recently baked rings (or at least ones not stale) stack and look best.
- A tiny dab of royal icing on the bottom of the serving plate stops the base ring from sliding around while you assemble the tower above it.
- If a ring cracks during handling, don’t discard it. Tuck it in the middle of the stack where it’s hidden, and no one will ever know.
Common Mistakes to Avoid
- Over-beating the egg whites: If you beat them until they’re dry and starting to look grainy, they won’t fold smoothly into the almond mixture, and your batter becomes lumpy and uneven.
- Opening the oven door during baking: The temperature drop can cause the rings to deflate or bake unevenly. Resist the urge to peek until the last 5 minutes.
- Assembling with warm rings: Warm baked goods are structurally weak and will flex, break, or slide out of alignment. Always wait for complete cooling.
- Making icing too thick: If your royal icing is like concrete, you can’t pipe it smoothly and you’ll strain your hand. It should flow slightly, not sit like mortar.
- Skipping the lemon juice in the icing: It brightens the flavor and helps prevent the icing from tasting cloyingly sweet, even though the amount is small.
Serving Suggestions
Kransekake is the star of the show and needs little accompaniment, but a few simple sides elevate the experience. Serve it with sparkling cider, champagne, or strong coffee to cut through the sweetness and refresh the palate between bites.
- Champagne or prosecco for toasts and celebration
- Strong black coffee or espresso for balance
- Fresh berries (raspberries or strawberries) scattered around the base for color contrast
- A small bowl of whipped cream on the side for those who want a creamy complement
- Sparkling cider for a non-alcoholic festive option
Variations to Try
- Pistachio Kransekake: Replace half the ground almonds with finely ground pistachios for a more delicate, slightly savory note and a subtle green hue. The flavor becomes earthier and the presentation shifts to something uniquely elegant.
- Hazelnut and Chocolate Version: Substitute half the ground almonds with finely ground hazelnuts and add 2 tablespoons unsweetened cocoa powder to the dry ingredients. This creates a nuttier, more chocolatey version perfect for those who find pure almond cakes too delicate.
- Orange-Scented Kransekake: Replace the cardamom with the zest of 1 large orange and 1/2 teaspoon orange extract for a bright, Mediterranean twist. Add a tiny pinch of orange zest to the royal icing as well for visual interest.
- Mini Kransekakes: Pipe much smaller rings and bake them for only 15 to 20 minutes, then assemble individual stacks with fewer rings. These make beautiful plated desserts for fancy dinners or stunning edible favors for guests.
- Decorated Tower: After the icing sets, drizzle additional icing over the top in artistic swirls, add edible gold leaf, or dust the entire cake with powdered sugar for a snowy winter effect.
Dietary Adaptations
- Gluten-Free: This recipe is naturally gluten-free as written since it uses almond flour as the base. Always verify that your almond flour, baking sheets, and equipment haven’t been contaminated with gluten if serving someone with celiac disease.
- Dairy-Free: The recipe contains no dairy, so it’s already dairy-free. Simply ensure your powdered sugar is made without any dairy additives, which is standard but worth checking.
- Vegan: Replace egg whites with aquafaba (the liquid from canned chickpeas): 3 tablespoons aquafaba replaces 1 egg white. Whip the aquafaba exactly as you would egg whites. The result is slightly less crispy but still delicious and impressive.
- Low-Carb/Keto: Substitute powdered sugar with powdered erythritol or monk fruit sweetener at a 1:1 ratio. The texture remains nearly identical, though some sweeteners have slightly different mouthfeel and you may need to adjust quantities by a few tablespoons.
Storage and Reheating
Refrigerator
Store the cooled, assembled kransekake in an airtight container at room temperature for up to 3 days. Refrigeration actually softens the rings because they absorb moisture from the air, so room temperature is preferable unless your kitchen is very warm.
- Keep the assembled cake away from strong odors and humidity
- If the icing softens slightly, it will re-firm up as the room temperature stabilizes
Freezer
Freeze unassembled rings in an airtight container for up to 1 month. The baked rings freeze beautifully because they have minimal moisture; assembled cake can freeze for 2 weeks but the icing may develop small cracks as it expands and contracts.
- Thaw rings at room temperature for about 30 minutes before reassembling
- Prepare fresh royal icing after thawing for the crispest assembly
Reheating
Kransekake is best served at room temperature and doesn’t require reheating. If you’ve frozen the rings and want to slightly crisp them, place them in a 300-degree oven for 5 to 8 minutes, then cool before reassembling.
- Never microwave kransekake as it will become soggy
- If rings have softened, a brief oven warm-up restores crispness
Nutrition Information
| Nutrient | Amount |
|---|---|
| Calories | 185 |
| Total Fat | 10g |
| Saturated Fat | 1g |
| Carbohydrates | 21g |
| Fiber | 1g |
| Sugar | 19g |
| Protein | 4g |
| Sodium | 25mg |
| Cholesterol | 0mg |
Nutritional values are approximate and based on serving 15 people. Actual values vary depending on specific brands and ingredient substitutions.
Frequently Asked Questions
Can I use store-bought almond flour instead of grinding my own?
Absolutely, and I recommend it for convenience and consistency. Blanched almond flour from reputable brands gives results identical to hand-ground almonds, and it’s much faster.
What if my rings crack while piping or baking?
Small cracks don’t matter because they’ll be hidden when you stack the rings. If a ring cracks badly during handling, simply place it in the middle of the stack where it’s invisible.
How far ahead can I make this cake?
You can bake the rings up to 1 week ahead and store them in an airtight container. Assemble the finished tower 2 to 3 hours before serving for the best appearance and firmness.
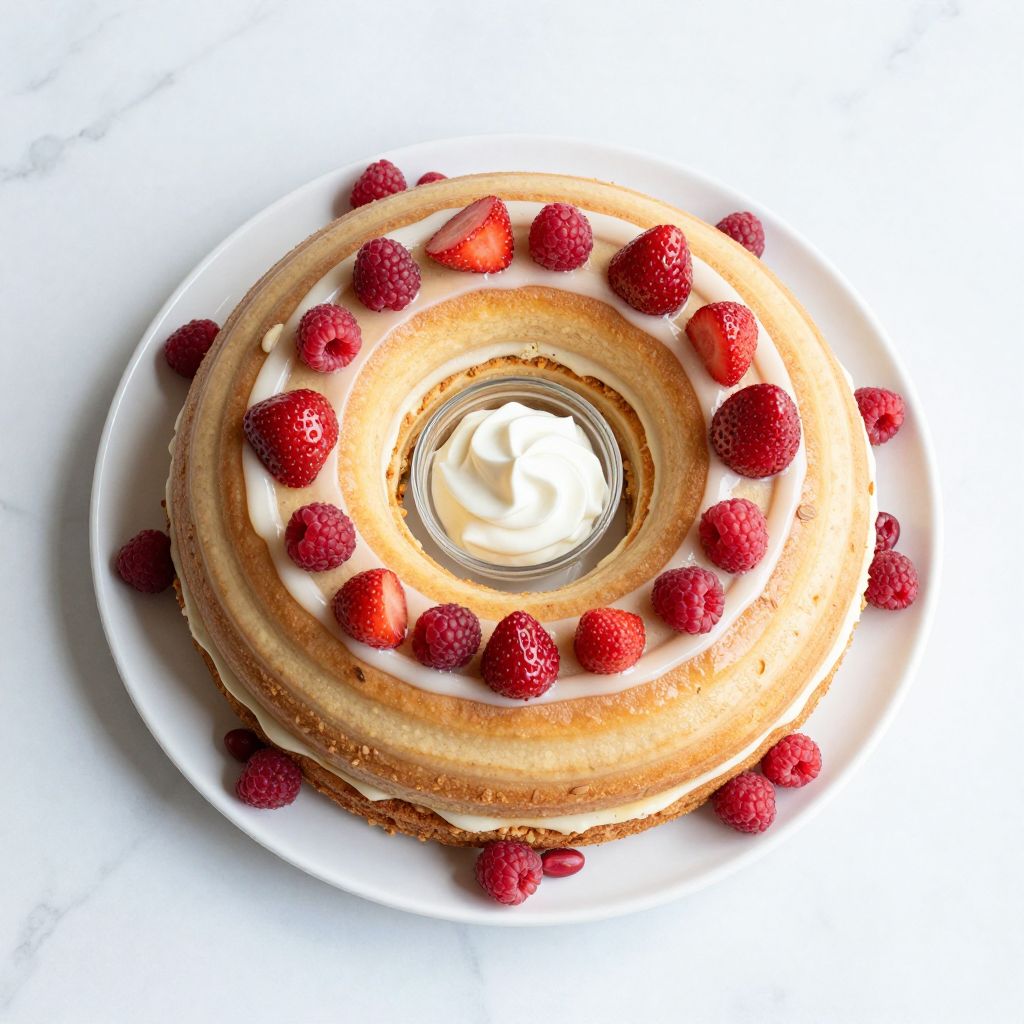
Kransekake (Norwegian Almond Ring Cake)
Ingredients
Equipment
Method
- Preheat your oven to 350 degrees Fahrenheit (175 degrees Celsius). Line two large baking sheets with parchment paper and have a piping bag fitted with a round tip (size 12 or 1/2 inch) ready.
- In a large, scrupulously clean bowl, begin beating 5 egg whites with a pinch of salt on medium-high speed until stiff, glossy peaks form, about 3 to 4 minutes.
- Sift together 2 cups ground almonds, 1 1/2 cups powdered sugar, and cardamom or 1/2 teaspoon ground cardamom into a separate bowl.
- Gently fold the almond mixture into the whipped egg whites in two additions, keeping as much air in the batter as possible.
- Spoon the batter into your piping bag filled about two-thirds full.
- Starting with the largest ring, pipe a 5-inch diameter circle of batter onto the prepared baking sheet. Then pipe smaller rings about 0.5 inches smaller each time until about 18 to 20 rings are piped ranging from 5 inches down to about 1 inch across. Space rings about 1 inch apart.
- Bake the rings for 35 to 40 minutes until pale golden and edges feel slightly firm. Avoid overbaking to prevent brittleness.
- Remove baking sheets from oven and cool rings on sheets for about 5 minutes. Then transfer rings to wire racks and let cool completely for about 30 minutes.
- Prepare royal icing by whisking 2 egg whites with 2 cups powdered sugar and 1 tablespoon lemon juice on low speed for about 1 minute.
- Gradually add 1 to 2 tablespoons water, a teaspoon at a time, until a thick, spreadable consistency that holds peaks but flows slightly when piped is reached.
- Place the largest ring on a flat serving plate. Pipe a thin line of royal icing around the inside edge, then place the next smaller ring directly on top, centering it carefully.
- Repeat icing and stacking with all remaining rings, working from largest to smallest, building a tall tower.
- Optionally, insert a thin wooden dowel or skewer vertically through the center before stacking for stability, removing it gently once icing sets.