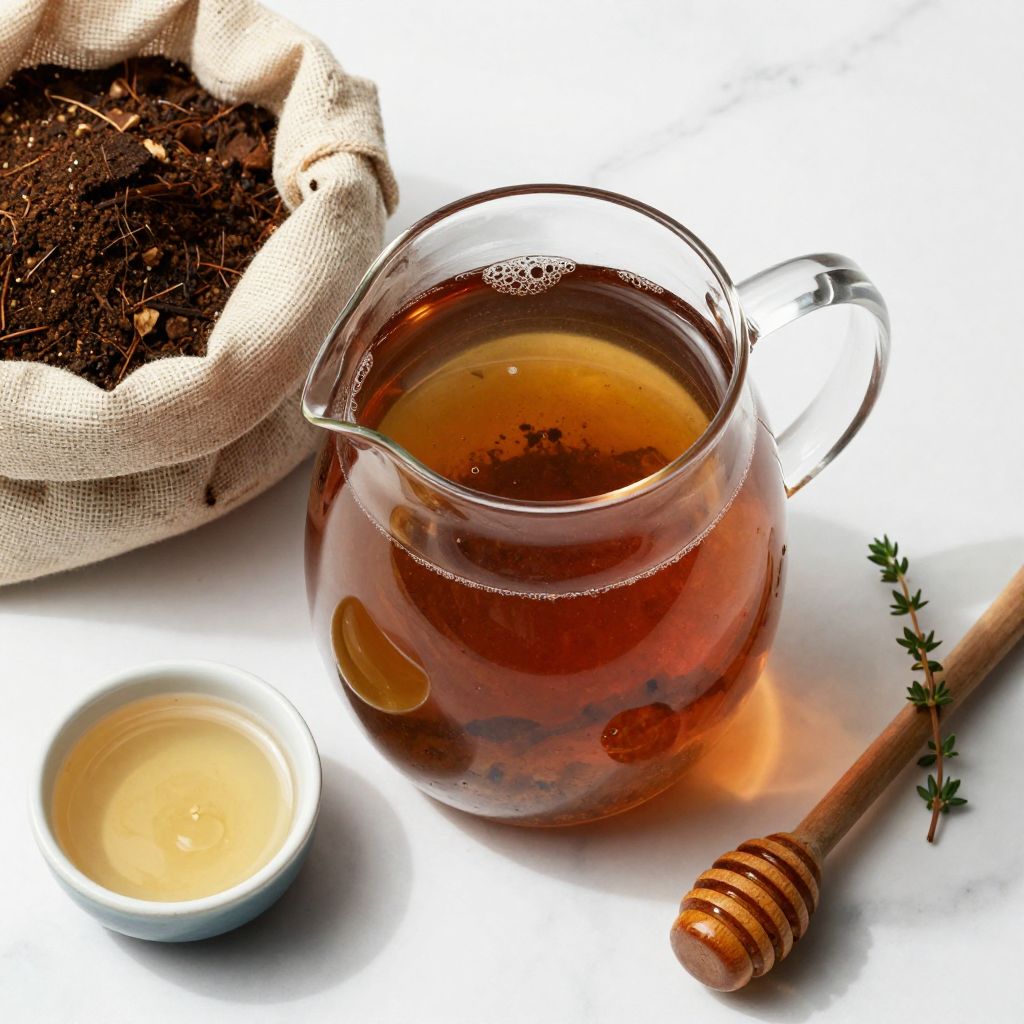
Compost tea is a nutrient-rich liquid fertilizer that transforms your garden into a thriving ecosystem without chemicals. Made by steeping finished compost in water, this brew activates beneficial microbes that feed plants and improve soil health from the roots up. Whether you’re growing vegetables, flowers, or houseplants, compost tea delivers the nutrients they crave in an easy-to-apply form.
If you’ve ever wondered how to get more from your compost pile, this recipe will change the way you garden. Let’s explore how to brew this liquid gold and watch your plants respond with visible vigor.
Why You’ll Love This Recipe
Compost tea is the gardener’s secret weapon for plant health and soil vitality. It costs almost nothing to make, works faster than solid compost alone, and creates an army of beneficial organisms that protect your plants.
- Activates beneficial bacteria and fungi that improve nutrient availability
- Boosts plant immunity and disease resistance naturally
- Costs pennies compared to commercial fertilizers
- Works on vegetables, flowers, lawns, and houseplants
- Reduces waste by using finished compost you already have
My Experience Making This Recipe
I started brewing compost tea five years ago out of curiosity, and it honestly transformed my vegetable garden. The first batch felt experimental, but within two weeks of applying it weekly, my tomatoes grew bushier and my lettuce stayed crisp longer.
The best part? Friends noticed the difference before I even told them about the tea. My roses bloomed fuller, my peppers set more fruit, and I stopped buying bottled fertilizer entirely.
The only learning curve was understanding that the “cooking” process matters. I killed my first batch by letting it brew too long in hot sun, but once I nailed the timing and aeration, consistency followed naturally.
Recipe Overview
- Recipe Name: Homemade Compost Tea
- Servings: Makes 5 gallons
- Prep Time: 15 minutes
- Brew Time: 24 to 48 hours
- Total Time: 1 to 2 days
- Type: Soil Amendment
- Category: Gardening
Equipment You Will Need
- Large bucket or food-grade container (5 gallons minimum)
- Mesh bag or old pillowcase for holding compost
- Air pump with airstone (aquarium pump works perfectly)
- Measuring cup or kitchen scale
- Stirring stick or paddle
- Strainer or cheesecloth for filtering
- Spray bottle or watering can for application
- Thermometer to check water temperature
Ingredients for Compost Tea
Base Recipe
- Finished compost – 1 to 2 cups (not fresh or hot compost)
- Dechlorinated water – 5 gallons (chlorine kills beneficial microbes)
- Air pump with airstone – for continuous aeration
Optional Microbial Boosters
- Unsulfured molasses – 1 to 2 tablespoons (feeds microbes)
- Fish emulsion – 1 to 2 tablespoons (nutrient boost)
- Kelp powder – 1 tablespoon (trace minerals)
- Aerated compost tea starter culture – optional commercial option
Ingredient Notes and Substitutions
- Finished Compost: Use only fully decomposed compost where you can’t identify the original materials. Fresh or hot compost kills the microbes you’re trying to activate. If you don’t have aged compost yet, wait a few more weeks before brewing.
- Dechlorinated Water: Chlorine in tap water destroys beneficial bacteria before brewing even starts. Let tap water sit uncovered for 24 hours, use a dechlorination filter, or collect rainwater instead.
- Molasses: This feeds the bacteria and fungi, accelerating their reproduction in your tea. Unsulfured molasses works; avoid blackstrap molasses as it can alter pH unpredictably.
- Fish Emulsion: Adds nitrogen and other nutrients that microbes need to multiply. You can skip this entirely if you want a purely microbe-focused brew, but it strengthens the final product.
- Kelp Powder: Provides iodine, potassium, and micronutrients that boost plant immunity. Omit it if you have limited ingredients; the tea still works without it.
How to Make Compost Tea
Step 1: Prepare Your Water
Fill your 5-gallon bucket with dechlorinated water and let it sit at room temperature. If using fresh tap water, set it out uncovered for at least 24 hours before starting so chlorine evaporates naturally.
Step 2: Fill Your Mesh Bag
Place 1 to 2 cups of finished compost into a mesh bag or old pillowcase and tie it closed. Putting compost in a bag prevents solid particles from clogging your pump and makes cleanup effortless.
Step 3: Submerge the Compost Bag
Drop the tied compost bag into the bucket of water and push it down so it’s fully submerged. The compost will begin leaching nutrients immediately, but aeration is what activates the beneficial microorganisms.
Step 4: Add Optional Microbial Boosters
Stir in 1 to 2 tablespoons of unsulfured molasses, 1 to 2 tablespoons of fish emulsion, and 1 tablespoon of kelp powder if you want a more nutrient-rich final product. These ingredients feed the microbes and give them energy to multiply faster during brewing.
Step 5: Set Up Your Air Pump
Place the airstone from your aquarium pump into the bottom of the bucket and turn the pump on to begin continuous aeration. Oxygen is essential because beneficial aerobic bacteria cannot thrive without it, and stagnant compost tea develops harmful anaerobic pathogens instead.
Step 6: Monitor Temperature and Brew Time
Keep your bucket in a location between 65 and 75 degrees Fahrenheit for best results. Brew for 24 to 48 hours depending on water temperature; warmer water speeds up microbial reproduction while cooler water takes longer.
Step 7: Check for Readiness
The tea is ready when it smells earthy and rich, not sour or rotten. If it smells vinegary or like sulfur, anaerobic bacteria have taken over and the batch should be discarded to avoid spreading pathogens to your garden.
Step 8: Strain and Use Immediately
Turn off the air pump and carefully pour the tea through cheesecloth or a fine strainer into containers, leaving the compost solids behind. Use the strained tea within 4 hours of completion for maximum microbial viability, as the beneficial organisms die quickly once aeration stops.
Step 9: Compost the Remaining Solids
Remove the mesh bag and return the spent compost and any solids to your compost pile. These materials are still nutrient-rich and will continue breaking down in your pile.
Pro Tip: Never let finished compost tea sit unused for more than 4 hours; the beneficial microbes begin dying off rapidly once aeration stops, reducing effectiveness significantly.
Tips for the Best Compost Tea
- Use water at room temperature instead of cold water, which slows microbial reproduction by several hours and reduces the final quality of your tea.
- Check your air pump before brewing to ensure it produces consistent bubbles throughout the bucket and isn’t blocked or damaged.
- Brew in a shaded location away from direct sunlight, which can heat the water unpredictably and stress the beneficial organisms you’re cultivating.
- Don’t overcrowd the compost ratio; more than 2 cups per 5 gallons often creates an anaerobic environment despite aeration.
- Use the finished tea on garden beds, potted plants, and even lawn areas for consistent results across all growing spaces.
- Brew a fresh batch every 2 to 3 weeks during growing season to maintain a steady supply and keep plants consistently fed.
Common Mistakes to Avoid
- Using chlorinated water without letting it sit first: Chlorine kills the beneficial bacteria you’re trying to cultivate, turning your tea into expensive water.
- Brewing with fresh or hot compost: Immature compost hasn’t finished breaking down and doesn’t contain the microbial populations you need for an effective tea.
- Skipping aeration or using a weak air pump: Without consistent oxygen, harmful anaerobic bacteria take over and create a smelly, plant-damaging product instead of beneficial tea.
- Letting the tea sit too long after brewing: Beneficial microbes die within 4 hours once aeration stops, so delayed application dramatically reduces effectiveness and wastes your effort.
- Brewing in hot or direct sunlight: Temperature swings stress the delicate microbial ecosystem and can kill off the bacteria you’re trying to activate.
Serving Suggestions
Apply your finished compost tea immediately to achieve the highest microbial benefit to your plants and soil. You can use it as a spray, soil drench, or foliar application depending on your garden goals.
- Drench the soil around vegetable plants every 2 weeks during growing season for consistent nutrient availability and disease suppression
- Spray directly onto plant leaves early morning or late evening for beneficial microbes to colonize leaf surfaces and prevent fungal diseases
- Water newly planted seedlings and transplants with compost tea within 24 hours of planting to establish beneficial root microbes immediately
- Apply to established lawns monthly to improve soil structure and reduce compaction over time
- Use on container plants and houseplants monthly to boost nutrient cycling in limited potting soil
Variations to Try
- Vermicompost Tea: Replace regular finished compost with worm castings from vermicomposting for a more concentrated microbial and nutrient brew that works faster on plants.
- Fungal-Dominant Tea: Add more molasses and reduce aeration slightly to favor fungal growth, which is better for woody plants and perennials that need mycelial networks in soil.
- Bacterial-Dominant Tea: Increase aeration to maximum and brew for a full 48 hours to heavily favor bacteria, which is ideal for vegetable gardens and quick nutrient uptake.
- Herbal Enhancement: Soak dried comfrey, nettle, or chamomile in the water before adding compost to add specific mineral profiles and plant-protective compounds to your tea.
- Bokashi Tea: Use bokashi fermented compost instead of aged compost for a faster, more potent microbial tea with added fermentation byproducts that boost plant vigor.
Dietary Adaptations
- For Organic Gardening: Ensure all ingredients, including molasses and fish emulsion, are certified organic to maintain organic certification for your garden produce.
- For Synthetic-Free Gardening: Use only compost, water, and optional kelp powder while skipping all processed additives like fish emulsion for a purely natural tea.
- For Budget-Conscious Gardeners: Skip all optional boosters and rely on finished compost and water alone; the tea works effectively at much lower cost with just the base recipe.
- For High-Speed Growing: Double the molasses amount and extend brewing to a full 48 hours to maximize microbial reproduction for plants with high nutrient demands like fruiting vegetables.
Storage and Reheating
Refrigerator
Finished compost tea does not store well in the refrigerator because beneficial microbes die rapidly without aeration. Use your tea immediately after brewing for maximum benefit and potency.
- If you must delay application by a few hours, keep the air pump running in the storage container
- Never refrigerate finished tea as cold temperatures kill beneficial organisms within minutes
Freezer
Freezing compost tea destroys the beneficial microbes you spent time cultivating, rendering it useless as a microbial inoculant. Freeze only the unbrewed compost itself for storage, not the finished tea.
- Keep finished compost in freezer bags to extend shelf life up to one year
- Thaw compost at room temperature before brewing a fresh batch
Reheating
Compost tea should never be heated or reheated after brewing because heat kills beneficial microbes instantly. Always brew fresh tea for each application to ensure maximum effectiveness.
- Use tea immediately at room temperature without any heating
- Brew fresh batches on a regular schedule rather than storing and reusing old tea
Nutrition Information
| Nutrient | Amount |
|---|---|
| Nitrogen (N) | 15 to 50 mg/L |
| Phosphorus (P) | 10 to 30 mg/L |
| Potassium (K) | 20 to 60 mg/L |
| Beneficial Bacteria | 100 million to 1 billion CFU/mL |
| Beneficial Fungi | 10 million to 100 million CFU/mL |
| Protozoa | 1 million to 10 million per mL |
| Nematodes | Thousands per mL |
| Humic Acid | 50 to 150 mg/L |
Nutrient levels vary based on source compost quality, brew time, water temperature, and additives used. These ranges represent typical results from well-brewed compost tea using finished compost and optional microbial boosters.
Frequently Asked Questions
Can I brew compost tea without an air pump?
You can stir the bucket manually every hour for 24 hours, but you’ll get inferior results compared to continuous aeration. An aquarium pump is inexpensive and worth the investment for consistently reliable tea.
What does bad compost tea smell like?
Bad tea smells sour, vinegary, or like rotten eggs, indicating anaerobic bacteria have dominated the brew. Discard it immediately and start a fresh batch, as applying bad tea can introduce pathogens to your garden.
How often should I apply compost tea to my garden?
Apply weekly during active growing season for best results, though once every 2 weeks still provides significant benefits. More frequent applications build robust soil biology faster than infrequent use.
Can I use fresh compost instead of finished compost?
Fresh compost won’t produce effective tea because it lacks the stable microbial communities that finished compost contains. Wait until your compost is fully decomposed and brown throughout before brewing with it.
Will compost tea help with plant diseases?
Yes, beneficial microbes in compost tea colonize plant leaves and soil, outcompeting disease-causing organisms and triggering plant immune responses. This reduces fungal diseases like powdery mildew and blight when applied regularly as a preventative.
Can I add anything else to boost my compost tea?
You can add compost tea starter cultures, humic acid products, or specific bacterial inoculants, though simple molasses works just as well and costs less. Stick with proven additions rather than experimental ingredients that might stress your microbial ecosystem.
Is compost tea safe for seedlings and young plants?
Compost tea is gentler than most fertilizers and safe for seedlings when diluted 1 part tea to 2 parts water. This prevents nutrient shock while still introducing beneficial microbes to young plants.
Final Thoughts
Brewing your own compost tea transforms wasted compost into liquid nutrition for your entire garden at practically zero cost. Once you see the results in plant vigor and soil health, you’ll wonder why you ever bought synthetic fertilizers in the first place.
Start brewing this week and commit to a regular schedule during growing season. Your plants will thank you with faster growth, healthier leaves, and more abundant harvests than you’ve ever experienced.
Homemade Compost Tea
Ingredients
Equipment
Method
- Fill your 5-gallon bucket with dechlorinated water and let it sit at room temperature for at least 24 hours if using tap water to allow chlorine to evaporate.
- Place 1 to 2 cups of finished compost into a mesh bag or old pillowcase and tie it closed.
- Submerge the tied compost bag fully into the bucket of water.
- Add optional 1 to 2 tablespoons unsulfured molasses, 1 to 2 tablespoons fish emulsion, and 1 tablespoon kelp powder; stir gently to dissolve and distribute.
- Place the airstone from your aquarium pump into the bottom of the bucket and turn on the pump to begin continuous aeration.
- Keep the bucket in a shaded location at 65 to 75°F (18 to 24°C) and brew the compost tea for 24 to 48 hours depending on water temperature.
- Check the tea smell; it should smell earthy and rich, not sour or rotten. If it smells vinegary or like sulfur, discard and start over.
- Turn off the air pump and strain the tea through cheesecloth or a fine strainer into containers, leaving compost solids behind.
- Use the strained compost tea immediately within 4 hours for maximum microbial viability.
- Remove the mesh bag and compost solids and return them to your compost pile.