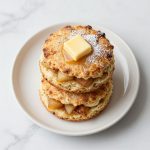
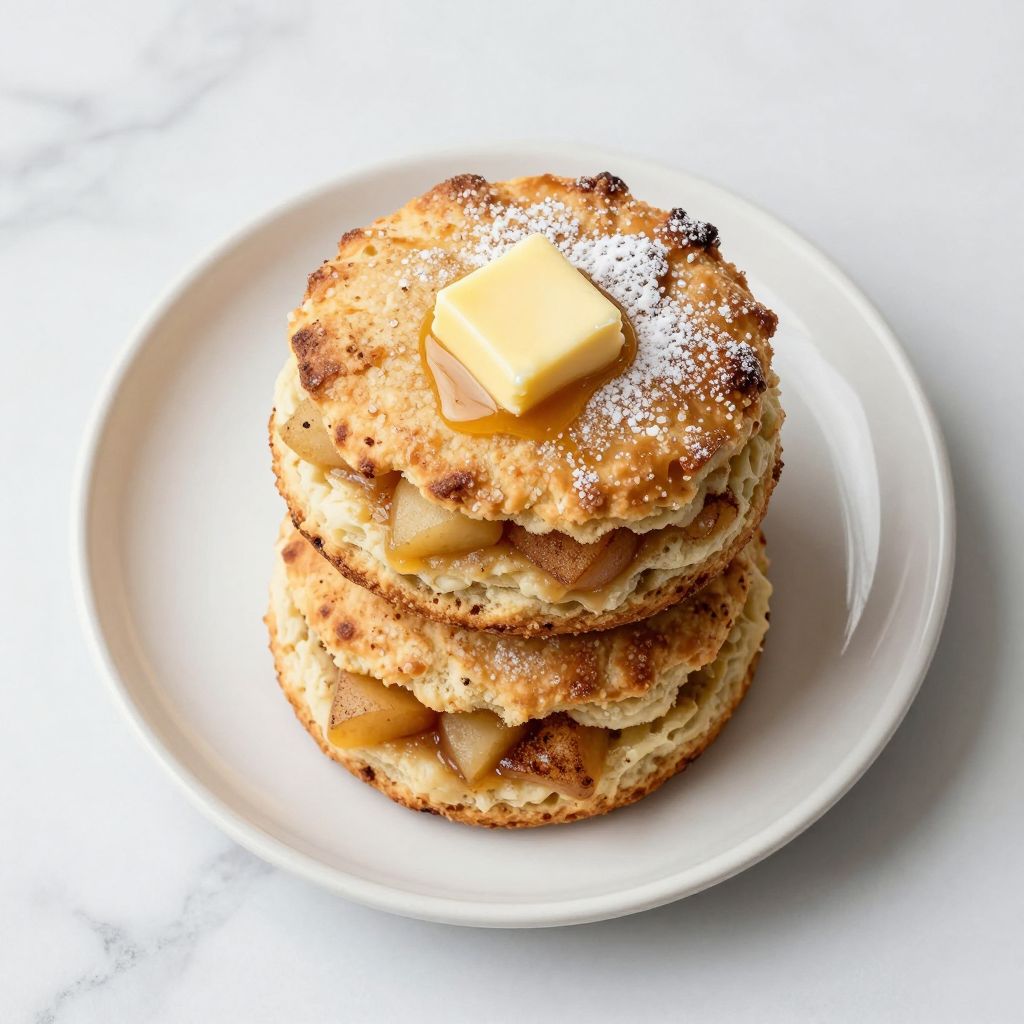
Apple Pie Biscuits deliver all the cozy warmth of fall in a handheld pastry that’s tender, buttery, and studded with cinnamon-spiced apples. These biscuits bridge the gap between breakfast and dessert, making them perfect for weekend brunch or a sweet afternoon snack. If you love the flavors of apple pie but want something faster and less fussy, these are your new go-to.
The magic happens when you layer soft, flaky biscuit dough with a simple apple filling that bakes into something absolutely irresistible. I’ll walk you through everything you need to know to nail these every single time.
Why You’ll Love This Recipe
These biscuits hit every mark: they’re buttery and flaky on the outside, tender inside, and packed with warm apple flavor that tastes like comfort food.
- Ready in under 45 minutes from start to finish.
- Works for breakfast, brunch, dessert, or an afternoon treat.
- The apple-cinnamon filling is simple but tastes homemade and special.
- Freezer-friendly, so you can make a batch ahead and bake when you want them fresh.
- Impresses guests without requiring any advanced baking skills.
My Experience Making This Recipe
The first time I made apple pie biscuits, I was honestly skeptical about how well they’d turn out. I’ve had plenty of disappointing biscuits that turned out dense or dry, so I approached this with cautious optimism.
Within minutes of pulling the first batch from the oven, my kitchen smelled like an orchard in the fall, and my skepticism vanished. The biscuits emerged golden and puffed, with that telltale flaky texture that only happens when you treat your butter right and don’t overwork the dough.
My family devoured them straight from the cooling rack, and I’ve made them at least a dozen times since. What surprised me most was how well they freeze and how quickly they come together when you already have the components prepped.
Recipe Overview
- Recipe Name: Apple Pie Biscuits
- Servings: 12 biscuits
- Prep Time: 20 minutes
- Cook Time: 20 minutes
- Total Time: 40 minutes
- Course: Breakfast, Brunch, Dessert
- Cuisine: American
- Calories per Serving: 240 calories
Equipment You Will Need
- Large mixing bowl
- Medium mixing bowl
- Pastry cutter or two forks
- Baking sheet
- Parchment paper
- Measuring cups and spoons
- Wooden spoon or spatula
- Sharp knife for dicing apples
- Cutting board
- Cooling rack
Ingredients for Apple Pie Biscuits
For the Biscuits
- 2 cups all-purpose flour
- 1/4 cup granulated sugar
- 2 1/2 teaspoons baking powder
- 1/2 teaspoon salt
- 6 tablespoons cold butter, cubed
- 3/4 cup whole milk
- 1 teaspoon vanilla extract
For the Apple Filling
- 2 medium apples, peeled and finely diced
- 3 tablespoons granulated sugar
- 1 tablespoon brown sugar
- 1/2 teaspoon ground cinnamon
- 1/4 teaspoon ground nutmeg
- 1 tablespoon lemon juice
- 1 tablespoon cornstarch
For Assembly
- 1 tablespoon butter, melted
- 1 tablespoon coarse sugar or regular sugar
Ingredient Notes and Substitutions
- Cold Butter: Cold butter creates steam pockets in the dough, making the biscuits flaky and light. Softened or melted butter won’t give you that layered texture. If your kitchen is warm, chill your butter in the freezer for 15 minutes before cutting it.
- All-Purpose Flour: All-purpose flour has the right gluten balance for tender biscuits that still hold together. Cake flour makes them too delicate, and bread flour makes them tough. If you need gluten-free biscuits, substitute a 1:1 gluten-free flour blend and add 1/2 teaspoon xanthan gum.
- Fresh Apples: Granny Smith or Honeycrisp apples work best because they hold their shape during baking and offer a nice tart-sweet balance. Mealy apples like Red Delicious break down too quickly. You can substitute with 1 1/2 cups canned diced apples, drained well and patted dry, if fresh apples aren’t available.
- Cornstarch: Cornstarch absorbs the moisture the apples release as they bake, preventing soggy biscuits. You can replace it with 1 1/2 teaspoons arrowroot powder, though the texture will be slightly less firm.
- Whole Milk: Whole milk creates the richest, most tender crumb. If you only have 2% or skim milk, the biscuits will be slightly less tender but still good. Non-dairy milk like oat milk also works without much difference in the final result.
How to Make Apple Pie Biscuits
Step 1: Prepare Your Apple Filling
Peel your apples, cut them in half, and remove the cores, then dice them into small cubes about 1/4 inch. In a medium bowl, toss the diced apples with both sugars, cinnamon, nutmeg, lemon juice, and cornstarch until every piece is coated evenly.
The lemon juice prevents the apples from browning and adds brightness to the filling, while the cornstarch will absorb moisture as the apples cook. Let this filling sit at room temperature while you make the biscuit dough.
Step 2: Combine Your Dry Ingredients
In a large mixing bowl, whisk together flour, granulated sugar, baking powder, and salt until everything is evenly distributed. Whisking incorporates air into the flour and ensures the baking powder spreads evenly throughout, so you get consistent rise in every biscuit.
Step 3: Cut in the Cold Butter
Add your cubed cold butter to the flour mixture and use a pastry cutter or two forks to work the butter into the flour until the mixture resembles coarse breadcrumbs with some pea-sized pieces of butter still visible. This step is crucial because those butter pieces create steam pockets that make biscuits flaky instead of dense.
Don’t overmix or you’ll melt the butter and end up with tough, dense biscuits instead of light, tender ones. Work quickly and keep everything as cold as possible.
Step 4: Add the Wet Ingredients
Pour the milk and vanilla extract into the flour mixture and stir gently with a wooden spoon or spatula until a shaggy dough just comes together. Stop mixing as soon as no dry flour remains in the bottom of the bowl.
Overmixing develops gluten and toughens the biscuits, so resist the urge to stir until everything looks perfectly smooth. A slightly rough, lumpy dough is exactly what you want here.
Step 5: Shape and Fill the Biscuits
Turn your dough out onto a lightly floured surface and gently pat it into a 1/2-inch thick rectangle. Using a 3-inch round biscuit cutter or a glass, cut out 12 rounds, re-rolling scraps gently as needed.
Place 6 biscuit rounds on a parchment-lined baking sheet, leaving about 2 inches between each one. Add a heaping tablespoon of apple filling to the center of each biscuit, then top with another biscuit round and gently press the edges together to seal.
Step 6: Brush and Sugar the Tops
Brush the top of each assembled biscuit lightly with melted butter, then sprinkle with coarse sugar. The butter helps the sugar stick and creates a beautiful, slightly crispy exterior, while the sugar adds sweetness and texture.
Step 7: Chill Before Baking
Place your assembled biscuits in the refrigerator for at least 10 minutes, preferably 20 minutes. Chilling allows the gluten to relax so the biscuits rise up rather than spreading out, and it firms up the butter again for better flaking.
You can also freeze them at this point for up to 3 months and bake straight from frozen, adding just 5 extra minutes to the bake time.
Step 8: Bake Until Golden
Preheat your oven to 400 degrees Fahrenheit. Bake the chilled biscuits for 18 to 22 minutes, until the tops are golden brown and a toothpick inserted into the biscuit (not the filling) comes out clean.
The biscuits should puff up noticeably and feel firm but still have some give when you tap the top gently. If the bottoms aren’t browning, slide the baking sheet to a lower oven rack for the last 5 minutes.
Step 9: Cool Briefly Before Serving
Transfer the biscuits to a cooling rack and let them rest for 5 to 10 minutes before eating. This brief cooling allows the filling to set slightly so it won’t run out when you bite in, but eating them while still warm delivers the best flavor and texture.
Pro Tip: Keep your butter cold and handle the dough as little as possible, these two habits alone will transform your biscuits from dense and tough to light and flaky.
Tips for the Best Apple Pie Biscuits
- Use very cold butter straight from the refrigerator or freezer, and work quickly so the butter doesn’t soften. Warm butter spreads into the flour instead of creating pockets, and you lose that flaky texture that makes biscuits special.
- Dice your apples small so they cook through completely and distribute evenly throughout each biscuit. Large chunks stay undercooked and release too much liquid, making the filling runny.
- Don’t skip the cornstarch in the filling. It’s the barrier between a perfectly moist apple filling and a soggy biscuit, and it takes up minimal space in the recipe.
- If your kitchen is very warm, chill the bowl and even the flour before you start. A cold environment makes it much easier to keep the butter cold throughout the mixing process.
- Chilling the assembled biscuits before baking makes a noticeable difference in how much they puff up and how flaky they become. The extra 10 minutes is absolutely worth it.
- Don’t press down hard when you seal the edges together, just a gentle press keeps them together without compacting the dough and blocking rise.
Common Mistakes to Avoid
- Using softened butter instead of cold butter: Softened or melted butter mixes completely into the flour, creating a uniform dough that bakes into a dense, cake-like crumb instead of flaky layers. Always start with cold butter straight from the refrigerator.
- Overmixing the dough: Stirring the dough too much develops gluten, which makes the biscuits tough and chewy instead of tender. Stop as soon as the dry flour disappears, even if the dough looks rough.
- Skipping the cornstarch in the filling: Without it, the apples release too much liquid as they bake, soaking into the biscuits and making them soggy and dense. Cornstarch absorbs that moisture and keeps the biscuits crispy.
- Making the apple chunks too large: Big apple pieces don’t cook through in the baking time and release excess moisture that escapes as steam. Dice them small so they cook evenly and distribute throughout the biscuit.
- Skipping the chilling step: Skipping the refrigerator time lets the gluten relax too much and the butter soften, so the biscuits spread wide and flat instead of puffing tall with flaky layers.
Serving Suggestions
Serve warm apple pie biscuits with a cup of strong coffee or hot tea for the perfect breakfast treat, or enjoy them alongside vanilla ice cream for a simple dessert that tastes indulgent. They work equally well as a standalone snack straight from the oven.
- Dust warm biscuits with powdered sugar for an elegant finish.
- Serve with a dollop of whipped cream or fresh whipped butter.
- Pair with a cup of spiced chai or apple cider for maximum coziness.
- Top with a scoop of cinnamon ice cream for dessert.
- Drizzle with a simple vanilla glaze made from powdered sugar and milk.
Variations to Try
- Pear and Ginger Biscuits: Replace apples with diced pears and add 1/4 teaspoon ground ginger to the filling for a more sophisticated, warming spice profile that works beautifully with the buttery biscuits.
- Maple Pecan Biscuits: Skip the apples entirely and mix 1/2 cup finely chopped pecans with 3 tablespoons maple syrup and 1/4 teaspoon cinnamon for a nutty, rich filling that bakes into crispy, caramelized edges.
- Caramel Apple Biscuits: Toss the diced apples with caramel sauce instead of sugar and spices for a gooey, luxe filling that pulls apart in strands when you bite through the warm biscuit.
- Cranberry Apple Biscuits: Mix the diced apples with 1/2 cup fresh or frozen cranberries for a tart-sweet filling that adds brightness and a touch of tartness to balance the richness of the buttery biscuits.
- Brown Butter Biscuits: Brown the butter on the stovetop for 5 minutes before chilling and cutting it into cubes, adding a nutty, toasted depth to the biscuit dough that pairs beautifully with the spiced apples.
Dietary Adaptations
- Gluten-Free: Substitute the all-purpose flour with a 1:1 gluten-free flour blend and add 1/2 teaspoon xanthan gum to bind the dough, though the texture will be slightly less flaky and more tender.
- Dairy-Free: Replace the butter with cold coconut oil or vegan butter and use a non-dairy milk like oat or almond milk, though the biscuits will be slightly less rich and flaky.
- Vegan: Use coconut oil instead of butter, non-dairy milk, and skip the melted butter topping, though you lose some of the richness and flaking that makes these special.
- Low-Carb or Keto: Substitute almond flour for half the all-purpose flour, use erythritol instead of sugar, and add 1 egg to bind, though the texture becomes denser and less flaky than the original.
Storage and Reheating
Refrigerator
Store cooled biscuits in an airtight container for up to 3 days. They’ll stay fresh and maintain their texture as long as you keep them sealed away from air.
- Keep in an airtight container on a shelf, not in direct sunlight.
- If they start to dry out slightly, warm them for 5 minutes in a 350-degree oven.
Freezer
Freeze unbaked assembled biscuits on a baking sheet for 2 hours, then transfer to a freezer bag for up to 3 months. You can also freeze baked biscuits, though they’re best eaten freshly baked.
- Bake frozen unbaked biscuits directly from the freezer, adding 5 to 7 minutes to the bake time.
- If freezing baked biscuits, let them cool completely first, then wrap individually in plastic wrap before placing in a freezer bag.
Reheating
Warm refrigerated or frozen baked biscuits in a 350-degree oven for 8 to 12 minutes until heated through and the exterior is crispy again. Wrapping them loosely in foil first prevents the tops from browning too much while the insides warm.
- For a quicker reheat, microwave a single biscuit for 20 to 30 seconds, though it won’t be quite as crispy.
- Eating them the day you bake them always tastes best, so plan accordingly if you’re making them ahead.
Nutrition Information
| Nutrient | Amount |
|---|---|
| Calories | 240 |
| Total Fat | 9g |
| Saturated Fat | 5g |
| Carbohydrates | 36g |
| Fiber | 1g |
| Sugar | 14g |
| Protein | 3g |
| Sodium | 240mg |
Apple Pie Biscuits
Ingredients
Equipment
Method
- Peel the apples, cut in half, remove the cores, then dice into small cubes about 1/4 inch. In a medium bowl, toss the diced apples with granulated sugar, brown sugar, ground cinnamon, ground nutmeg, lemon juice, and cornstarch until evenly coated. Let sit at room temperature while making the biscuit dough.
- In a large mixing bowl, whisk together all-purpose flour, granulated sugar, baking powder, and salt until evenly distributed.
- Add the cubed cold butter to the flour mixture and use a pastry cutter or two forks to work the butter into the flour until the mixture resembles coarse breadcrumbs with some pea-sized butter pieces visible. Work quickly and keep everything cold.
- Pour the whole milk and vanilla extract into the flour mixture and stir gently with a wooden spoon or spatula until a shaggy dough just comes together with no dry flour remaining. Do not overmix.
- Turn dough out onto a lightly floured surface and pat into a 1/2-inch thick rectangle. Using a 3-inch round biscuit cutter or a glass, cut out 12 rounds, gently re-rolling scraps as needed.
- Place 6 biscuit rounds on a parchment-lined baking sheet, spacing about 2 inches apart. Add a heaping tablespoon of apple filling to the center of each biscuit, then top with another biscuit round. Gently press the edges together to seal.
- Brush the top of each assembled biscuit lightly with melted butter, then sprinkle with coarse sugar.
- Refrigerate the assembled biscuits for at least 10 minutes, preferably 20 minutes, to chill before baking. Alternatively, freeze them for up to 3 months and bake from frozen with an additional 5 minutes baking time.
- Preheat oven to 400 degrees Fahrenheit. Bake chilled biscuits for 18 to 22 minutes until golden brown and a toothpick inserted into the biscuit (not the filling) comes out clean. If bottoms are not browning, move baking sheet to a lower oven rack for last 5 minutes.
- Transfer baked biscuits to a cooling rack and let cool for 5 to 10 minutes before serving to allow the filling to set slightly. Best served warm.