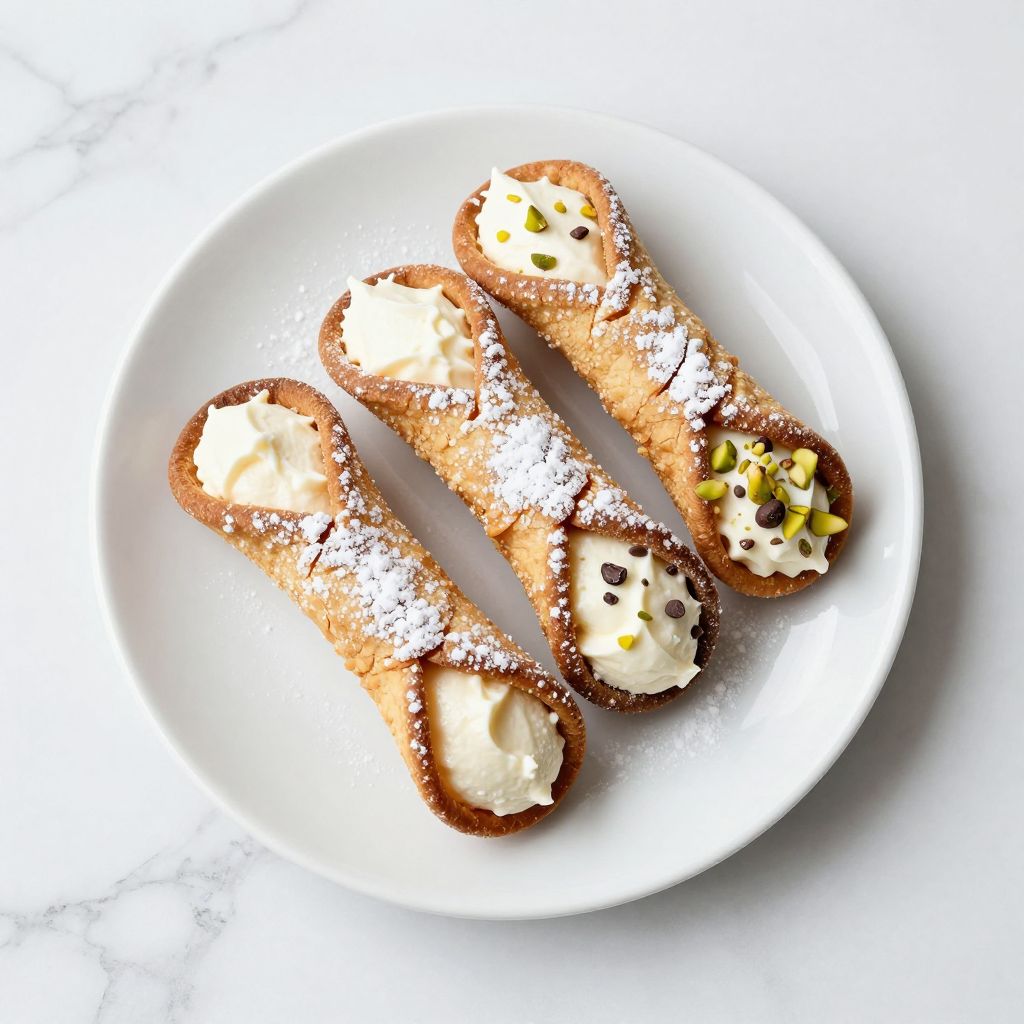
Cannoli cookies bring the beloved Italian pastry into crispy, bite-sized form that tastes like pure indulgence without the frying mess.
These delicate treats combine a tender, slightly crispy shell with a sweet ricotta filling that melts on your tongue, making them perfect for dessert tables, gift boxes, or midnight snacks when you crave something special.
Why You’ll Love This Recipe
Cannoli cookies deliver all the flavor of the classic Italian pastry in a format that’s easier to make and serve.
- No deep frying required, making them healthier and less messy than traditional cannoli
- Impressive enough for guests but simple enough for a weeknight baking session
- The filling can be made ahead, saving you time on baking day
- They stay fresh for several days, so you can enjoy them throughout the week
- Perfect for holiday gift boxes or potlucks where you want to stand out
My Experience Making This Recipe
The first time I made cannoli cookies, I was skeptical that you could capture that iconic flavor without the traditional fried shell. I rolled out the dough, shaped it, and baked it nervously, wondering if the filling would taste as good as I remembered from Italian bakeries.
The moment I pulled the first batch from the oven and the kitchen filled with the aroma of toasted almonds and vanilla, I knew this recipe was a winner. My family devoured a dozen in one evening, and I actually had to hide some in the back of the freezer just to save them for the next day.
What impressed me most was how the cookies stayed crispy at the edges while staying tender in the middle, and the ricotta filling was so creamy and rich that it rivaled any cannoli I’d ordered from a professional bakery. You’ll feel like a master baker after you nail this one.
Recipe Overview
- Recipe Name: Cannoli Cookies
- Servings: Makes about 24 cookies
- Prep Time: 25 minutes
- Cook Time: 12 minutes per batch
- Total Time: 1 hour and 15 minutes (including cooling)
- Course: Dessert
- Cuisine: Italian-American
- Calories per Serving: 145
Equipment You Will Need
- Two baking sheets
- Parchment paper
- Stand mixer or hand mixer
- Large mixing bowl
- Small mixing bowl
- Cookie scoop or spoon
- Wire cooling rack
- Electric mixer or whisk
- Piping bag with a small round tip
- Rubber spatula
- Measuring cups and spoons
Ingredients for Cannoli Cookies
For the Cookies
- 1 3/4 cups all-purpose flour
- 1/2 teaspoon baking powder
- 1/4 teaspoon salt
- 1/2 cup unsalted butter, softened
- 1 cup granulated sugar
- 1 large egg
- 1 teaspoon vanilla extract
- 1/2 teaspoon almond extract
- 2 tablespoons whole milk
- 1/4 cup finely chopped pistachios or almonds
For the Ricotta Filling
- 1 1/2 cups whole milk ricotta cheese, drained well
- 1/2 cup powdered sugar
- 1/2 teaspoon vanilla extract
- 1/4 teaspoon cinnamon
- 1/4 cup mini chocolate chips
- 2 tablespoons finely chopped pistachios
- Pinch of salt
For Assembly
- 2 tablespoons powdered sugar for dusting
- 2 tablespoons chopped pistachios for garnish
Ingredient Notes and Substitutions
- Ricotta cheese: Use whole milk ricotta for the creamiest filling; low-fat versions can taste watery. Substitute with mascarpone for a richer filling, though it will be slightly tangier.
- Almond extract: This gives cannoli cookies their signature flavor profile. Skip it if you prefer a pure vanilla taste, but you’ll lose some authenticity.
- Mini chocolate chips: These add texture and the classic cannoli flavor. Use regular chocolate chips chopped into smaller pieces, or swap for candied orange peel for brightness.
- Pistachios: Traditional and flavorful, but almonds work just as well if you prefer a milder nut taste.
- All-purpose flour: Do not substitute with cake flour, as it will make the cookies too tender and cake-like.
How to Make Cannoli Cookies
Step 1: Prepare Your Workspace
Preheat your oven to 350 degrees Fahrenheit and line two baking sheets with parchment paper. Having everything ready before you mix prevents the dough from sitting around and becoming difficult to work with.
Step 2: Mix the Dry Ingredients
In a small bowl, whisk together the flour, baking powder, and salt until evenly combined. This ensures the leavening agent distributes evenly, so every cookie has a consistent, tender crumb.
Step 3: Cream the Butter and Sugar
In a large bowl with a mixer, beat the softened butter and granulated sugar together for about 2 minutes until the mixture is light and fluffy. This aerates the dough, which creates a tender cookie with a subtle crumb.
Step 4: Add the Eggs and Extracts
Beat in the egg, vanilla extract, and almond extract until fully combined and the mixture looks smooth. The almond extract is what separates these cookies from regular sugar cookies, so don’t skip it.
Step 5: Incorporate the Dry Ingredients
Add the flour mixture in two additions, mixing on low speed after each addition and adding the milk between additions to keep the dough moist. Overmixing develops gluten, which makes cookies tough, so stop as soon as no streaks of flour remain.
Step 6: Fold in the Nuts
Fold in the finely chopped pistachios or almonds with a rubber spatula until evenly distributed. These nuts toast slightly during baking and add a delicate crunch and authentic flavor.
Step 7: Scoop and Shape the Cookies
Drop heaping teaspoons of dough onto the prepared baking sheets, spacing them about 2 inches apart. These cookies spread a bit, so giving them room prevents them from baking together.
Step 8: Bake Until Golden
Bake for 10 to 12 minutes, until the edges are light golden brown but the centers still look slightly underdone. The cookies continue to set as they cool, and pulling them out at this stage keeps them crispy on the edges while tender in the middle.
Step 9: Cool Completely
Let the cookies cool on the baking sheet for 2 minutes, then transfer them to a wire rack to cool completely before filling. Cooling on the sheet first helps them set, and moving them to the rack prevents them from continuing to bake from the sheet’s residual heat.
Step 10: Make the Ricotta Filling
While the cookies cool, combine the drained ricotta, powdered sugar, vanilla, cinnamon, and salt in a bowl and mix until smooth and creamy. Drain the ricotta well over a fine-mesh strainer for at least 15 minutes so the filling isn’t watery.
Step 11: Fold in Mix-ins
Gently fold in the mini chocolate chips and chopped pistachios so they’re evenly distributed throughout the filling. This step should take just a few seconds so you don’t break down the ricotta texture.
Step 12: Fill the Cookies
Transfer the filling to a piping bag fitted with a small round tip and pipe a generous dollop onto the flat side of each cooled cookie. You can also use two cookies sandwich-style with filling in the middle for a more elegant presentation.
Pro Tip: Drain your ricotta cheese over a fine-mesh strainer for at least 15 minutes before mixing the filling; this one step makes the difference between a watery filling and one that stays creamy for days.
Tips for the Best Cannoli Cookies
- Don’t skip draining the ricotta; excess moisture is the number one reason fillings become watery and sloppy.
- Chill the dough for 30 minutes before scooping if it feels too soft or sticky; cold dough is easier to work with and produces more uniform cookies.
- Use a cookie scoop for uniform sizing, which ensures all cookies bake at the same rate and look more professional.
- Toast your own chopped nuts in a dry skillet for 2 to 3 minutes before adding them to the dough for deeper flavor.
- Fill the cookies no more than 2 hours before serving so the filling stays creamy; if making them ahead, store the cookies and filling separately.
- Brush the baked cookie edges with a light egg wash before baking for extra shine and a more authentic cannoli appearance.
Common Mistakes to Avoid
- Overmixing the dough makes cookies tough and dense instead of tender and crispy; mix only until the flour disappears.
- Using room-temperature ricotta that hasn’t been drained leaves you with a filling that leaks and soaks the cookies.
- Baking the cookies until they’re completely golden brown makes them hard and brittle; they should still look slightly underdone in the center.
- Skipping the almond extract strips away the signature cannoli flavor, leaving you with ordinary sugar cookies.
- Filling the cookies too far in advance causes them to soften and become soggy; fill them just before serving for best texture.
Serving Suggestions
Cannoli cookies shine as a simple dessert after an Italian dinner, or dusted with powdered sugar as an elegant addition to a dessert platter. Pair them with coffee, espresso, or sweet wine to round out the experience.
- Serve alongside fresh berries and whipped cream for a simple summer dessert
- Dust with extra powdered sugar and arrange on a tiered stand for an elegant presentation
- Pair with strong espresso or cappuccino for an authentic Italian dessert experience
- Box them up with tissue paper and ribbon for an impressive homemade gift
- Serve with a dessert wine like Moscato or Vin Santo for a sophisticated pairing
Variations to Try
- Orange Cannoli Cookies: Add 1 teaspoon of orange zest to the dough and replace the chocolate chips with candied orange peel for a bright, citrusy twist that feels refreshing.
- Dark Chocolate Version: Replace mini chocolate chips with chopped dark chocolate and add 1 tablespoon of cocoa powder to the filling for a richer, less sweet option.
- Nutella Filling: Mix 1/3 cup of Nutella into the ricotta filling instead of chocolate chips for a hazelnut flavor that’s indulgent and fun.
- Pistachio-Heavy: Increase the pistachios in both the dough and filling, and use pure pistachio butter as a base for the filling for a more savory, nutty profile.
- Tiramisu Inspired: Dip the cooled cookies in strong espresso, then fill with ricotta mixed with mascarpone and a dusting of cocoa powder for a sophisticated variation.
Dietary Adaptations
- Gluten-Free: Swap all-purpose flour for a one-to-one gluten-free flour blend; the texture will be slightly more tender, but the flavor stays the same.
- Dairy-Free: Use coconut oil instead of butter and replace ricotta with cashew cream or store-bought dairy-free ricotta; the filling will be slightly less creamy.
- Vegan: Replace the egg with a flax egg (1 tablespoon ground flax mixed with 3 tablespoons water), use vegan butter, and make the filling with a dairy-free ricotta alternative.
- Low-Carb/Keto: Use almond flour mixed with coconut flour in a 3:1 ratio, replace sugar with erythritol, and use full-fat ricotta for the filling; the texture will be denser but still delicious.
Storage and Reheating
Refrigerator
Store unfilled cookies in an airtight container at room temperature for up to 5 days, keeping them crispy and fresh. Store filled cookies in the refrigerator for up to 2 days, though the cookies will soften slightly over time.
- Keep the cookies and filling separate for the longest shelf life
- Use parchment paper between layers to prevent sticking
- Fill cookies only a few hours before serving for the best texture
Freezer
Unfilled cookies freeze beautifully for up to 2 months in a freezer-safe container. The ricotta filling does not freeze well because it separates and becomes grainy.
- Freeze unfilled cookies in a single layer before stacking to prevent breaking
- Wrap the container tightly to prevent freezer burn
- Freeze the ricotta filling separately if you want to prepare it ahead
Reheating
Thaw unfilled cookies at room temperature for 15 minutes before eating, or warm them in a 300-degree Fahrenheit oven for 5 minutes to refresh their crispness. Do not reheat filled cookies, as the filling may become too warm or leak out.
- Warm cookies briefly in the oven just before serving to restore their original texture
- Thaw unfilled cookies at room temperature to maintain their crispness
Nutrition Information
| Nutrient | Amount |
|---|---|
| Calories | 145 |
| Total Fat | 6g |
| Saturated Fat | 3g |
| Carbohydrates | 20g |
| Fiber | 0g |
| Sugar | 14g |
| Protein | 3g |
| Sodium | 85mg |
| Cholesterol | 22mg |
These nutritional values are approximate and based on standard ingredient measurements. Exact nutrition will vary based on specific brands and any substitutions you make.
Frequently Asked Questions
Can I make the filling ahead of time?
Yes, the ricotta filling can be made up to 24 hours ahead and stored in an airtight container in the refrigerator. Just give it a quick stir before piping onto the cooled cookies.
What if my dough is too sticky to work with?
Refrigerate the dough for 30 minutes until it firms up and becomes easier to scoop. A cold dough also produces more uniform, evenly-baked cookies.
Can I use store-bought cannoli shells instead?
You absolutely can; this cuts down on baking time significantly and you just focus on making the filling fresh. However, the homemade shell offers better texture and fresher flavor than store-bought.
Why are my cookies spreading too much and connecting on the baking sheet?
This usually means the dough was too warm or the oven temperature was too high. Chill the dough for 30 minutes before scooping, and verify your oven temperature with an oven thermometer.
Can I use regular granulated sugar instead of powdered sugar in the filling?
No, because granulated sugar won’t dissolve into the ricotta and will make the filling gritty. Powdered sugar dissolves smoothly and creates a silky filling texture.
How do I know when the cookies are done baking?
The edges should be light golden brown and firm, but the very center should still look slightly underdone or pale. The cookies continue to set as they cool, and this method keeps them crispy on the edges while tender in the center.
Final Thoughts
Making cannoli cookies at home proves that you don’t need complicated techniques or special equipment to create bakery-quality Italian desserts. The combination of crispy, buttery shells and creamy ricotta filling is absolutely worth the small amount of effort, and your friends and family will be amazed that you made them from scratch.
Pull these cookies out of the oven, fill them with that silky ricotta mixture, and watch everyone at your table light up when they bite into one. You’ve earned the right to take a bow.
Cannoli Cookies
Ingredients
Equipment
Method
- Preheat your oven to 350 degrees Fahrenheit and line two baking sheets with parchment paper.
- In a small bowl, whisk together the flour, baking powder, and salt until evenly combined.
- In a large bowl with a mixer, beat the softened butter and granulated sugar together for about 2 minutes until the mixture is light and fluffy.
- Beat in the egg, vanilla extract, and almond extract until fully combined and the mixture looks smooth.
- Add the flour mixture in two additions, mixing on low speed after each addition and adding the milk between additions to keep the dough moist. Mix only until no streaks of flour remain.
- Fold in the finely chopped pistachios or almonds with a rubber spatula until evenly distributed.
- Drop heaping teaspoons of dough onto the prepared baking sheets, spacing them about 2 inches apart.
- Bake for 10 to 12 minutes, until the edges are light golden brown but the centers still look slightly underdone.
- Let the cookies cool on the baking sheet for 2 minutes, then transfer them to a wire rack to cool completely before filling.
- While the cookies cool, combine the drained ricotta, powdered sugar, vanilla, cinnamon, and salt in a bowl and mix until smooth and creamy.
- Gently fold in the mini chocolate chips and chopped pistachios until evenly distributed.
- Transfer the filling to a piping bag fitted with a small round tip and pipe a generous dollop onto the flat side of each cooled cookie.