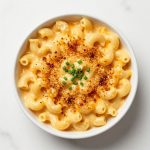
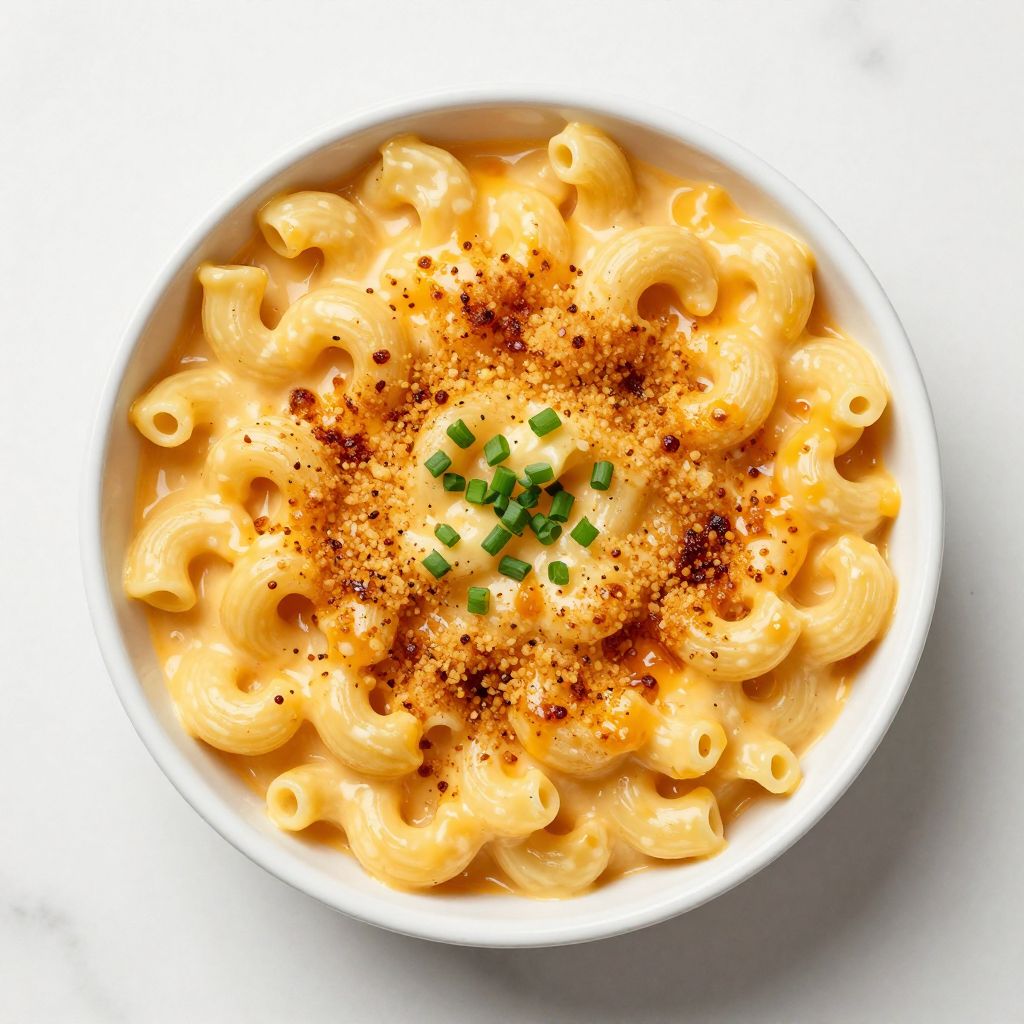
Cracker Barrel Mac and Cheese is the ultimate comfort food that tastes just like the restaurant version, with that signature creamy sauce and crispy breadcrumb topping. If you’ve ever craved that specific tang and richness from the real thing, this copycat recipe delivers the exact experience at home.
The beauty of making this at home is that you control the cheese blend, the sauce consistency, and how golden that topping gets. Whether you’re feeding picky eaters or hosting a potluck, this dish wins every single time.
Why You’ll Love This Recipe
This recipe captures the restaurant magic without the restaurant prices or waiting in line. You’ll understand why people keep coming back to Cracker Barrel for this specific dish once you taste your homemade version.
- Tastes identical to the restaurant original with that creamy, tangy cheese sauce.
- Finished with a buttery, crunchy breadcrumb topping that stays crispy even after sitting.
- Uses simple pantry ingredients that you probably already have on hand.
- Comes together in under an hour from start to finish.
- Reheats beautifully and tastes great for leftovers.
My Experience Making This Recipe
I first attempted this recipe after visiting Cracker Barrel and thinking, “Why am I paying for this when I can make it at home?” The first batch was decent, but it lacked that signature sharp cheese flavor and the texture felt off.
After testing different cheese combinations and cooking methods, I finally nailed it by using a mix of sharp cheddar, mild cheddar, and a touch of smoked gouda. That combination hits all three flavor notes that make the restaurant version so addictive.
When I served it at a dinner party, one guest actually asked if I’d bought it from Cracker Barrel and just heated it up. That’s when I knew I’d cracked the code.
Recipe Overview
- Recipe Name: Cracker Barrel Mac and Cheese
- Servings: 8 servings
- Prep Time: 15 minutes
- Cook Time: 30 minutes
- Total Time: 45 minutes
- Course: Main Dish, Side Dish
- Cuisine: American, Comfort Food
- Calories per Serving: 520
Equipment You Will Need
- Large pot for boiling pasta
- Colander for draining pasta
- Medium saucepan for the cheese sauce
- Whisk for smooth sauce consistency
- 9×13 inch baking dish
- Wooden spoon for stirring
- Oven for baking
- Measuring cups and spoons
- Cheese grater if shredding cheese from blocks
Ingredients for Cracker Barrel Mac and Cheese
For the Pasta and Sauce
- 1 pound elbow pasta
- 4 tablespoons butter
- 3 tablespoons all-purpose flour
- 3 cups whole milk, warmed
- 2 cups sharp cheddar cheese, shredded
- 1 cup mild cheddar cheese, shredded
- 1/2 cup smoked gouda cheese, shredded
- 1 teaspoon salt
- 1/2 teaspoon black pepper
- 1/4 teaspoon garlic powder
- 1/4 teaspoon dry mustard powder
- Pinch of cayenne pepper (optional but recommended)
For the Breadcrumb Topping
- 1 cup panko breadcrumbs
- 4 tablespoons butter, melted
- 1/2 teaspoon salt
- 1/4 teaspoon black pepper
Ingredient Notes and Substitutions
- Sharp cheddar provides the signature tang that makes this recipe taste like the restaurant version. If you can’t find it, use extra mild cheddar, though the flavor won’t be quite as bold.
- Smoked gouda adds depth and a subtle smokiness that rounds out the flavor profile. Gruyere works as a substitute and adds a nutty complexity instead.
- Whole milk creates the right sauce consistency and richness. Half-and-half makes it even creamier but heavier, while 2% milk works but produces a thinner sauce.
- Dry mustard powder enhances the cheese flavor without making the dish taste like mustard. Skip it if you have a strong aversion, but it really helps.
- Panko breadcrumbs stay crunchier than regular breadcrumbs. Regular breadcrumbs work fine but won’t have that satisfying crisp texture on top.
How to Make Cracker Barrel Mac and Cheese
Step 1: Cook the Pasta
Bring a large pot of salted water to a rolling boil and add the elbow pasta. Cook the pasta until it reaches an al dente texture, about 1 minute under the package directions, since it will cook further in the oven.
Salted water flavors the pasta itself rather than waiting for seasoning at the end. Draining it 1 minute early prevents mushiness when everything combines in the oven.
Step 2: Drain and Set Aside
Pour the pasta into a colander and let it drain completely. Reserve about 1/2 cup of the pasta cooking water, which you’ll use to thin the sauce if needed.
Starchy pasta water actually helps the sauce coat the noodles better than milk alone. Don’t rinse the pasta, since a light coating of starch helps the cheese sauce cling to each piece.
Step 3: Make the Roux
In a medium saucepan over medium heat, melt 4 tablespoons of butter. Add 3 tablespoons of flour and whisk constantly for about 2 minutes until the mixture turns light golden and smells nutty.
This roux serves as the base that thickens the sauce and creates a smooth texture. Cooking it briefly removes the raw flour taste without browning it too much.
Step 4: Add the Warm Milk
Slowly pour the warm milk into the roux while whisking constantly to prevent lumps from forming. This gradual addition is the secret to a silky sauce rather than a grainy one.
Warm milk incorporates more smoothly than cold milk since the temperature stays consistent. Keep whisking for about 3-4 minutes until the sauce thickens enough to coat the back of a spoon.
Step 5: Add the Cheeses
Remove the pan from heat and add all three cheeses to the warm sauce. Stir until the cheese melts completely and the sauce looks smooth and creamy.
Taking the pan off heat prevents the cheese from becoming grainy from overcooking. The residual heat is more than enough to melt everything evenly.
Step 6: Season the Sauce
Add the salt, black pepper, garlic powder, dry mustard, and cayenne pepper to the cheese sauce. Stir well and taste it, adjusting seasonings as needed.
These seasonings enhance the natural cheese flavor without overpowering it. The mustard powder is subtle but makes a noticeable difference in that Cracker Barrel-esque taste.
Step 7: Combine Pasta and Sauce
Pour the drained pasta into the cheese sauce and stir until every piece is coated. If the mixture seems too thick, add a splash of the reserved pasta water to reach a creamy consistency.
Coating everything evenly ensures that every bite has that rich, cheesy flavor. Transfer the mixture to a greased 9×13 inch baking dish and spread it in an even layer.
Step 8: Make the Breadcrumb Topping
In a small bowl, combine the panko breadcrumbs, melted butter, salt, and pepper. Mix until the breadcrumbs are evenly moistened and have a sandy texture.
Butter-coated breadcrumbs toast to golden perfection in the oven rather than staying pale. Evenly coating them ensures consistent browning across the entire top.
Step 9: Top and Bake
Sprinkle the breadcrumb mixture evenly over the mac and cheese. Bake at 350 degrees Fahrenheit for 25-30 minutes until the breadcrumbs turn golden brown and the edges bubble slightly.
A 350-degree oven lets the mac and cheese heat through while the topping crisps up without burning. The bubbling around the edges signals that the cheese sauce is hot all the way through.
Pro Tip: Make the entire casserole ahead of time, refrigerate it uncovered until the sauce cools, then cover with plastic wrap. Bake it straight from the fridge for 35-40 minutes until golden and bubbling, which makes weeknight dinners much easier.
Tips for the Best Cracker Barrel Mac and Cheese
- Use freshly shredded cheese from a block instead of pre-shredded if possible, since the coating on shredded cheese can make the sauce grainy and separated.
- Warm the milk before adding it to the roux to prevent temperature shock that can cause lumps and a broken sauce.
- Don’t skip the dry mustard powder, as it amplifies the cheese flavor in a way that tastes almost identical to the restaurant version.
- If your sauce breaks or looks grainy, strain it through a fine mesh sieve into a clean pan and whisk in a splash more warm milk to smooth it out.
- Let the finished casserole rest for 5 minutes after pulling it from the oven so the sauce sets slightly and you get cleaner servings.
- For extra crispy breadcrumbs, brush the top with an extra tablespoon of melted butter right before baking.
Common Mistakes to Avoid
- Adding cold milk to the roux creates lumps that are nearly impossible to fix without straining the entire sauce. Always warm the milk first.
- Cooking the pasta too long before the final bake makes it mushy and breaks down the texture, so aim for just under the package directions.
- Overcrowding the pan with too much pasta to sauce ratio creates a dry, clumpy dish instead of a creamy one. Keep the ratio about 1 pound pasta to 4 cups sauce.
- Skipping the mustard powder might seem fine, but it’s the secret ingredient that makes this taste like Cracker Barrel instead of generic mac and cheese.
- Forgetting to butter the breadcrumbs means they stay pale and dense instead of turning golden and crispy on top.
Serving Suggestions
Cracker Barrel Mac and Cheese works as a main dish on its own or as a side that steals the show next to grilled proteins. Pair it with simple salads, grilled vegetables, or proteins that don’t compete for attention.
- Serve with a crisp green salad dressed in vinaigrette to cut through the richness.
- Pair with grilled chicken breast or pulled pork for a complete meal.
- Add steamed broccoli on the side for vegetables without complicated preparation.
- Serve alongside Southern-style collard greens or cornbread for a comfort food feast.
- Top individual servings with crispy bacon bits and fresh chives for elevated casual dining.
Variations to Try
- Add 1 cup of cooked crumbled bacon to the sauce for a smoky, salty upgrade that tastes incredible. The bacon adds texture and depth without overwhelming the cheese.
- Mix in 1 cup of roasted broccoli florets before baking for hidden vegetables and a slight earthy flavor. Kids often don’t notice the broccoli, which is a bonus.
- Use a mix of fontina, asiago, and sharp cheddar instead of the original cheese blend for a more sophisticated, nutty flavor profile.
- Stir in 1 teaspoon of smoked paprika and a pinch of chipotle powder to the sauce for a smoky, slightly spicy twist. This variation tastes like upscale barbecue mac.
- Add 1/2 cup of crispy fried onions to the breadcrumb topping for extra crunch and a subtle sweet onion flavor.
Dietary Adaptations
- Gluten-free: Use gluten-free pasta and replace the flour with cornstarch using the same amount. The sauce will be slightly less thick but still delicious and creamy.
- Dairy-free: Swap butter for olive oil, use unsweetened oat or cashew milk instead of whole milk, and use dairy-free sharp cheddar. The sauce won’t be quite as rich, but modern dairy-free cheeses work surprisingly well.
- Vegan: Use vegan butter, unsweetened plant milk, and high-quality vegan cheddar or cashew-based cheese sauce. The flavor won’t be identical but tastes good in its own right.
- Low-carb/Keto: Replace pasta with spiralized zucchini or cauliflower rice and reduce the flour in the roux to 1 tablespoon. The texture changes but the cheesy flavor remains the main attraction.
Storage and Reheating
Refrigerator
Store leftover mac and cheese in an airtight container for up to 4 days. The sauce firms up slightly as it cools but loosens again when reheated.
- Keep the breadcrumb topping in a separate container for the crispiest results.
- Assemble fresh topping before reheating if you want maximum crunch.
Freezer
Freeze the mac and cheese in the baking dish covered tightly with plastic wrap and foil for up to 3 months. Thaw overnight in the refrigerator before reheating.
- Avoid freezing with the breadcrumb topping already on top, as it gets soggy.
- Add fresh breadcrumb topping right before baking from frozen.
Reheating
Reheat covered in a 350-degree oven for 20-25 minutes if thawed, or 35-40 minutes straight from frozen. Add a splash of milk or pasta water if the sauce seems too thick.
- Stovetop reheating works well at medium-low heat in a saucepan with a splash of milk, stirring frequently.
- Microwave reheating works for individual servings but can cause uneven heating, so stir halfway through.
Nutrition Information
| Nutrient | Amount |
|---|---|
| Calories | 520 |
| Total Fat | 28g |
| Saturated Fat | 17g |
| Carbohydrates | 48g |
| Fiber | 1g |
| Sugar | 3g |
| Protein | 24g |
| Sodium | 720mg |
| Cholesterol | 75mg |
These nutritional values are estimates based on standard ingredients and serving sizes. Individual nutrition will vary based on specific brands and preparation methods used.
Frequently Asked Questions
Can I make this recipe without the breadcrumb topping?
Yes, the mac and cheese is delicious without it. Simply bake the pasta and cheese mixture covered at 350 degrees for 20 minutes, then uncover for the last 5 minutes to set the top slightly.
Why is my cheese sauce grainy or separated?
This usually happens from adding cold milk to hot roux or cooking the sauce too long after adding cheese. Always use warm milk and remove the pan from heat before stirring in the cheese.
Can I assemble this the day before and bake it the next day?
Absolutely, and this is one of the biggest time-savers for meal prep. Assemble everything without the breadcrumb topping, cover tightly, refrigerate, then add the breadcrumb topping and bake from cold for 35-40 minutes.
What if I don’t have smoked gouda?
Gruyere, fontina, or extra sharp cheddar all work well as substitutes. You’ll lose the subtle smokiness but still end up with a delicious, creamy mac and cheese.
How do I prevent the breadcrumb topping from burning?
Bake at 350 degrees instead of higher temperatures and watch carefully after 20 minutes. If the breadcrumbs are browning too quickly, loosely tent the dish with foil for the final few minutes.
Can I double this recipe?
Yes, simply double all ingredients and use two 9×13 baking dishes. Bake both at the same temperature but check at 25 minutes since they may cook at slightly different rates depending on oven hotspots.
Final Thoughts
Making Cracker Barrel Mac and Cheese at home is one of those cooking experiences that feels indulgent but is actually straightforward. You’ll impress everyone at the table without spending hours in the kitchen or breaking the bank.
Once you taste this version, you’ll understand why people keep ordering it at the restaurant. Make a batch this week and discover why this recipe deserves a
Cracker Barrel Mac and Cheese
Ingredients
Equipment
Method
- Bring a large pot of salted water to a rolling boil and add the elbow pasta. Cook the pasta until it reaches an al dente texture, about 1 minute under the package directions, since it will cook further in the oven.
- Pour the pasta into a colander and let it drain completely. Reserve about 1/2 cup of the pasta cooking water for thinning the sauce if needed.
- In a medium saucepan over medium heat, melt 4 tablespoons of butter. Add 3 tablespoons of flour and whisk constantly for about 2 minutes until the mixture turns light golden and smells nutty.
- Slowly pour the warm milk into the roux while whisking constantly to prevent lumps from forming. Continue whisking for about 3-4 minutes until the sauce thickens enough to coat the back of a spoon.
- Remove the pan from heat and add all three cheeses to the warm sauce. Stir until the cheese melts completely and the sauce looks smooth and creamy.
- Add the salt, black pepper, garlic powder, dry mustard powder, and cayenne pepper to the cheese sauce. Stir well and taste, adjusting seasonings as needed.
- Pour the drained pasta into the cheese sauce and stir until every piece is coated. If the mixture seems too thick, add a splash of the reserved pasta water to reach a creamy consistency.
- Transfer the mixture to a greased 9x13 inch baking dish and spread it in an even layer.
- In a small bowl, combine the panko breadcrumbs, melted butter, salt, and pepper. Mix until the breadcrumbs are evenly moistened and have a sandy texture.
- Sprinkle the breadcrumb mixture evenly over the mac and cheese.
- Bake at 350 degrees Fahrenheit for 25-30 minutes until the breadcrumbs turn golden brown and the edges bubble slightly.
- Let the finished casserole rest for 5 minutes after pulling it from the oven to allow the sauce to set slightly for cleaner servings.