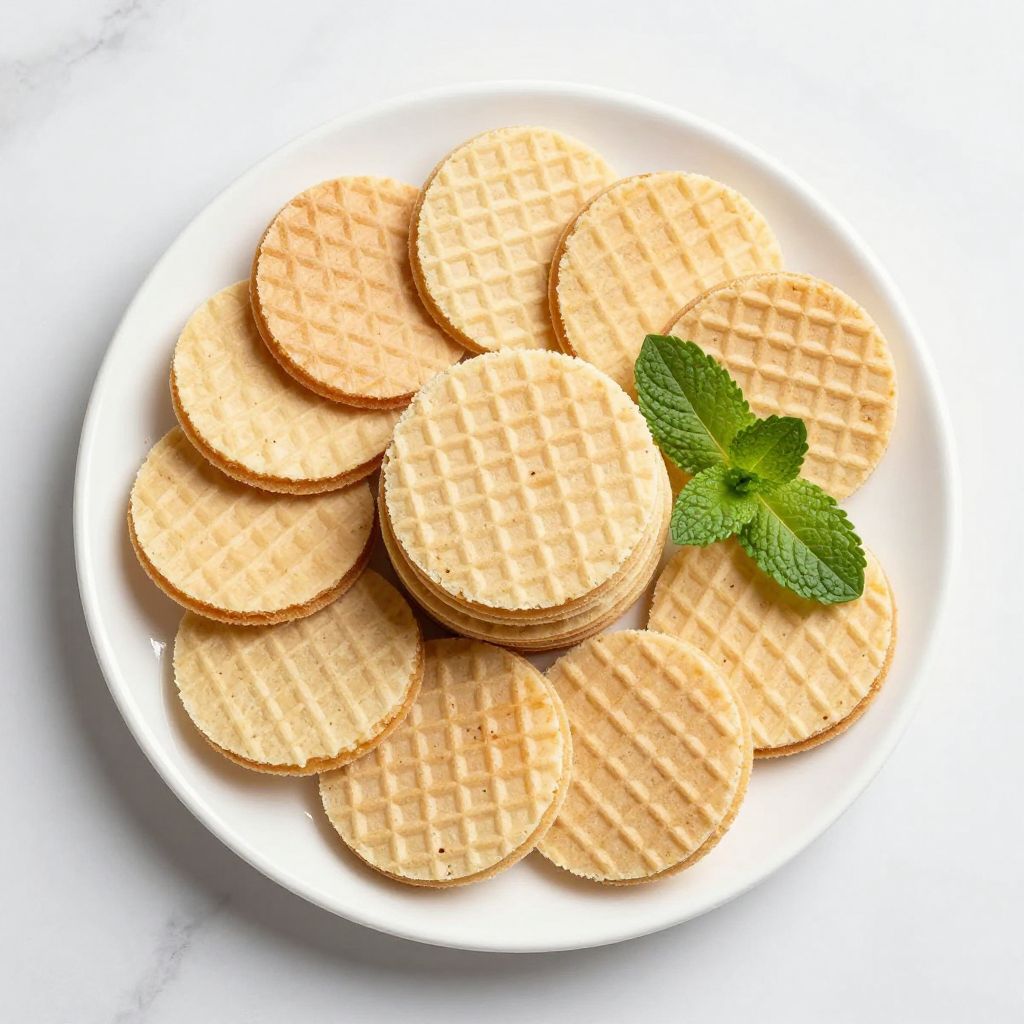
Vanilla wafers are delicate, crispy cookies that taste like a nostalgic trip to your grandmother’s kitchen, except you made them yourself.
These thin, buttery biscuits deliver pure vanilla flavor with a satisfying crunch that makes them perfect for snacking, dunking in coffee, or crushing into dessert crusts.
In this guide, you’ll learn exactly how to bake vanilla wafers that rival any store-bought version, plus discover why homemade versions taste infinitely better.
Why You’ll Love This Recipe
Homemade vanilla wafers give you control over ingredients, freshness, and that crack-and-crunch texture that commercial cookies struggle to match.
- Simple five-ingredient base means no mystery chemicals or preservatives
- Ready in under 30 minutes from mixing bowl to cooling rack
- Perfect for gift-giving, lunch boxes, or late-night snacking
- Incredibly versatile for crushing into pie crusts or ice cream sandwiches
- The smell while baking will make your entire home smell like a bakery
My Experience Making This Recipe
I first tried making vanilla wafers on a whim, skeptical that something so thin and crispy could come from my home oven. The moment I pulled the first batch out and heard that satisfying crunch, I was hooked.
My family demolished half the batch before they even cooled completely, which told me everything I needed to know. Now I make these at least twice a month because they’re so quick and the results feel fancy without any fuss.
The best part? My kids now request homemade vanilla wafers over store-bought every single time, and honestly, that’s the highest compliment a baker can get.
Recipe Overview
- Recipe Name: Vanilla Wafers
- Servings: Makes about 36 wafers
- Prep Time: 10 minutes
- Cook Time: 8 to 10 minutes
- Total Time: 20 minutes (plus cooling)
- Course: Dessert or Snack
- Cuisine: American
- Calories per Serving: 45 calories per wafer
Equipment You Will Need
- Electric mixer or mixing bowl with whisk
- Measuring cups and spoons
- Two baking sheets
- Parchment paper
- Small cookie scoop or teaspoon
- Cooling racks
- Sifter or fine-mesh strainer
Ingredients for Vanilla Wafers
- 1/2 cup (115g) unsalted butter, softened to room temperature
- 1/2 cup (100g) granulated sugar
- 1 large egg
- 1 1/2 teaspoons vanilla extract
- 1 cup (125g) all-purpose flour
- 1/4 teaspoon salt
- 1/8 teaspoon baking powder
Ingredient Notes and Substitutions
- Butter: Softened butter creams easily with sugar to trap air, creating that light, crispy texture. You can use salted butter if you reduce the salt to 1/8 teaspoon, though unsalted gives you better control over sodium.
- Granulated Sugar: Regular white sugar dissolves smoothly for a uniform crumb. Brown sugar will make the cookies chewier and slightly darker, which changes the texture considerably.
- Egg: One large egg binds the dough and adds moisture for the right consistency. You can’t really skip it without the cookies falling apart, but a yolk-only mixture will make them richer.
- Vanilla Extract: Pure vanilla extract delivers real flavor depth and aroma. Vanilla powder or imitation vanilla work in a pinch, though pure extract tastes noticeably better.
- All-Purpose Flour: This gives structure and the right density. Cake flour will make cookies too soft; bread flour will make them tough.
How to Make Vanilla Wafers
Step 1: Cream the Butter and Sugar
Place softened butter and granulated sugar in your mixing bowl and beat on medium speed for 2 to 3 minutes until the mixture turns pale and fluffy. This creaming step traps tiny air bubbles that make the cookies light and crispy rather than dense.
Step 2: Add the Egg
Crack the egg into the butter-sugar mixture and beat for about 1 minute until fully incorporated. You’ll see the texture change as the egg combines with the creamed butter, creating a smooth, pale batter.
Step 3: Stir in the Vanilla Extract
Add vanilla extract and mix for another 30 seconds on low speed until the vanilla is evenly distributed throughout the batter. This ensures consistent flavor in every single wafer.
Step 4: Sift the Dry Ingredients
In a separate bowl, sift together flour, salt, and baking powder to remove any lumps and add air. Sifting prevents lumpy cookies and gives you a smoother dough.
Step 5: Combine the Wet and Dry Mixtures
Gently fold the dry ingredients into the wet ingredients using a spatula or whisk, stirring just until no streaks of flour remain. Overmixing at this stage will overdevelop gluten and make your cookies tough instead of tender.
Step 6: Prepare Your Baking Sheets
Preheat your oven to 375 degrees Fahrenheit and line two baking sheets with parchment paper. Parchment prevents sticking and ensures even browning on the bottoms.
Step 7: Portion the Dough
Using a small cookie scoop or teaspoon, drop tiny balls of dough onto your prepared baking sheets, spacing them about 1 inch apart. These cookies spread a little during baking, so don’t crowd them.
Step 8: Flatten and Bake
Use the bottom of a glass or your fingers to gently flatten each dough ball into a thin disk about 1/8 inch thick. Thin, even thickness is the secret to achieving that signature crispy wafer texture.
Step 9: Bake Until Golden
Bake for 8 to 10 minutes until the edges turn light golden brown but the centers remain pale. Watch carefully during the last 2 minutes because thin cookies brown quickly and can burn in seconds.
Step 10: Cool on Racks
Remove the baking sheets from the oven and let the cookies cool on the pan for 2 minutes, then transfer them to cooling racks. Cooling on racks prevents them from steaming and losing their crispness.
Pro Tip: Get your oven temperature exactly right by using an oven thermometer, because even 25 degrees off will change your baking time and texture significantly.
Tips for the Best Vanilla Wafers
- Use room-temperature butter: Cold butter won’t cream properly, and melted butter changes the texture entirely. Set your butter out 30 minutes before baking.
- Keep an eye on the oven: These thin cookies go from golden to burnt in about 60 seconds, so set a timer and don’t wander off.
- Let cookies cool completely before storing: Warm cookies are fragile and will break; cooled cookies become crisp and snappy.
- Flatten consistently: Uneven thickness means some cookies will be cake-like while others burn, so take 30 seconds per cookie to flatten them evenly.
- Don’t skip the parchment paper: It’s the difference between cookies that stick and cookies that slide right off the pan.
- Make two batches instead of crowding one pan: Overcrowding traps steam and makes cookies soft instead of crispy.
Common Mistakes to Avoid
- Skipping the creaming step: Rushing past butter-and-sugar creaming means no air gets trapped, resulting in dense, cake-like cookies instead of crispy wafers.
- Overmixing after adding flour: Stirring too much develops gluten and toughens the cookies, making them chewy rather than delicate and crispy.
- Using cold butter: Cold butter won’t cream smoothly and creates lumpy dough that bakes unevenly and tastes dense.
- Making cookies too thick: Thick wafers become more like shortbread than crispy snaps, defeating the whole purpose of the recipe.
- Opening the oven door repeatedly: Every time you peek, heat escapes and throws off your baking time and browning.
Serving Suggestions
Vanilla wafers shine when paired with coffee, tea, or milk, but they’re equally at home as part of a dessert spread. Try them alongside fruit, chocolate, or in creative applications that go way beyond simple snacking.
- Dunk in hot coffee or tea for a classic pairing that highlights the vanilla
- Crush and mix with melted butter for a quick, crispy pie crust
- Layer with whipped cream and fresh berries for an easy parfait
- Sandwich with chocolate frosting or peanut butter for homemade wafer cookies
- Crumble over vanilla ice cream for an impromptu ice cream topping
Variations to Try
- Lemon Wafers: Replace vanilla extract with 1 teaspoon of lemon extract and add the zest of one lemon to brighten the flavor. The citrus adds a sophisticated tang without overwhelming the delicate cookie base.
- Almond Wafers: Use 1 teaspoon of almond extract instead of vanilla for a nuttier profile. You can also add 1/4 cup of finely ground almonds to the flour mixture for deeper almond flavor and texture.
- Cinnamon Sugar Wafers: Dust the flattened dough with cinnamon sugar before baking for a warm spice note. This simple change transforms the plain wafers into something that feels more like a snickerdoodle.
- Chocolate-Dipped Wafers: Dip half of each cooled wafer into melted chocolate for an elegant twist. Let the chocolate set on parchment before serving.
- Ginger Wafers: Add 1 teaspoon of ground ginger and 1/4 teaspoon of ground cloves to the dry ingredients. Warming spices add depth and work beautifully with the vanilla base.
Dietary Adaptations
- Gluten-Free: Swap all-purpose flour with a one-to-one gluten-free flour blend, though the texture will be slightly more fragile and crumbly.
- Dairy-Free: Use dairy-free butter or coconut oil instead of butter; the cookies will bake similarly though the flavor will shift slightly.
- Vegan: Replace the egg with 2 tablespoons of applesauce mixed with 1 tablespoon of cornstarch, and use dairy-free butter. The cookies will be slightly less crispy but still delicious.
- Low-Carb or Keto: Replace sugar with monk fruit sweetener in a one-to-one ratio, though you may need to reduce baking time by 1 to 2 minutes since these sweeteners brown differently.
Storage and Reheating
Refrigerator
Store cooled vanilla wafers in an airtight container at room temperature for up to 5 days. They crisp back up at room temperature, so refrigerating them is unnecessary unless your kitchen is very warm.
- Use an airtight glass container or resealable plastic bag
- Keep them separate from other baked goods to prevent flavor transfer
- Add a silica gel packet to maintain crispness in humid kitchens
Freezer
Freeze wafers in a freezer-safe container for up to 3 months. They thaw quickly at room temperature without losing crispness.
- Layer them between parchment paper to prevent sticking
- Label with the baking date so you remember when you made them
- Let them come to room temperature before opening the container to prevent condensation
Reheating
You don’t need to reheat vanilla wafers, but if they soften over time, pop them in a 300-degree oven for 2 to 3 minutes to restore crispness. Let them cool on a rack before eating.
- Watch closely to avoid browning them further
- This works best for wafers that softened from humidity rather than old age
Nutrition Information
| Nutrient | Amount |
|---|---|
| Calories | 45 |
| Total Fat | 2.5g |
| Saturated Fat | 1.5g |
| Carbohydrates | 5g |
| Fiber | 0g |
| Sugar | 3g |
| Protein | 0.5g |
| Sodium | 35mg |
| Cholesterol | 8mg |
These values are approximate and based on the ingredient amounts listed in the recipe. Individual nutritional content may vary based on specific brands and preparation methods.
Frequently Asked Questions
Can I Make the Dough Ahead of Time?
Yes, you can refrigerate the dough in an airtight container for up to 2 days, then bake when you’re ready. The dough will be firmer and slightly harder to flatten, so let it sit at room temperature for 15 minutes first to make it more workable.
Why Are My Wafers Cake-Like Instead of Crispy?
Cake-like texture usually means you either skipped the creaming step, overmixed the flour into the dough, or made the cookies too thick. Go back and check that you’re creaming the butter and sugar for a full 2 to 3 minutes until it’s pale and fluffy.
Can I Double This Recipe?
Absolutely, just multiply all the ingredients by two and bake in batches. Keep in mind that you’ll need to work with larger quantities, so give yourself extra time.
What if My Cookies Spread Too Much During Baking?
Spreading usually means your oven is too hot or your butter was too soft going into the oven. Try chilling the portioned dough for 15 minutes before baking, and verify your oven temperature with a thermometer.
Can I Use Salted Butter Instead of Unsalted?
Yes, but reduce the salt in the recipe from 1/4 teaspoon to 1/8 teaspoon. Salted butter adds flavor but makes it harder to control the exact saltiness of your final cookies.
How Do I Know When the Cookies Are Done?
The edges should turn light golden brown while the centers stay pale. The cookies will continue to firm up as they cool, so don’t overbake looking for brown centers.
Final Thoughts
Homemade vanilla wafers prove that you don’t need a long ingredient list or complicated techniques to create something special. This recipe delivers restaurant-quality results in 20 minutes flat, which means you can have fresh, crispy wafers any time the craving hits.
Go ahead and make a batch this week. Your kitchen will smell amazing, your family will be thrilled, and you’ll wonder why you ever bought the store-bought version in the first place.
Vanilla Wafers
Ingredients
Equipment
Method
- Preheat your oven to 375 degrees Fahrenheit and line two baking sheets with parchment paper.
- Place softened butter and granulated sugar in a mixing bowl and beat on medium speed for 2 to 3 minutes until the mixture turns pale and fluffy.
- Crack the egg into the butter-sugar mixture and beat for about 1 minute until fully incorporated.
- Add vanilla extract and mix for another 30 seconds on low speed until evenly distributed.
- In a separate bowl, sift together flour, salt, and baking powder.
- Gently fold the dry ingredients into the wet ingredients using a spatula or whisk, stirring just until no streaks of flour remain.
- Using a small cookie scoop or teaspoon, drop tiny balls of dough onto the prepared baking sheets spaced about 1 inch apart.
- Use the bottom of a glass or your fingers to gently flatten each dough ball into a thin disk about 1/8 inch thick.
- Bake for 8 to 10 minutes until the edges turn light golden brown while centers remain pale.
- Remove baking sheets from oven and let cookies cool on the pan for 2 minutes, then transfer to cooling racks to cool completely.