Tamale sauce is the soul of every great tamale, and homemade versions blow store-bought options out of the water. This rich, deeply flavored red sauce transforms simple masa and fillings into something truly memorable.
Whether you’re making tamales for a family gathering or meal prepping for the week, a good tamale sauce makes all the difference. Let me walk you through creating an authentic version that tastes like it came from a real Mexican kitchen.
Why You’ll Love This Recipe
This tamale sauce recipe delivers authentic flavor with straightforward technique and readily available ingredients.
- Bold, complex chile flavor from dried chiles that you toast and rehydrate yourself
- Rich and velvety texture that coats your tamales without being heavy
- Freezer-friendly, so you can make a big batch and use it for weeks
- Versatile enough for tamales, enchiladas, or as a dipping sauce
- Takes less than 30 minutes from start to finish
My Experience Making This Recipe
I first made this sauce on a cold Saturday morning when my abuela asked me to help with tamale prep for her church fundraiser. She handed me a bag of dried guajillo chiles and told me to “just know when they’re ready,” which was absolutely no help at that moment.
After a few attempts and a lot of tasting, I figured out that the magic happens when you toast the chiles just long enough to release their aroma without burning them. The first time I got it right, the kitchen smelled incredible, and my family couldn’t stop eating those tamales.
Now I make this sauce every month, and it’s become my go-to for taco nights, enchiladas, or whenever I need something hearty. The best part is watching people’s faces light up when they taste homemade sauce for the first time.
Recipe Overview
- Recipe Name: Tamale Sauce
- Servings: Makes about 3 cups (12 servings)
- Prep Time: 10 minutes
- Cook Time: 20 minutes
- Total Time: 30 minutes
- Course: Condiment/Sauce
- Cuisine: Mexican
- Calories per Serving: 45
Equipment You Will Need
- Large skillet or comal
- Blender or food processor
- Medium saucepan
- Fine mesh strainer
- Wooden spoon
- Measuring cups and spoons
- Knife and cutting board
Ingredients for Tamale Sauce
- 8 dried guajillo chiles
- 4 dried ancho chiles
- 4 cloves garlic
- 1 teaspoon cumin
- 1/2 teaspoon oregano
- 1/4 teaspoon black pepper
- 1/2 teaspoon salt (adjust to taste)
- 2 tablespoons vegetable oil
- 3 cups chicken or vegetable broth
- 1 tablespoon apple cider vinegar
Ingredient Notes and Substitutions
- Guajillo chiles bring mild heat and fruity undertones essential to authentic tamale sauce. If unavailable, use 2 additional ancho chiles for deeper flavor, though you’ll lose some of the brightness.
- Ancho chiles add rich, smoky depth and slight sweetness to the base. Pasilla chiles work as a substitute but deliver more earthiness with less fruity notes.
- Fresh garlic provides aromatic punch that powder cannot match. Use 1/2 teaspoon garlic powder per clove if fresh isn’t available, though the flavor will be flatter.
- Cumin adds warmth and complexity that ties the sauce together. Omit if you prefer a more pure chile flavor, or reduce to 1/2 teaspoon if sensitive to its intensity.
- Chicken broth creates savory depth, but vegetable broth works for a vegetarian version without sacrificing much flavor.
How to Make Tamale Sauce
Step 1: Toast the Dried Chiles
Heat your skillet over medium heat and place the guajillo and ancho chiles directly on the surface. Toast them for about 30 seconds per side, pressing gently with your spoon, until they become fragrant and slightly darkened but not burned.
This step is crucial because it brings out the natural oils and deepens the chile flavor, transforming them from flat and papery to rich and complex. If you skip toasting, your sauce will taste one-dimensional and lacking warmth.
Step 2: Remove Seeds and Stems
Transfer the toasted chiles to a cutting board and let them cool for about 2 minutes. Use your knife to slit each chile lengthwise and remove the seeds and white membrane inside, then discard the stems.
Removing the seeds reduces heat significantly without losing flavor, giving you control over spice level. If you like more kick, leave some seeds in.
Step 3: Soak the Chiles
Place the cleaned chiles in a bowl and cover them completely with hot water from the kettle. Let them soak for 5 to 8 minutes until they’re soft and pliable, not mushy.
Proper soaking time matters because under-soaked chiles won’t blend smoothly, while over-soaked ones lose their flavor to the water. You want them tender but still vibrant.
Step 4: Prepare the Garlic and Spices
While the chiles soak, peel and roughly chop your garlic cloves. Measure out your cumin, oregano, black pepper, and salt into a small bowl so they’re ready when you need them.
Prepping ingredients this way speeds up the cooking process and prevents mistakes when things are moving fast. It’s a small step that makes a big difference.
Step 5: Blend the Sauce Base
Drain the soaked chiles, reserving the soaking liquid, and transfer them to your blender. Add the garlic, cumin, oregano, black pepper, salt, and 1 cup of the reserved soaking liquid.
Blend on high speed for 2 to 3 minutes until the mixture is completely smooth and silky with no chile pieces visible. Add more soaking liquid if needed to help the blender work.
Step 6: Strain the Mixture
Pour the blended mixture through your fine mesh strainer into a bowl, using the back of a spoon to push it through. This removes any remaining chile skin bits and creates an incredibly velvety texture.
Straining is the difference between a rustic sauce and a refined one, so don’t skip it. Your tamales deserve that silky finish.
Step 7: Cook the Sauce
Heat the vegetable oil in your saucepan over medium heat and pour in the strained chile mixture carefully. Stir constantly for about 3 to 4 minutes until it darkens slightly and becomes fragrant, which concentrates the flavors.
This cooking step is important because it marries the spices and removes any raw blended taste. You’ll notice the sauce transforms from thin and separated to unified and rich.
Step 8: Add the Broth and Finish
Gradually stir in your chicken or vegetable broth, starting with 2 cups and adding the third cup slowly to reach your desired consistency. Bring to a gentle simmer and cook for 5 minutes, stirring occasionally.
Stir in the apple cider vinegar, which brightens the sauce and balances the richness. Taste and adjust salt as needed, keeping in mind that the sauce will concentrate slightly as it cools.
Pro Tip: Never skip the straining step, and toast your chiles just until fragrant because burned chiles make bitter sauce that’s impossible to fix.
Tips for the Best Tamale Sauce
- Use whole dried chiles rather than chile powder because you control the flavor intensity and get a fresher taste that powers through in the final dish.
- Keep your heat at medium or medium-low to prevent the sauce from scorching on the pan bottom, which creates acrid flavors that ruin hours of work.
- Make the sauce a day ahead and refrigerate it because the flavors marry and deepen overnight, tasting noticeably better than the same day.
- Taste constantly as you cook and adjust seasoning aggressively because dried chiles vary in intensity depending on age and storage conditions.
- If the sauce seems too thick after cooling, thin it with broth because sauces thicken as they cool, and you want it pourable for tamales.
- Double the batch and freeze half because this sauce keeps for three months and you’ll always be glad to have it on hand.
Common Mistakes to Avoid
- Burning the toasted chiles creates a bitter, smoky taste that overpowers everything else and ruins the entire batch, so watch carefully and stay on medium heat.
- Blending for too short creates a gritty, separated sauce instead of velvety, so blend until completely smooth even if it takes longer than you expect.
- Using boiling hot oil to cook the blended mixture can cause splattering and uneven cooking, so wait for the oil to reach medium temperature first.
- Skipping the straining step leaves chile skins in the sauce that create an unpleasant gritty texture that gets worse when reheated.
- Adding the broth all at once instead of gradually makes the sauce separate and thin unevenly, so add it slowly while stirring constantly.
Serving Suggestions
This sauce shines alongside fresh tamales, but its versatility means you can use it far beyond that one application. The rich chile flavor works beautifully with almost any Mexican dish you’re making.
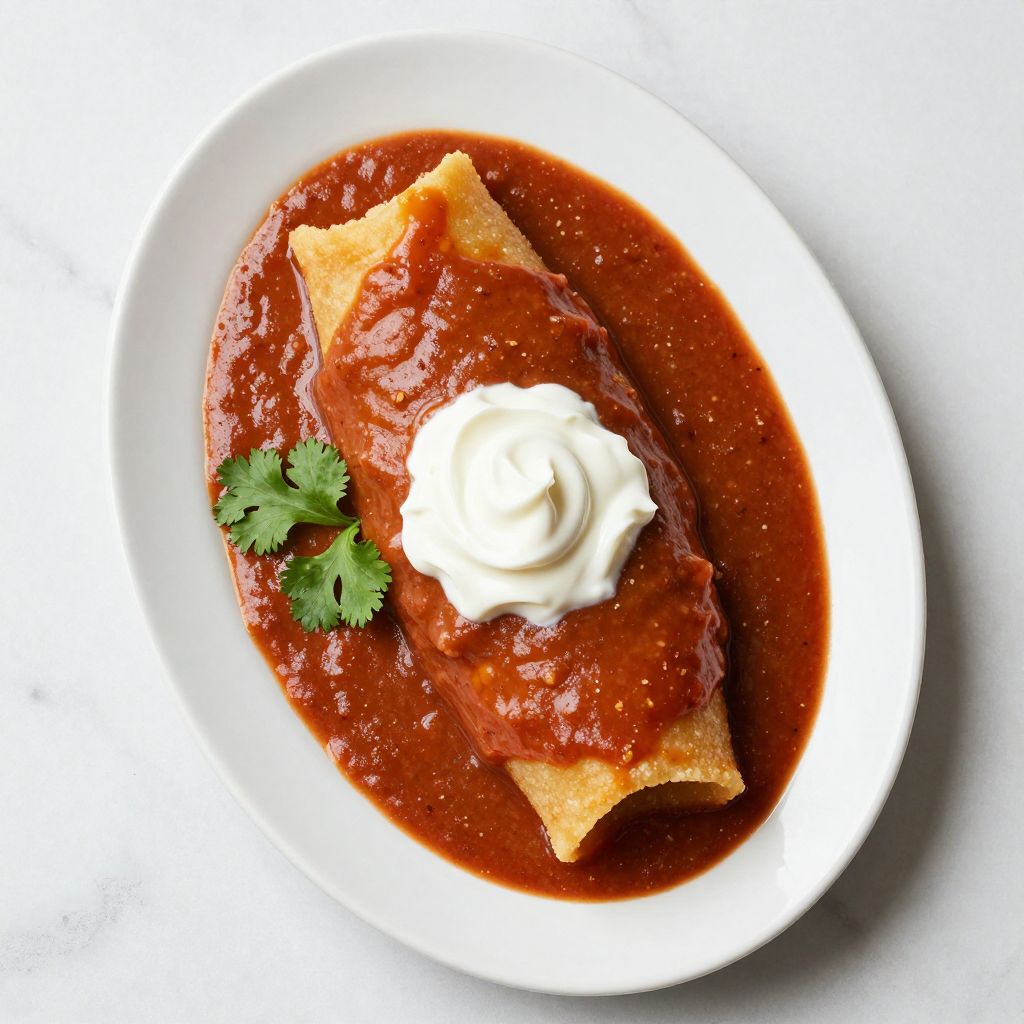
- Pour warm sauce over steamed tamales with a dollop of sour cream and fresh cilantro on top
- Use as the base sauce for enchiladas layered with cheese, chicken, and more sauce
- Serve alongside chile rellenos with melted cheese and a fried egg
- Use as a dipping sauce for chilaquiles or fried tortilla chips with queso fresco
- Spoon over roasted vegetables or grilled chicken for a simple Mexican dinner
Variations to Try
- Smoky Chipotle Version: Replace 2 ancho chiles with 2 dried chipotle chiles for a deeper smoke flavor that adds sophistication without overpowering the base sauce.
- Spicy Heat Version: Keep the chile seeds in and add 1 to 2 dried arbol chiles for fiery kick that builds on your palate as you eat.
- Chocolate Mole Style: Add 1 tablespoon unsweetened cocoa powder and 1/2 teaspoon cinnamon after straining for rich complexity that evokes traditional mole.
- Tomato-Based Version: Replace 1 cup of broth with tomato sauce or crushed tomatoes for brighter acidity and a lighter color that pairs well with cheese.
- Herb-Forward Version: Stir in 2 tablespoons fresh cilantro and 1 tablespoon fresh epazote after cooking for herbal brightness that elevates the sauce.
Dietary Adaptations
- Gluten-Free: This recipe is naturally gluten-free, but verify your broth label because some brands sneak gluten into their seasoning blends.
- Dairy-Free: The sauce itself contains no dairy, so use it freely, though dairy-free toppings like coconut cream work in place of sour cream.
- Vegan and Vegetarian: Use vegetable broth instead of chicken broth and the sauce remains completely plant-based with no flavor loss.
- Low-Carb and Keto: This sauce is naturally low in carbs with about 2 grams per serving, making it perfect for keto tamales using almond flour masa.
Storage and Reheating
Refrigerator
Store cooled tamale sauce in an airtight container in the refrigerator for up to 5 days. A thin layer of oil may separate on top, which you can stir back in.
- Transfer to glass or plastic containers with tight-fitting lids
- Label with the date so you remember how old it is
- Keep away from strong-smelling foods because chile sauce absorbs odors
Freezer
Freeze tamale sauce in ice cube trays for convenient portioning, then transfer frozen cubes to freezer bags. The sauce keeps for up to 3 months without quality loss.
- Freeze in ice cube trays first, then pop into labeled freezer bags
- Leave 1/2 inch headspace in containers if freezing in bulk to prevent cracking
- Thaw overnight in the refrigerator before using
Reheating
Warm sauce gently over medium-low heat, stirring frequently, until it reaches serving temperature. Add a splash of broth if it seems too thick after sitting.
- Reheat in a saucepan over medium-low heat, never high heat which can scorch it
- Microwave in 30-second intervals, stirring between each, until hot
- Thin with broth or water if the sauce thickens too much during storage
Nutrition Information
| Nutrient | Amount |
|---|---|
| Calories | 45 |
| Total Fat | 2.5g |
| Saturated Fat | 0.3g |
| Carbohydrates | 5g |
| Fiber | 1g |
| Sugar | 1g |
| Protein | 1g |
| Sodium | 280mg |
| Cholesterol | 0mg |
Nutritional values are estimates based on standard USDA data and ingredient amounts in this recipe. Individual results vary based on specific brands and ingredient substitutions used.
Frequently Asked Questions
Can I use fresh chiles instead of dried chiles?
Fresh chiles create an entirely different sauce with milder flavor and watery texture that doesn’t concentrate properly when cooked. Stick with dried chiles for authentic tamale sauce, though you can make fresh chile sauce separately for a different dish.
How spicy is this tamale sauce?
This recipe is mild to medium heat because guajillo and ancho chiles provide flavor more than fire, making it family-friendly. Remove the seeds completely for even milder sauce, or add arbol chiles if you want serious heat.
Can I make this sauce ahead of time?
Absolutely, and I recommend it because the flavors marry and improve when refrigerated overnight. Make the sauce up to 3 days ahead, then use it straight from the fridge or reheat gently before serving.
What if my sauce is too thick or too thin?
Thin sauce by stirring in broth one tablespoon at a time until you reach the right consistency. Thicken by simmering uncovered for a few minutes to evaporate excess liquid.
Why does my sauce taste bitter?
Bitterness comes from burning the chiles during toasting or cooking the blended sauce too aggressively. Next time, watch carefully on medium heat and stir constantly during the cooking step.
Can I substitute the dried chiles with chile powder?
Store-bought chile powder loses freshness and delivers flat flavor compared to whole dried chiles that you toast yourself. If you must use powder, use 3 to 4 tablespoons and accept that the result won’t match homemade.
Final Thoughts
Making tamale sauce from scratch feels intimidating until you realize it’s just toasting, soaking, blending, and simmering a few humble ingredients. The entire process takes under 30 minutes, and the flavor difference compared to store-bought versions is night and day.
Give this recipe a try this weekend and taste what real tamale sauce should be like. Once you master this sauce, you’ll find yourself making it for everything from enchiladas to chilaquiles, and your kitchen will always smell like a real Mexican home.
Tamale Sauce
Ingredients
Equipment
Method
- Heat your skillet over medium heat and place the guajillo and ancho chiles directly on the surface. Toast them for about 30 seconds per side, pressing gently with your spoon, until they become fragrant and slightly darkened but not burned.
- Transfer the toasted chiles to a cutting board and let them cool for about 2 minutes. Use a knife to slit each chile lengthwise and remove the seeds and white membrane inside, then discard the stems.
- Place the cleaned chiles in a bowl and cover them completely with hot water from a kettle. Let them soak for 5 to 8 minutes until they are soft and pliable, not mushy.
- While the chiles soak, peel and roughly chop the garlic cloves. Measure out the cumin, oregano, black pepper, and salt into a small bowl so they are ready when needed.
- Drain the soaked chiles, reserving the soaking liquid, and transfer the chiles to your blender. Add the garlic, cumin, oregano, black pepper, salt, and 1 cup of the reserved soaking liquid.
- Blend on high speed for 2 to 3 minutes until the mixture is completely smooth and silky with no chile pieces visible. Add more soaking liquid if needed to help the blender work.
- Pour the blended mixture through a fine mesh strainer into a bowl, using the back of a spoon to push it through. This removes remaining chile skin bits and creates a velvety texture.
- Heat the vegetable oil in a medium saucepan over medium heat. Pour in the strained chile mixture carefully. Stir constantly for about 3 to 4 minutes until the sauce darkens slightly and becomes fragrant.
- Gradually stir in the chicken or vegetable broth starting with 2 cups, then add the remaining cup slowly to reach your desired consistency. Bring to a gentle simmer and cook for 5 minutes, stirring occasionally.
- Stir in the apple cider vinegar. Taste and adjust salt as needed, keeping in mind the sauce will concentrate slightly as it cools.